Users
Administrators can manage users, teams and assign roles.
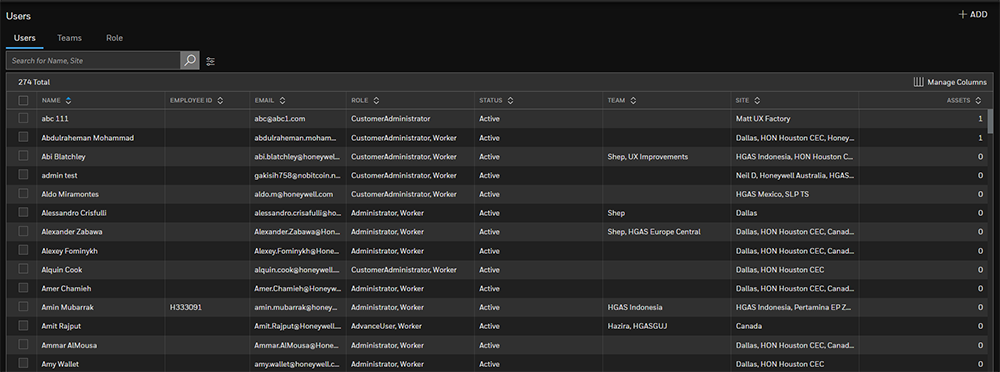
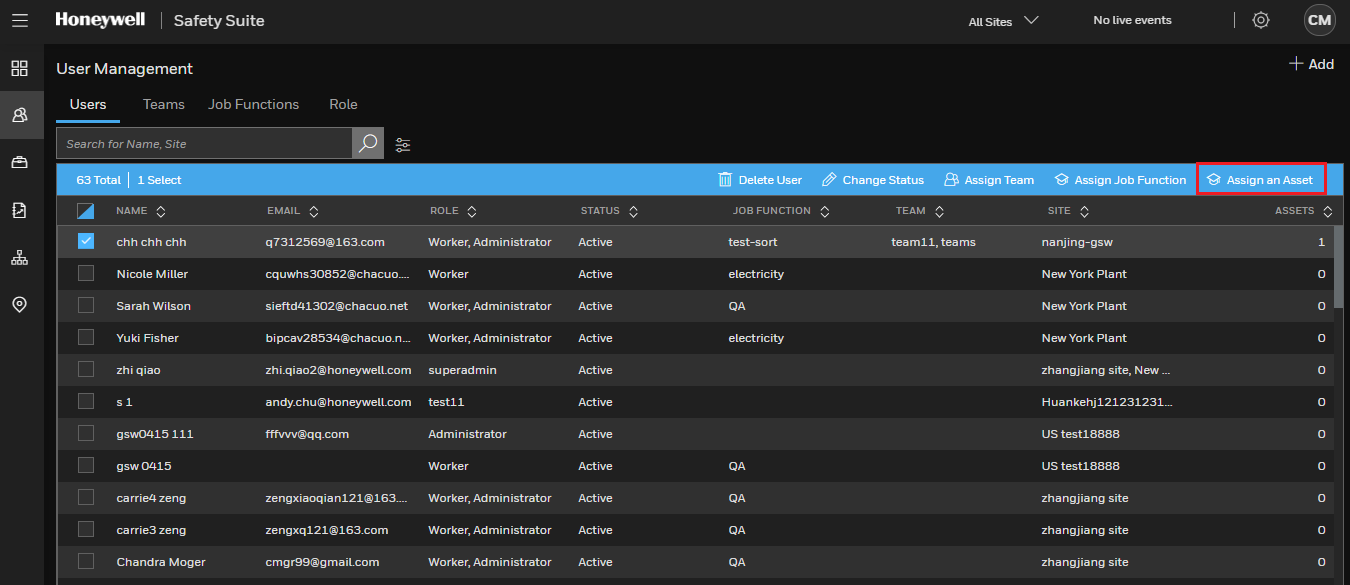
Click  and select Users. The Users main screen is displayed.
Search for a User
Enter the user name, team, or role in the search tab, and the results will display as a list.

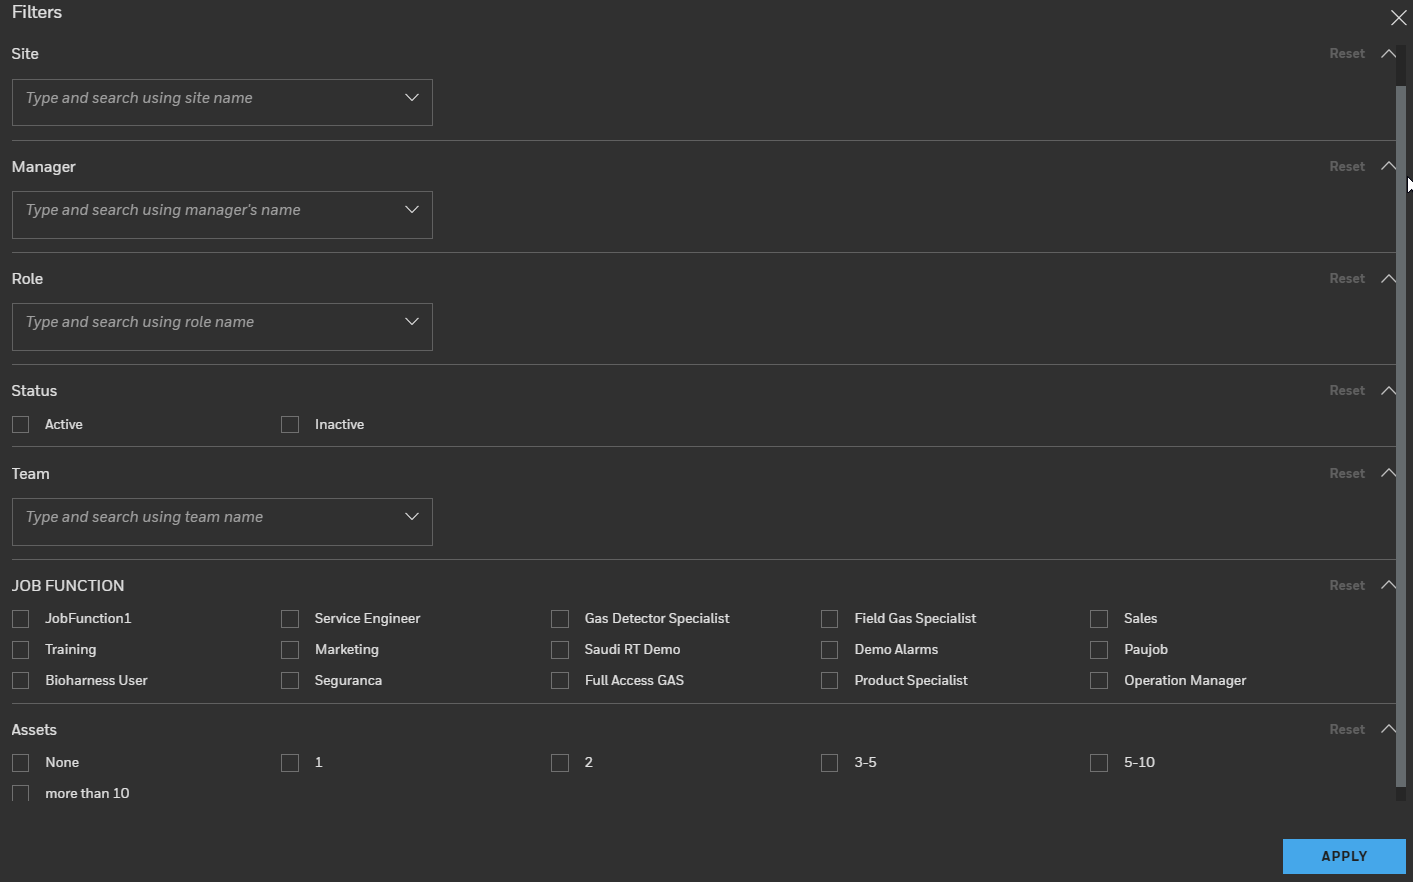
Filter User
Click  to filter users by site, manager, role, status, team, assets, and job function.
Manage Columns
Click  to sort out the info displayed on the screen by email, status, team, site, employee ID, role, job function, manager, and assets.
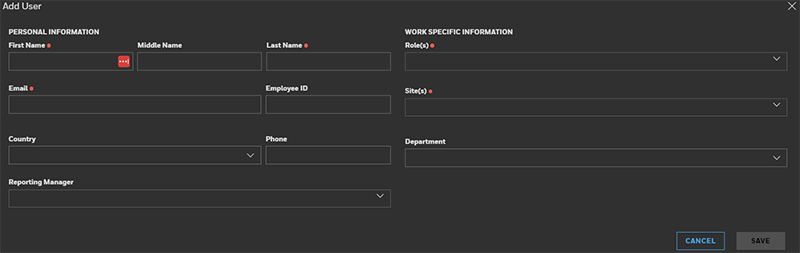
Add a user
Click +ADD and select User.
Enter user's personal and work information, and then click SAVE.
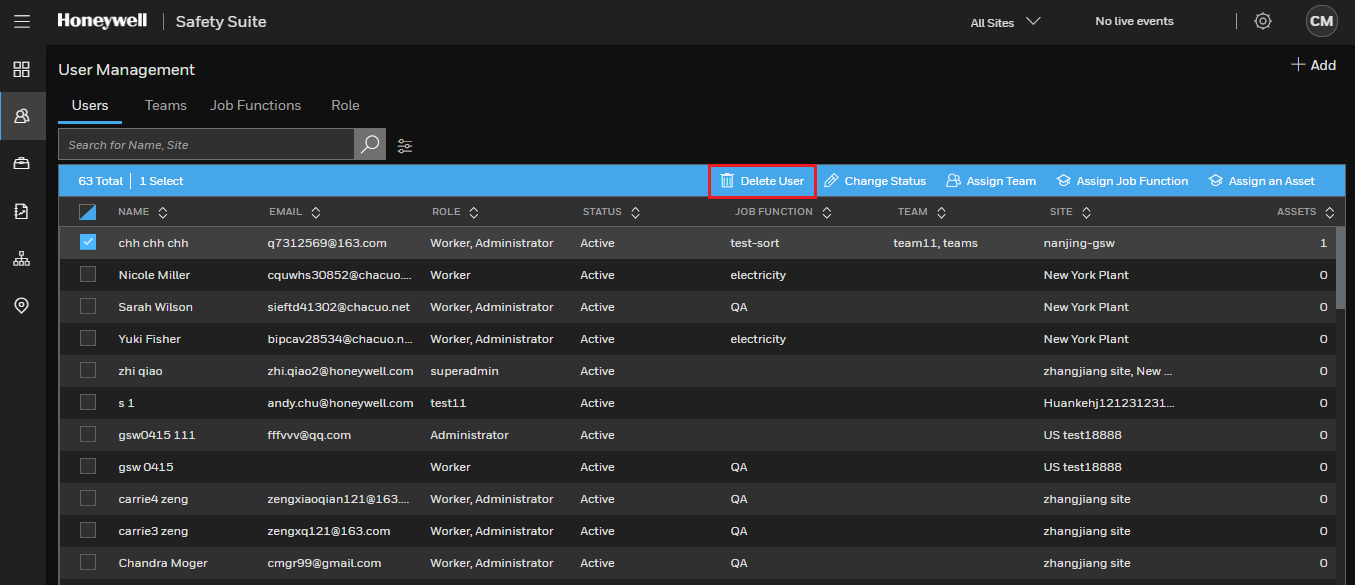
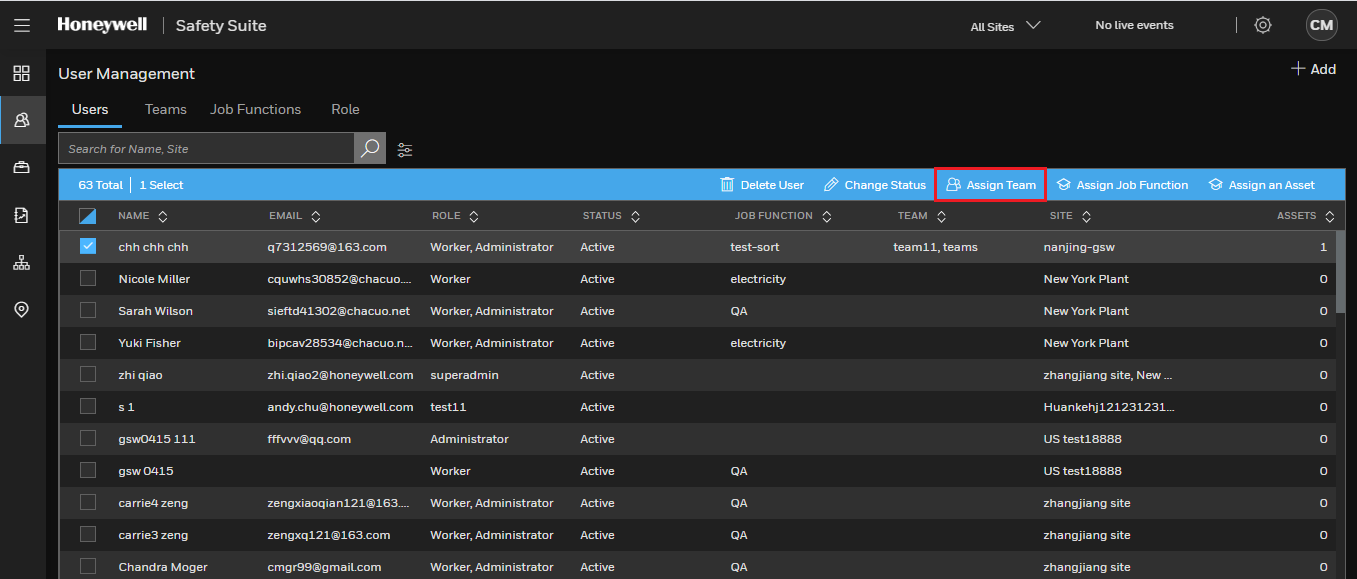
Select the User by clicking on check box, as shown in below screen.
After selecting the user, you will see the highlighted blue bar having the actions.
- Delete User
- Change Status
- Assign Team
- Assign Asset
Delete User
If you want to delete the User from the list, click on Delete User as shown below.
Click OK to proceed.
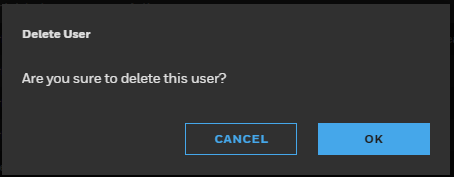
After successfully deleting the User, a confirmation message will be displayed..
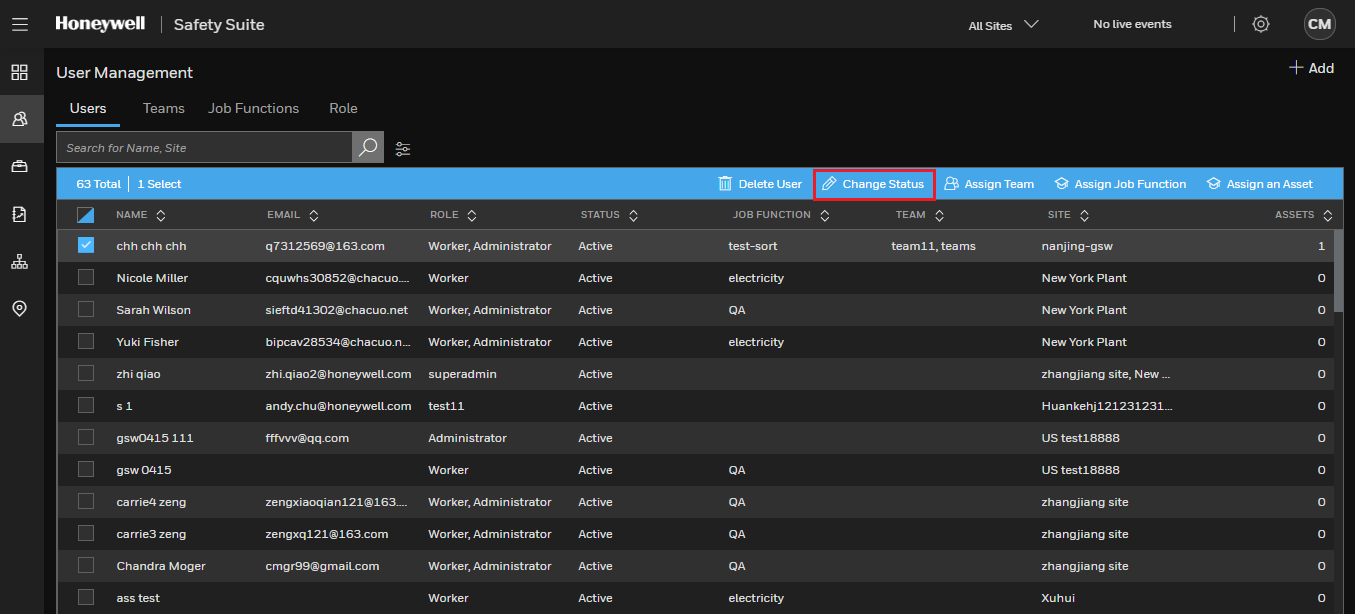
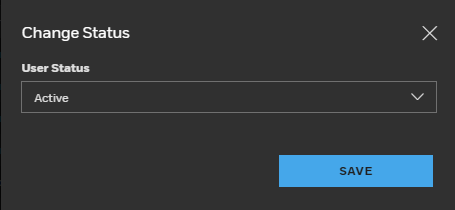
Change Status
You can update the status of the user like Active or Inactive by using this option. Click on Change Status as shown below.
Click on the drop down box to select user status.

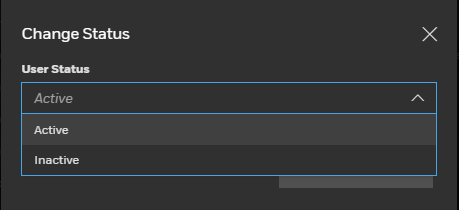
After selecting the user status, click SAVE to save the user status.
After successfully update the status, message will pop up on screen.

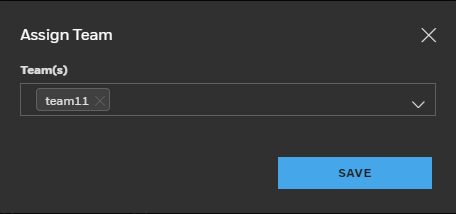
Assign Team
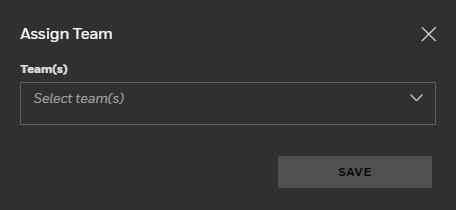
You can assign different teams to user by using this option. Click Assign Team to select Team.
Click on drop down to select the Teams.
Select teams from the drop down teams list.
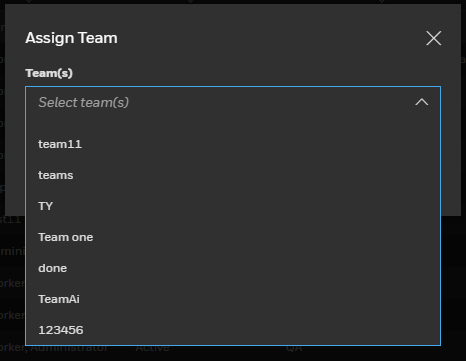
After selecting team, click SAVE to proceed.
After successfully assign the team to user, below message will pop up on screen.

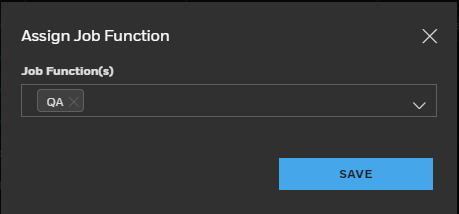
Assign Job Function
To Assign job function to user, click Assign Job Function from the below screen.

Select job function from the drop down.

After selecting the Job function, click SAVE to proceed.
After successfully assign the job function, below message will pop up on screen.

Assign an Asset
To assign an asset to user, first you need to select the User from the user list. To select the User, Click on check box as shown in below screen.
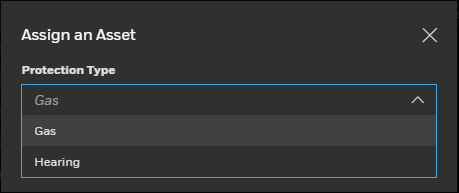
Select protection type from the drop down.
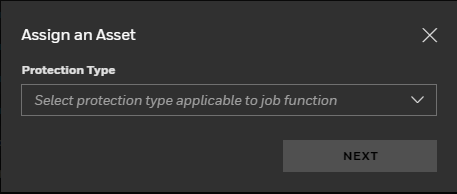
If you select the Gas protection type, then select the Gas type from Gas Types drop down.

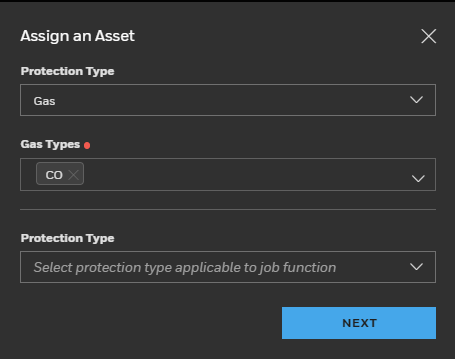
If you want to add another protection type, click on "+" in below screen.
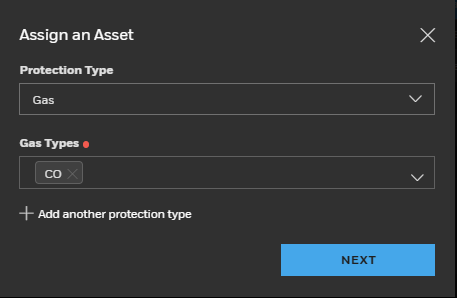
Select the Gas type and click NEXT to proceed.
Select the Model, Model number and Serial number from the respective drop down on below screen.
Click on ASSIGN.

After successfully assign the asset, below message will pop on screen.

Download User List
-
Click Settings
and select Users. -
Click
 to export the complete user list as a CSV file format.
SAML Single Sign-On
-
A user with the Global Admin role can enable SAML SSO (Single Sign On) in the Security Setting UI.

-
You can copy or download Safety Suite SSO Metadata for setup in SAML SSO service.

-
Input the Metadata URL of a customer-owned SAML SSO service or import the metadata XML file to gain authentication from the SAML SSO service.

-
After configuring SSO, you can log in using the Use Single Sign On method.