Site
Site List
-
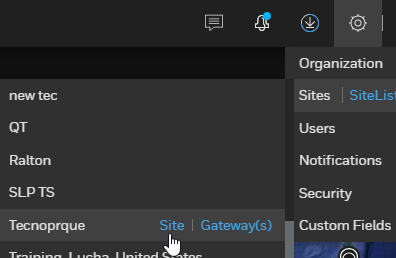
Click Settings
 and select SiteList.
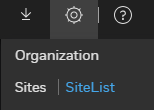
-
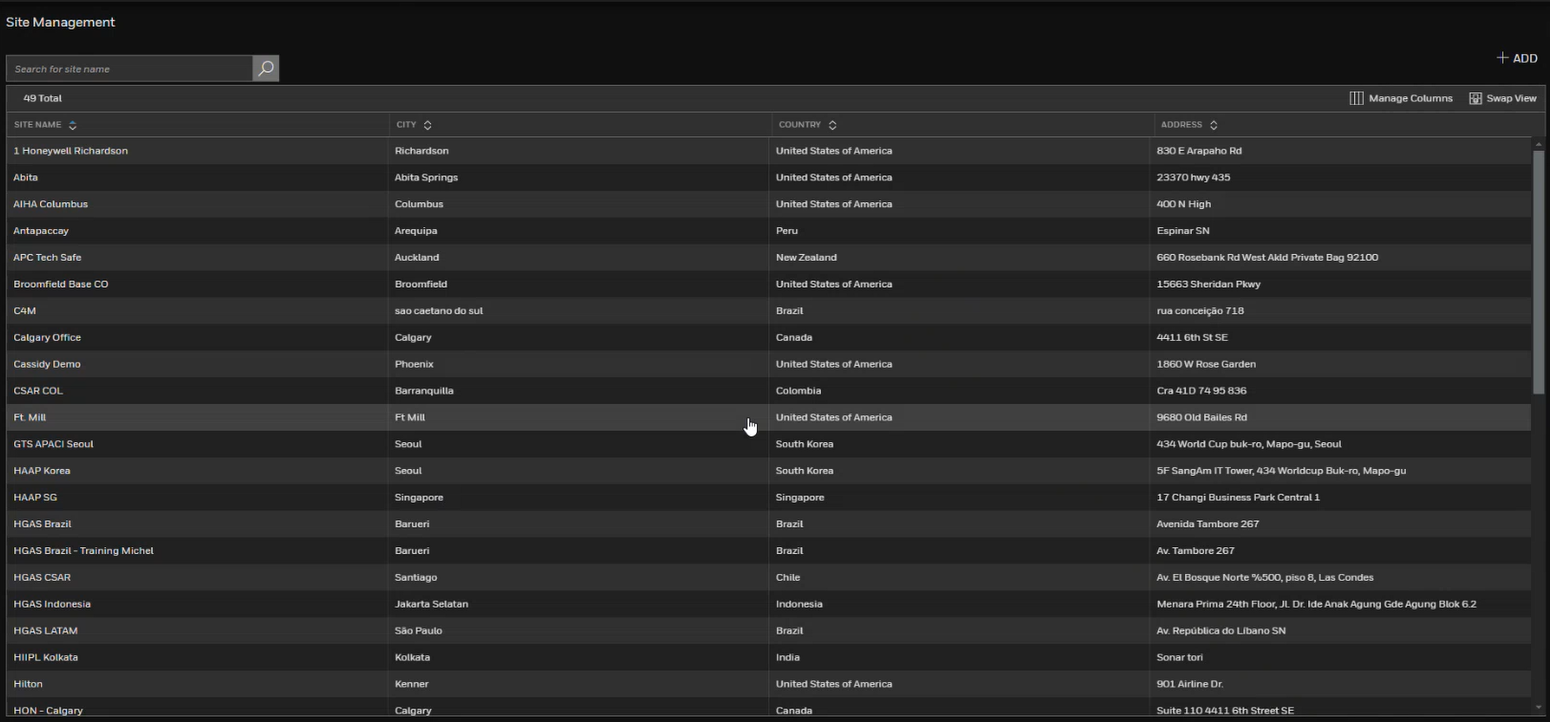
A list of sites is displayed. You can sort them by Name, City, Country, and Address.
-
Add a Site
-
Click Settings
and select SiteList. -
Click +ADD, and select Add A Site.
Create an online site (Cloud / On-premise)
-
Click Settings
and select SiteList. -
Click +ADD, and select Add A Site.
-
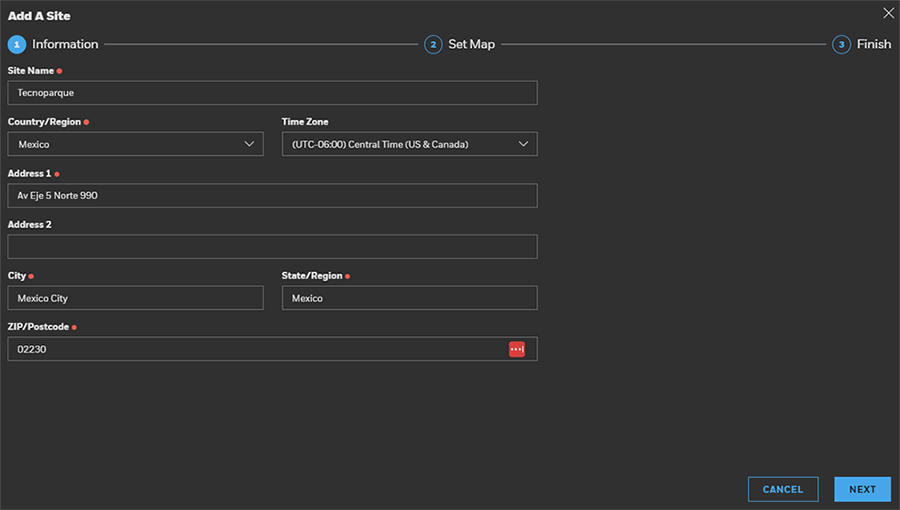
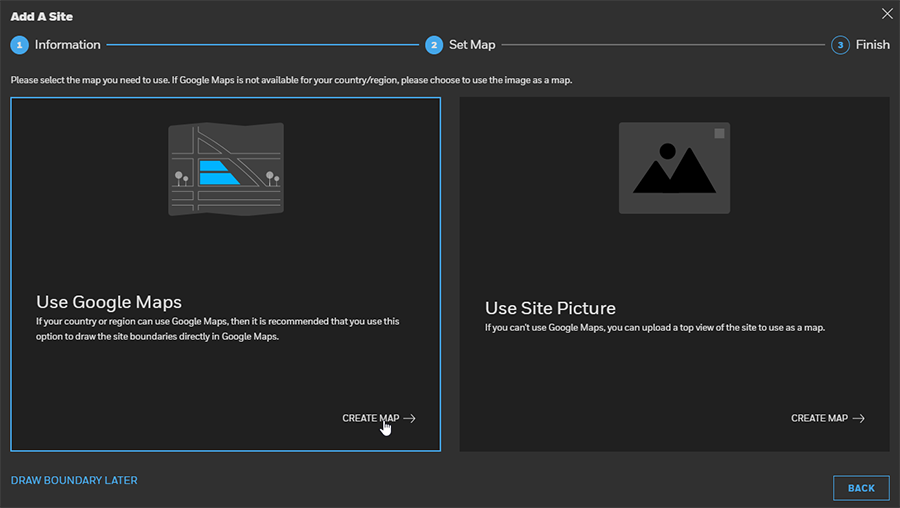
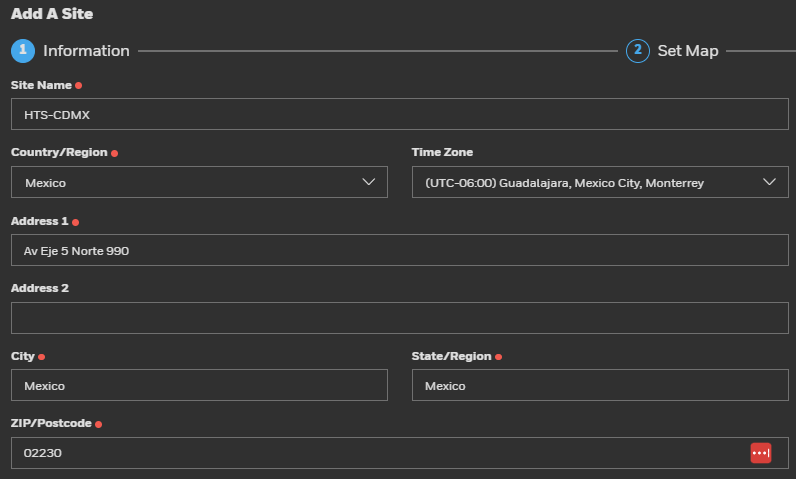
Populate the Add a Site Information form, and then click NEXT
-
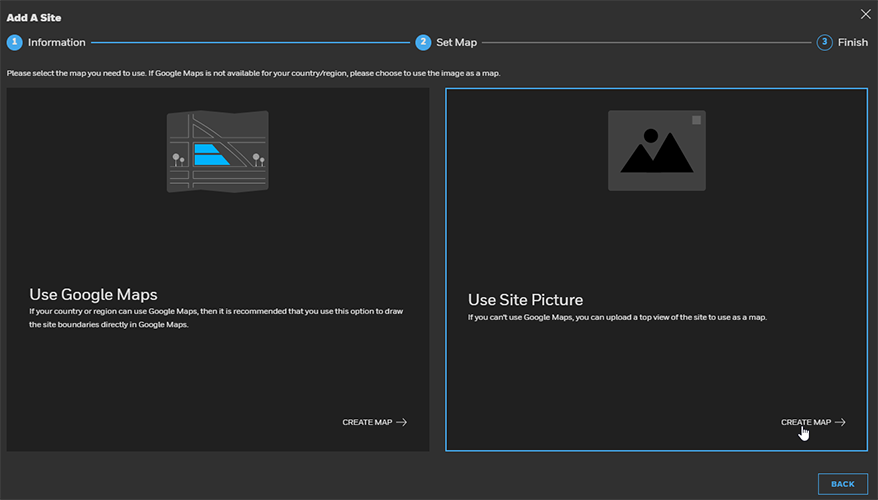
Click on the left box and when you see it highlighted in blue, click CREATE MAP.
-
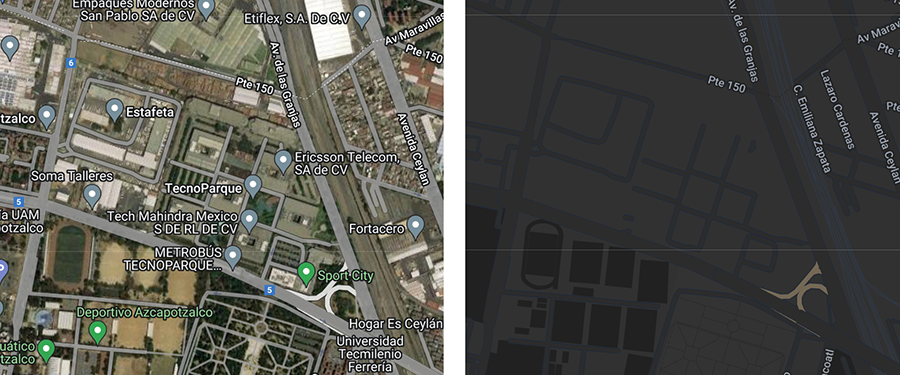
Use the Google Maps tools
 to locate your site on the Screen. You can toggle between the Map or Satellite views.
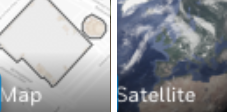
-
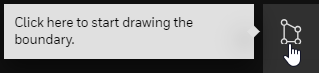
Click
 and then click on every corner of your site on the map until you draw an complete the perimeter around it.
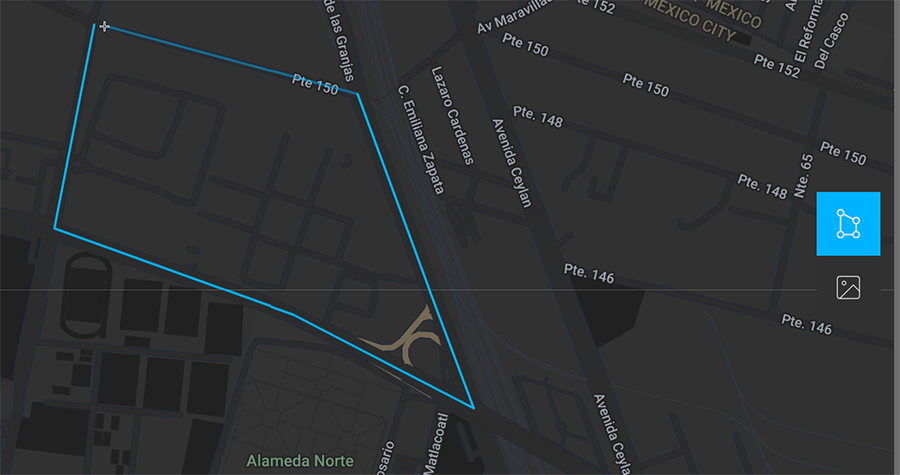
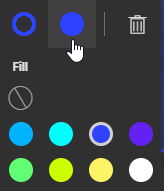
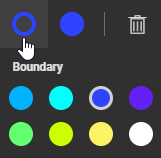
When the perimeter is complete it will be auto-filled with a solid color. - Optional Step: You can change the border or the fill colors with the tools displayed over your site. You can also adjust the site boundaries by moving the white nodes in the drawing.

-
Click SAVE.
-
Click FINISH to confirm your map or click EDIT MAP to modify it.
-
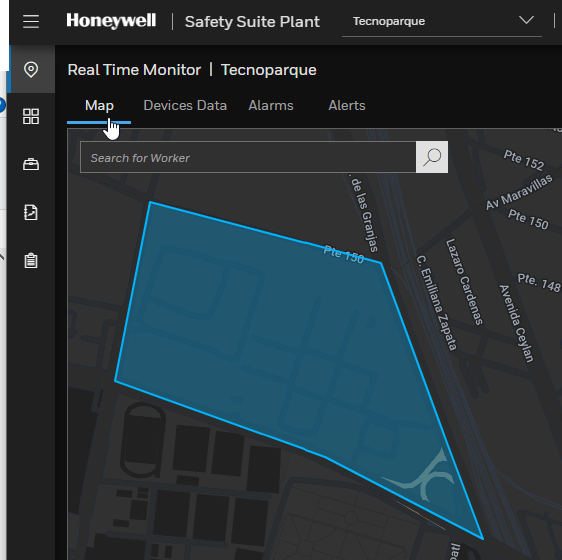
Expand the Search for a Site menu as you did in Step 1 and select your site, then click on Real Time Monitor, and finally click on the Map tab. Your site will be displayed on the screen.
Add a Site Map
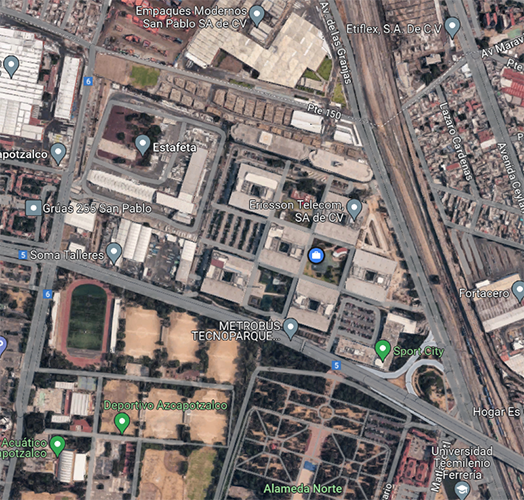
A site map is an image you take from Google Maps using the Satellite view and place it on top of the Google Map (as described in the previous process) to get a better representation of your site. A site map will display the inside of a building, different rooms and locations to make it easier to track people and equipment.
- Open your preferred web browser, locate your site and take an screenshot of your site; then save it. You will use it later.
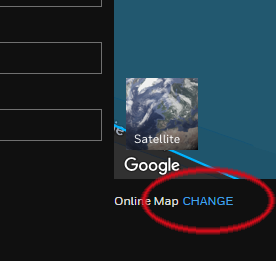
- Click Settings then select Sites and scroll until you view your site previously created, and click Site.
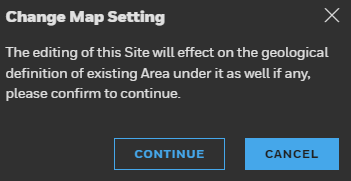
- Click CHANGE, and then, click CONTINUE.
- Click CREATE MAP on the left box.
- Click on the Image Map button on the right side of the screen, and open the image you saved on Step 1.
- Zoom out the map until you see the complete site on the right image.
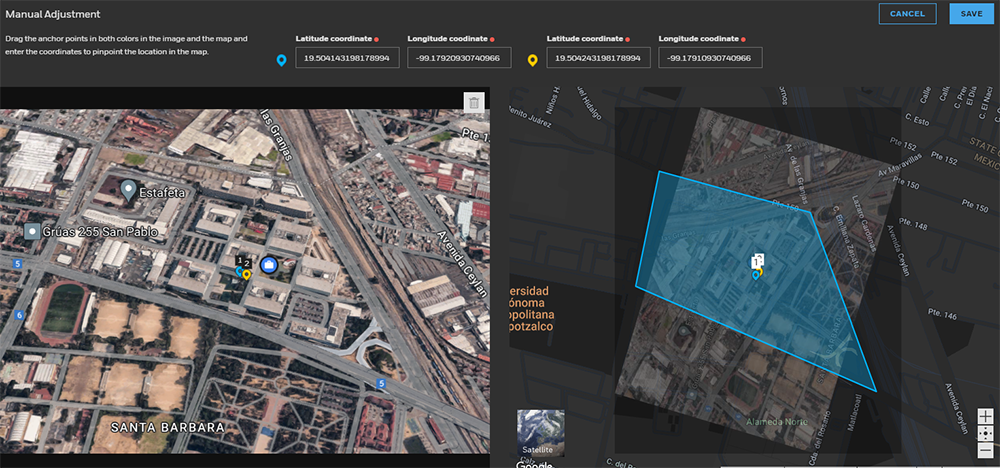
- Drag the anchor points numbered 1 & 2 in opposites corners of the image on the left and then drag the anchor points in the image on the right to match them on the very same corners.
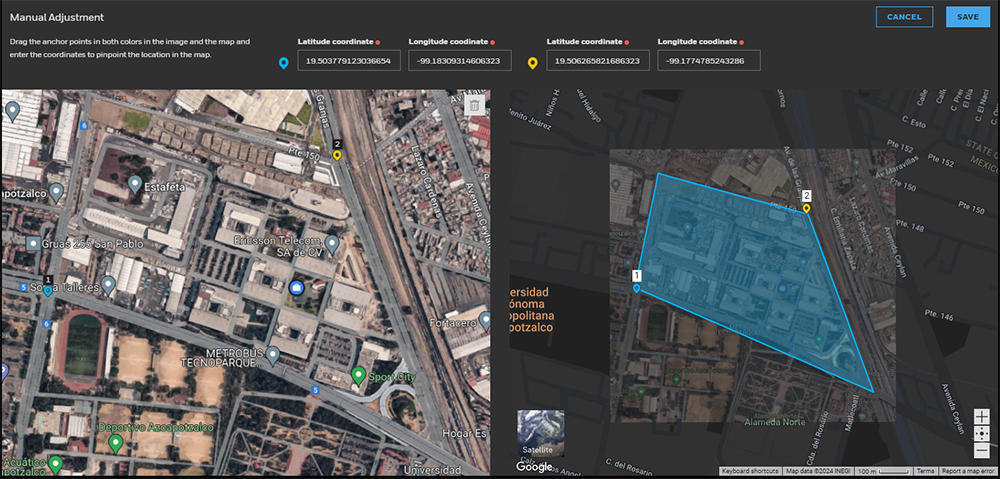
- Click SAVE
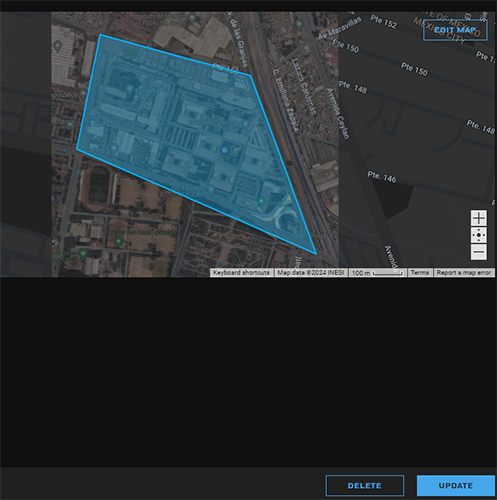
- Click SAVE again.
- Click UPDATE. a confirmation message is displayed.

- Expand the All Site drop menu and select your site.
- Click
 in the upper left side of your screen. Click on the Map tab to view your site's boundaries on the Google map.
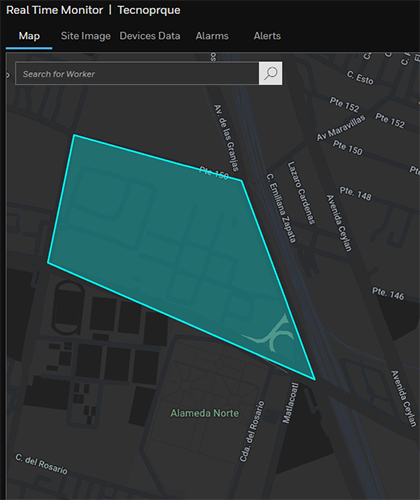
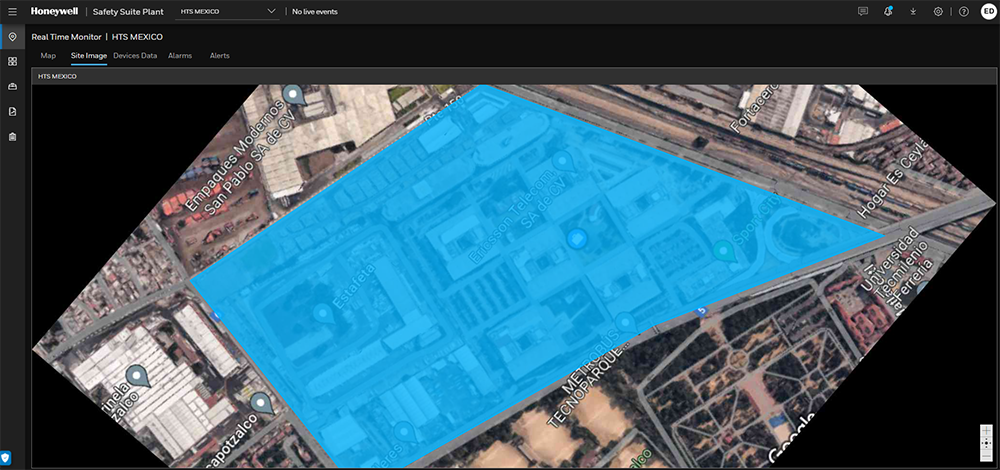
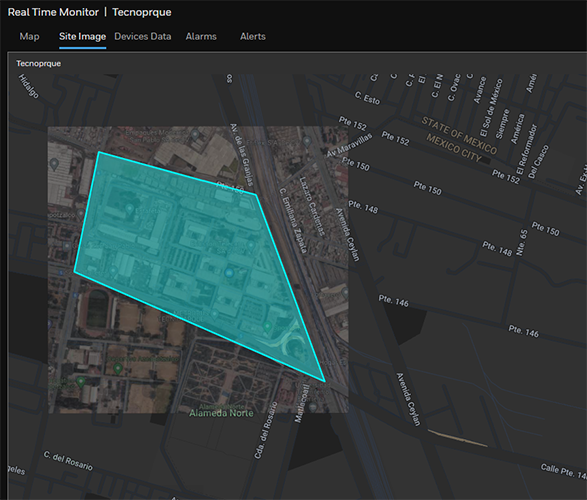
- Click on the Site Image tab to view your detailed site buildings on top of the Google Map. By clicking on any of these two tabs you can have different views of your site.
Create an offline site (On-Premise)
Create a site when you are not connected to the Internet.
Get a Site Map
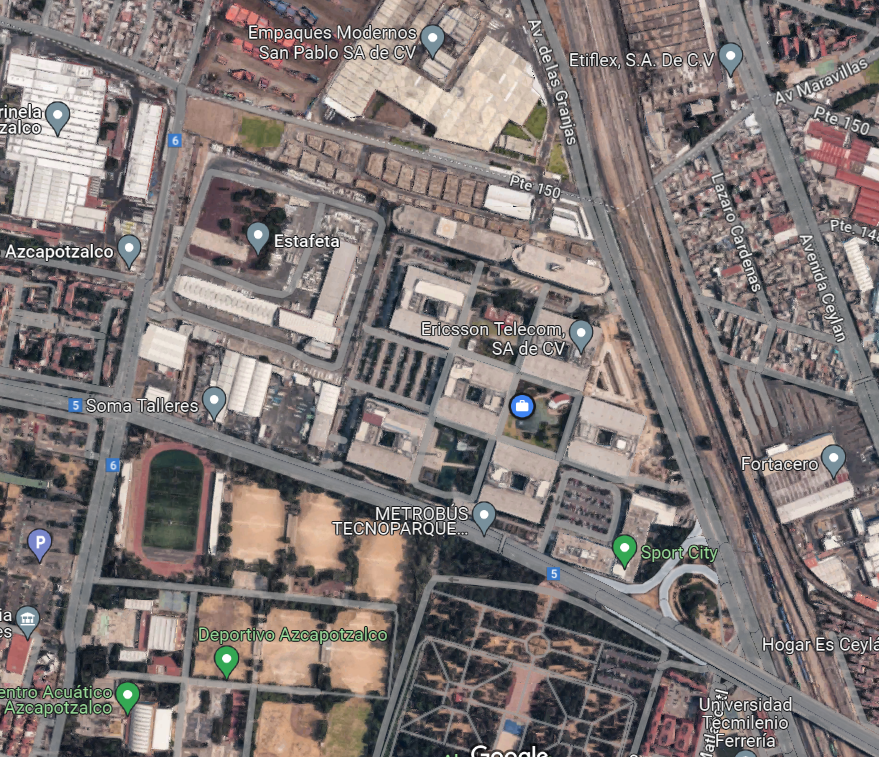
You need to get an image from your site from Google Maps and save it in your computer. You will used later. You can get this image from any other computer connected to the Internet or from an smartphone.
-
Open Google Maps in your preferred Internet browser and locate your site, take an screenshot and save it.
-
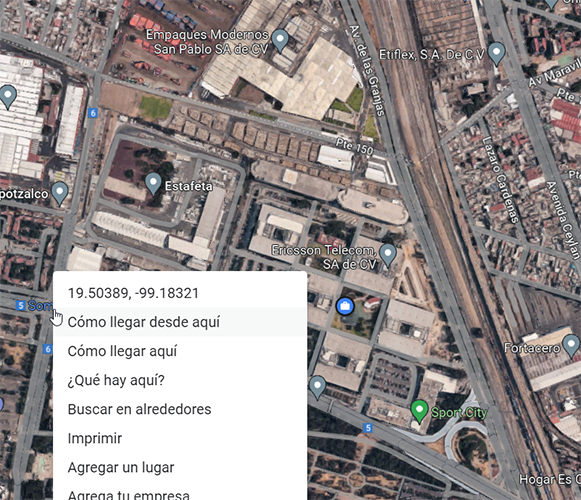
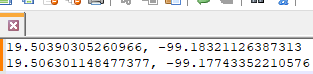
Right-Click on any of the major corners of your site and from the expanded list click on the latitude and longitude coordinates. These numbers will be copied to the clipboard of your computer. If you are using an smartphone these coordinates are displayed on the top of the screen, press-click to copy them.
-
Open your Notepad app or similar app and Paste the numbers from the clipboard.

-
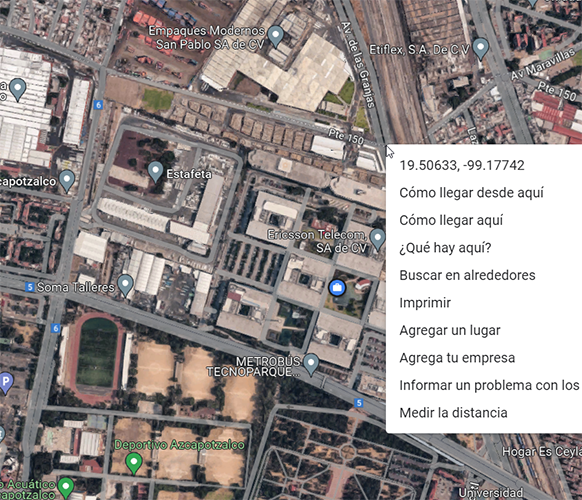
Go back to the map and repeat the same process by right-clicking on the oppose side of the previous selected corner.
-
Paste the new coordinates next to the first coordinates in the Notepad app. Save this file because we will use these coordinates in our Safety Suite map right next.
Create a Site
-
Go to the Safety Suite app and expand the Search for a Site menu and select Add a Site.
-
Populate the Add a Site Information form, and then click NEXT
-
Click on the right box and when you see it highlighted in blue, click CREATE MAP.
-
Click
and select the image you previously saved from Google Maps.
-
Copy each latitude and Longitude values and Paste them in it correspondent field in the Safety Suite map.

-
Drag the blue anchor point numbered 1
 to the point where you copied the first Latitude-Longitude coordinate and the yellow anchor numbered 2
  to the second point. We call GPS Image Calibration to matching these anchors with the image.
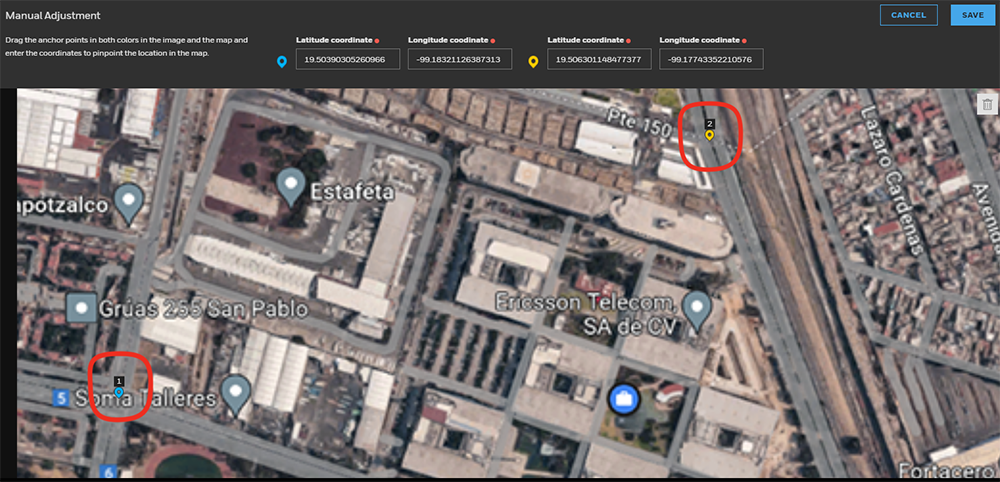
-
Click SAVE.
-
Click
 and draw the boundaries of your site.
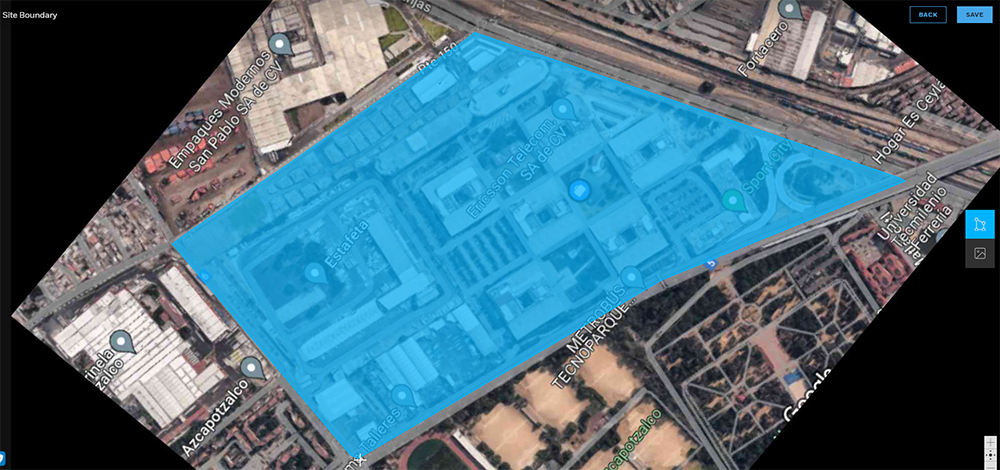
-
Click SAVE, and then Click FINISH.
-
To view your site, expand the Search for site drop menu and select your site.

-
Click
and then, click on the Site Image tab.