Deployment on Premise
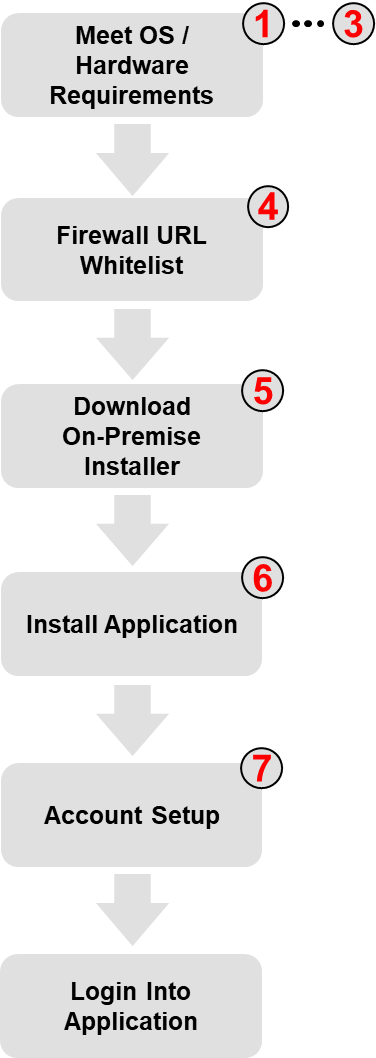
1- Hardware
-
CPU Intel Quad Core 3.4 GHz or higher
-
MEMORY 8 GB RAM minimum; 32 GB RAM recommended
-
HARD DRIVE 10 GB minimum; 200 GB recommended
-
DISPLAY Color monitor (at least 1366 x 768 resolution, 24-bit color)
-
USB PORT for instrument/modem connection
-
SOUND CARD: to enable local sound notifications
-
Intel® Wireless Bluetooth® Adapter for instrument BLE connectivity
-
LAN connection for network-connected instruments
-
Internet Connection to view Google® Maps
2- OS
-
Windows® Server 2016 or above
-
Windows® 10 (64-bit)
-
Windows® 11
-
Chrome, Safari, or Edge
3- Topology
Topology for the On-Premise deployment.
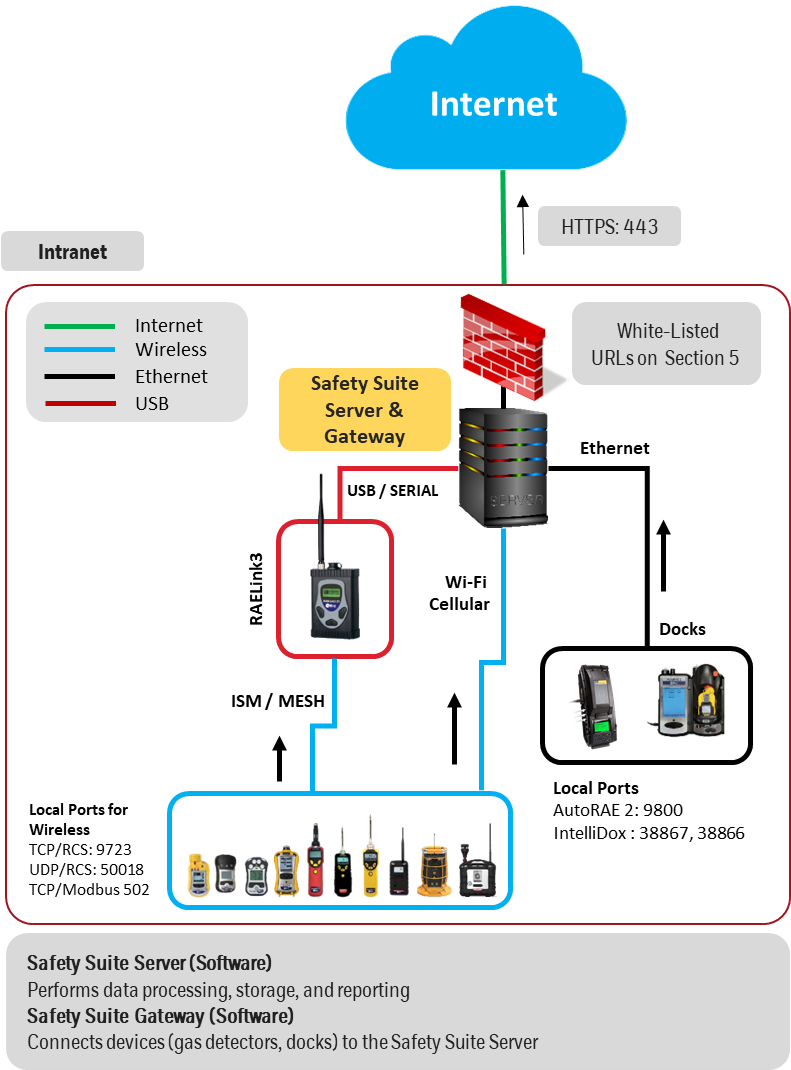
4- Firewall
Required: The following is the list of URLs that need to be whitelisted for the application to install and run:
-
Honeywell subdomains for US, Canada, Latin America & Asia customers:
-
Honeywell subdomains for Europe customers:
-
Third Party APIs
-
Email: https://api.sendgrid.com
-
Maps: *.googleapis.com
Local Ports (no action required, informational purpose)
-
Database: PostgreSQL: 5432
-
Webserver: Nginx: 80
-
PDF-generator: 8088
-
Database: InfluxDB: 8086,29008
-
SaaS: AllInOne: 8100, 8111, 8987
-
Plume Modeling: Aloha:88
Important: To Install the application you will need Administrator privileges.
5- Download
Check list:
-
Download Safety Suite Responder or Plant (On Premise) from any of the following links; this is a large download file (about 1.2GB download). Scroll down to the section shown below to download the application:

Download the correct installer based on your application:
-
If your application is based on an Industrial or Plant setting, click Download Safety Suite.
-
If you are a First Responder, click Download Safety Suite Responder .
For Customers using the RAELink3 host:
-
Download the following USB-serial cable driver ONLY if your cable is brand/model: ATEN / UC232A.
https://www.aten.com/us/en/supportcenter/info/downloads/?action=display_product&pid=575 -
If available, have a RAELink3 and Gas Detector (AreaRAE) to setup within the application.
6- Install
NOTE: We recommend using a disk encrypted with a BitLocker option for an On-premise installation.
6.1 Safety Suite Responder
-
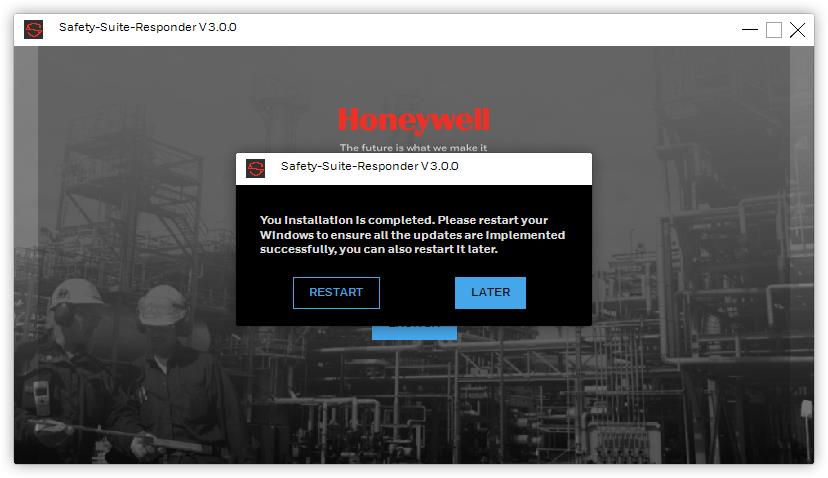
Execute installer: Safety Suite Responder On-premise Setup V3.X.exe
-
Click through all default options by Clicking NEXT
-
Click Restart
-
Open the Safety Suite Responder Utility app on your desktop (or search on Windows)
-
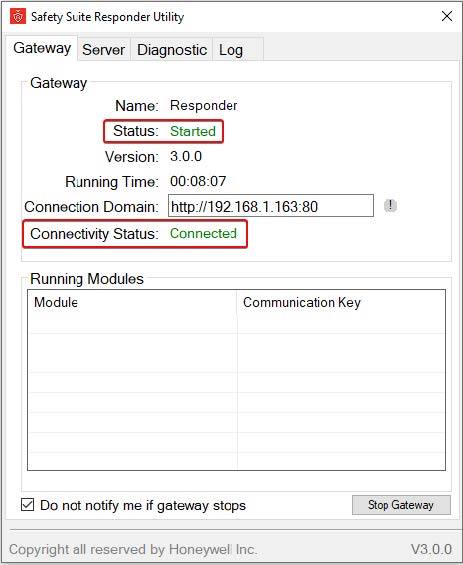
Click on the Gateway tab. Status and Connectivity should match the following image.
-
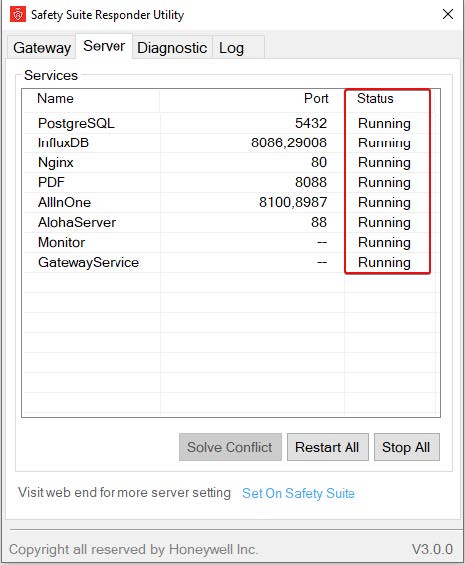
Click on the Server Tab; all the statuses must be running.
6.2 Safety Suite Plant
-
Execute installer: Safety Suite Plant Setup V3.X.exe (Admin Rights Required)
-
Click through all default options by Clicking NEXT
-
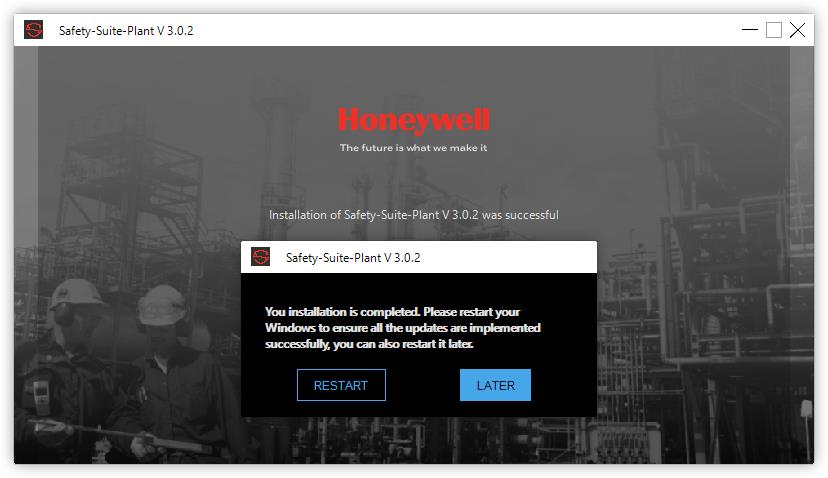
Click Restart
-
Open the Safety Suite Plant Utility app on your desktop (or use Windows search to find the application)
-
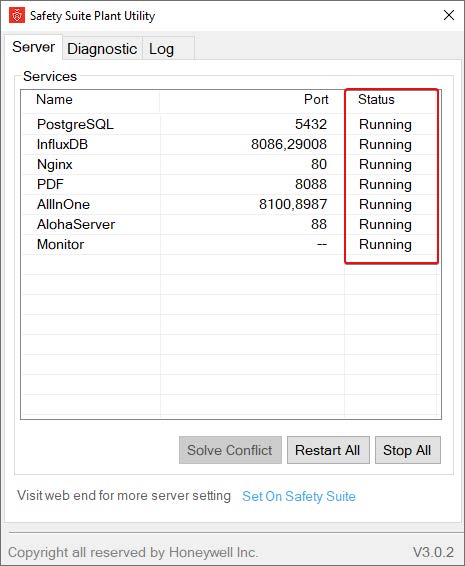
Click on the Server Tab, all statuses must be running
m
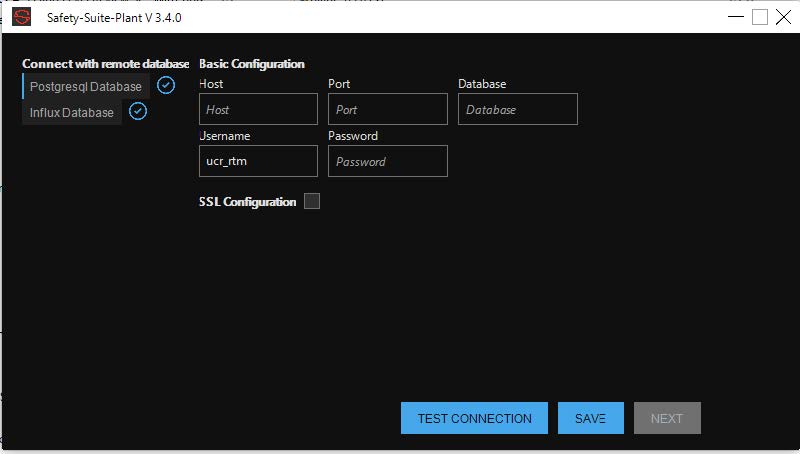
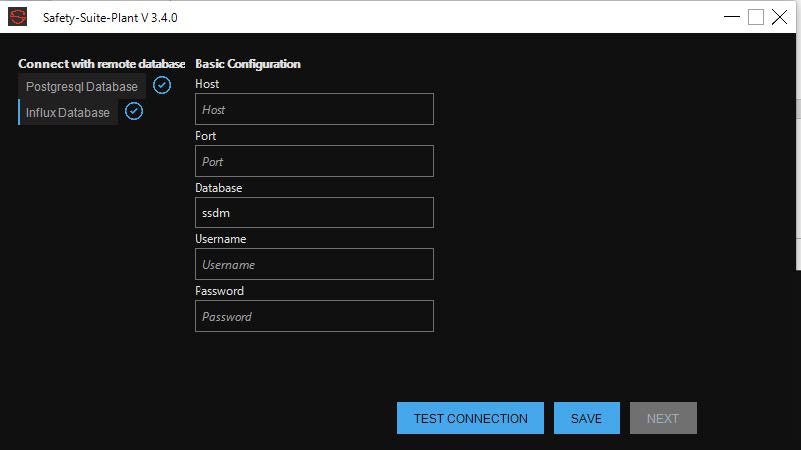
6.3 Optional Step. Remote Database for Safety Suite Plant
During the installation of Safety Suite on-premise, you can remotely assign Safety Suite data storage to existing databases (InfluxDB & PostGre SQL) on another machine.
-
During the installation, select Advanced options settings to start configuring the remote database connection.

-
Input the required parameters to remove the InfluxDB and PostGre SQL databases. Before saving, you can test the connection.
7a- Activate an Account by Requesting a trial account
Request a trial account after installing the application, and then activate a key.
-
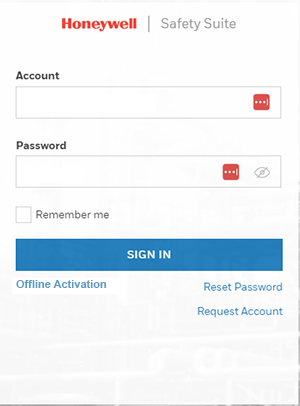
Double click the desktop app Safety Suite Plant Login or Safety Suite Responder Login depending on your installation.
-
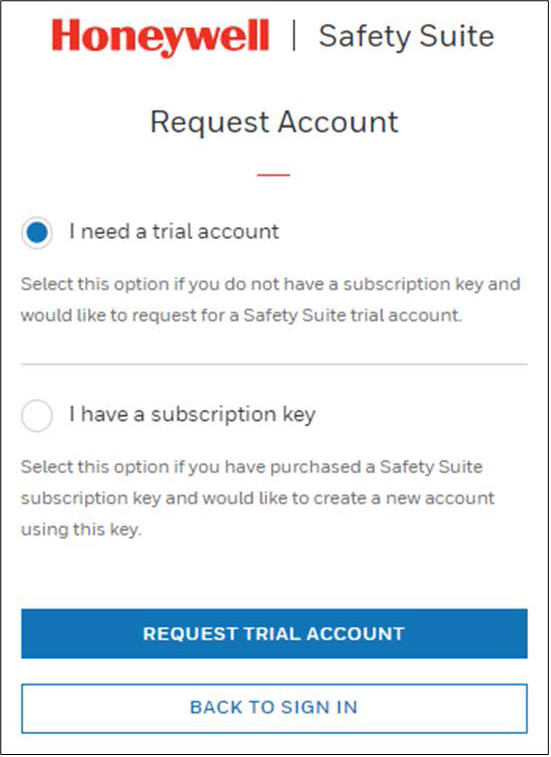
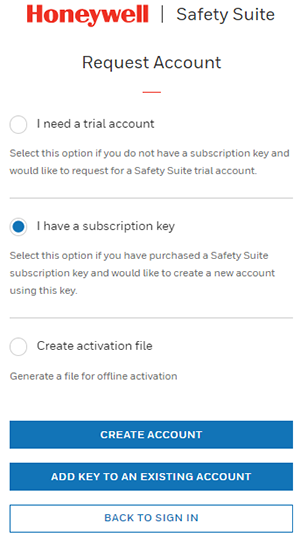
Click Request Account in the Login screen.
-
Select I need a trial account and click REQUEST TRIAL ACCOUNT.
-
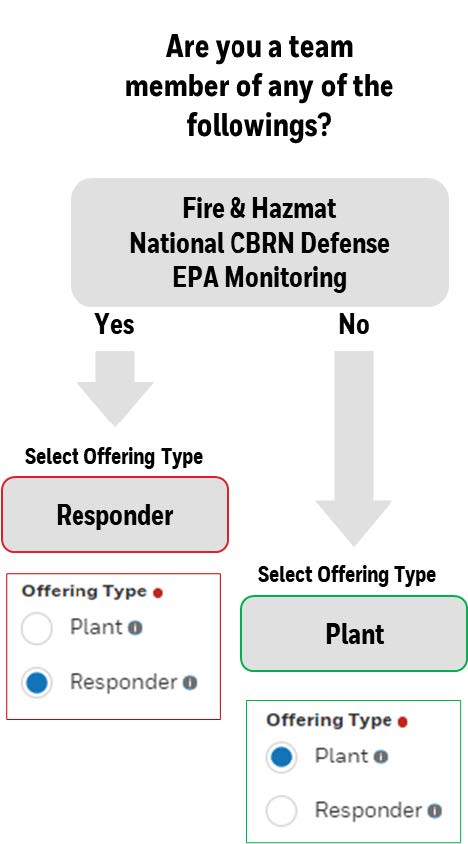
Fill up the application.
- Select the Offering type: Plant or First Responder
-
Select the Package type: Safety Suite Premium if you have gas detectors with wireless real-time monitoring capabilities or Safety Suite Deluxe if you don't.
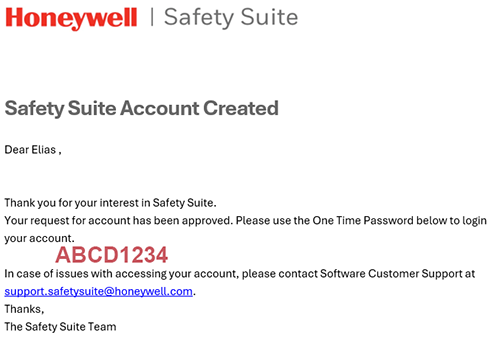
-
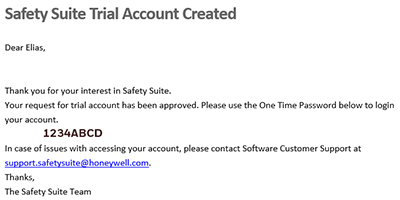
You will receive the Safety Suite Trial Account Created email from noreply-safetysuite@honeywell.com including a temporary password.
-
Open a browser tab (Chrome or Edge) and go to http://127.0.0.1/
-
Log in with the temporary password you got by email.
-
You will be requested to change the password and log in again.
-
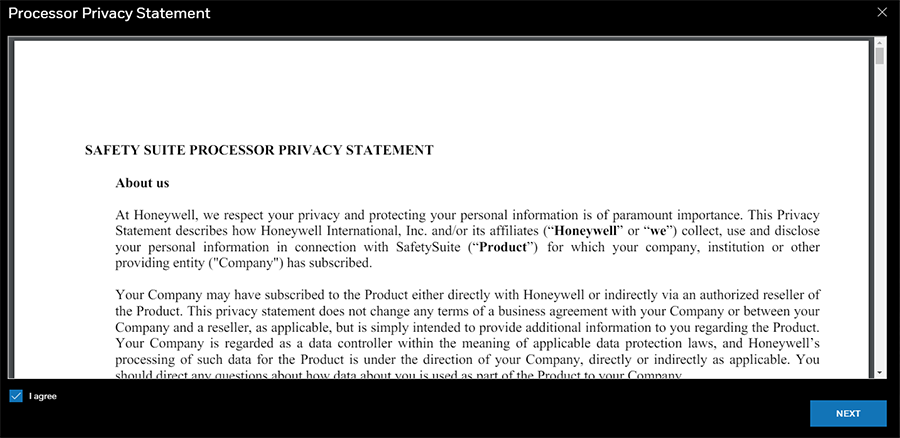
Agree on the End User License Agreement (EULA) and the Processor Privacy Statement.
-
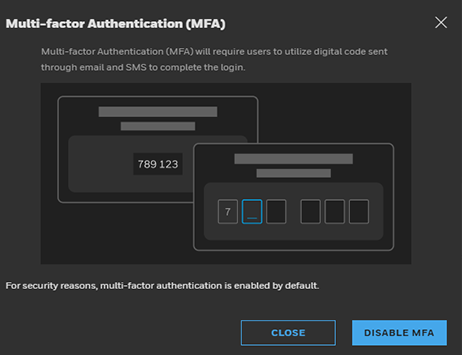
Click Disable MFA if you don't want Multi-factor authentication.
-
Go to
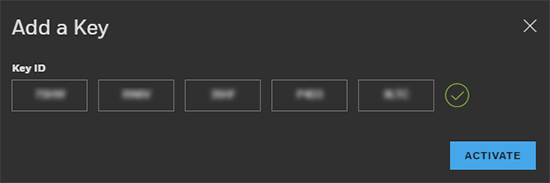
 Settings > Organization, and click + ADD > Key
 -
Enter your key and click ACTIVATE.
7b- Activate an Account when having a Key
- In your Internet browser go to http://127.0.0.1
-
Click Request Account.
-
Select I have a subscription key and click CREATE ACCOUNT
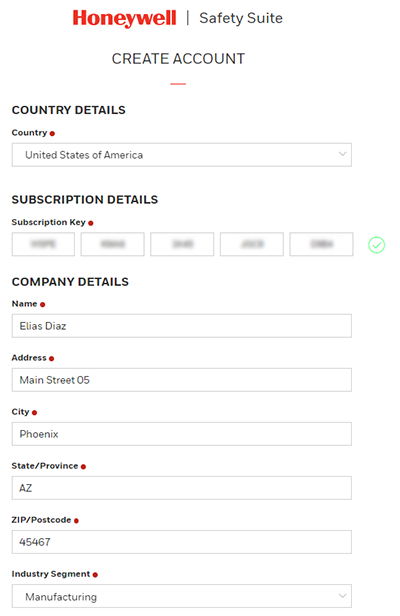
- Fill up the form and enter your license key. Click SEND REQUEST.
- Accept the Subscription Agreement.
- Look for instructions in your registered email. Close the browser URL tab.

- Review your email. A temporary password was emailed.
- In your Internet browser go to http://127.0.0.1 , enter the temporary password. You will be requested to change it and asked to log in.
- Enter your new password and accept the End User License Agreement. (EULA) and the Processor Privacy Statement.
- Click Disable MFA if you do not want Multi-factor Authentication.
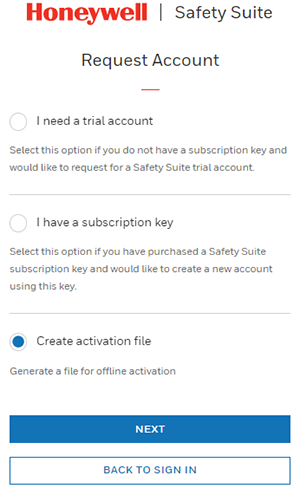
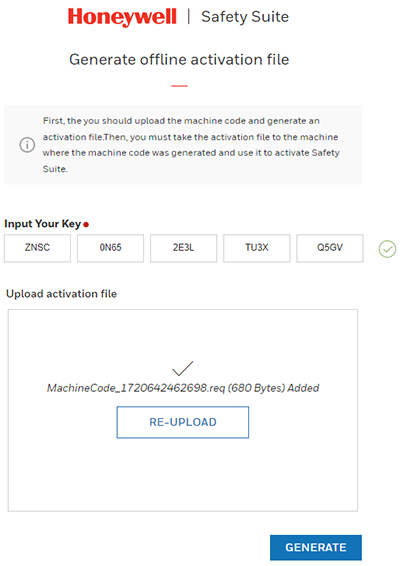
7c- Activate an Account Offline
Activate your software when you don't have access to the Internet.
Before you begin: You should have previously downloaded and installed the software and should have an activation key.

- Go to http://127.0.0.1 In your Internet browser
- Click Request Account
- Select Create activation file and click NEXT.
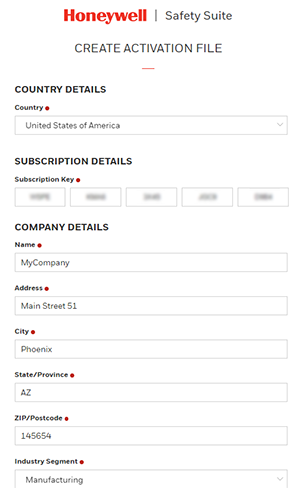
- Fill up the application form and enter your subscription key.
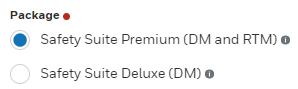
- Select either Safety Suite Premium (Real-Time) or Safety Suite Deluxe and click SUBMIT.
- Click DOWNLOAD. Save the MachineCode REQ file type in your Downloads folder.

- Go to https://ss.honeywell.com/#/generateActivationFile
- Enter your Key, upload the MachineCode.REQ file, and click GENERATE. An .act file type is generated. Click DOWNLOAD to your downloads folder.
- Go to http://127.0.0.1 In your Internet browser
- Click Offline Activation.
- Enter your key, upload the .act file, and click ACTIVATE.

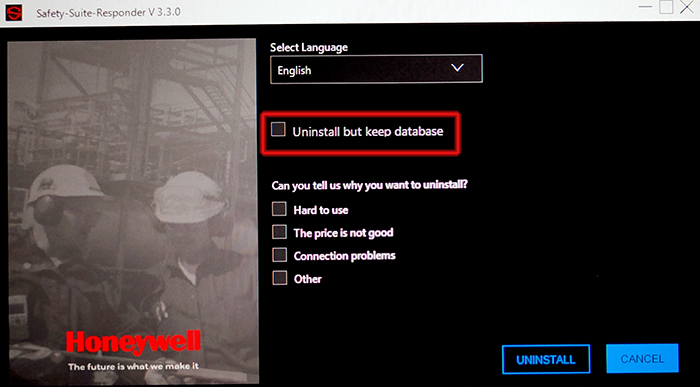
Unistall the software
When unistalling the software, ensure Uninstall but keep database is unchecked to fully erase the program.