Device Configurator
The Device Configurator app is a powerful tool for managing your wirelessly enabled BW or RAE personal /portable /transportable gas detection device(s) on a one-to-one basis. The app works with smartphones running Android or iOS operating systems and is FREE to download via the Google Play store or Apple App Store.
Key features include:
-
Real time gas readings of paired instruments
-
Real time reports and emails send and export capabilities
-
Configure devices in the field
-
Remote field calibrations
-
Access event logs, data logs, and real time measurements and quickly export them to email
Devices supported:
-
MicroRAE – wireless BLE enabled
-
BW Icon & BW Icon+
-
BW Flex Series
-
MultiRAE (Pro, Lite, Benzene)
-
BW RigRat
-
3GPID+ Series devices
-
MiniRAE 3000 +
-
MiniRAE Lite +
-
UltraRAE 3000 +
-
ppbRAE 3000 +
Download and install Device Configurator ![]() from the Apple App Store or the Google Play Store.
from the Apple App Store or the Google Play Store.
Step 1: Open the Device Configurator app.
Note: There is no Login for the Device Configurator app.
The default screen is the Device List

- Tap

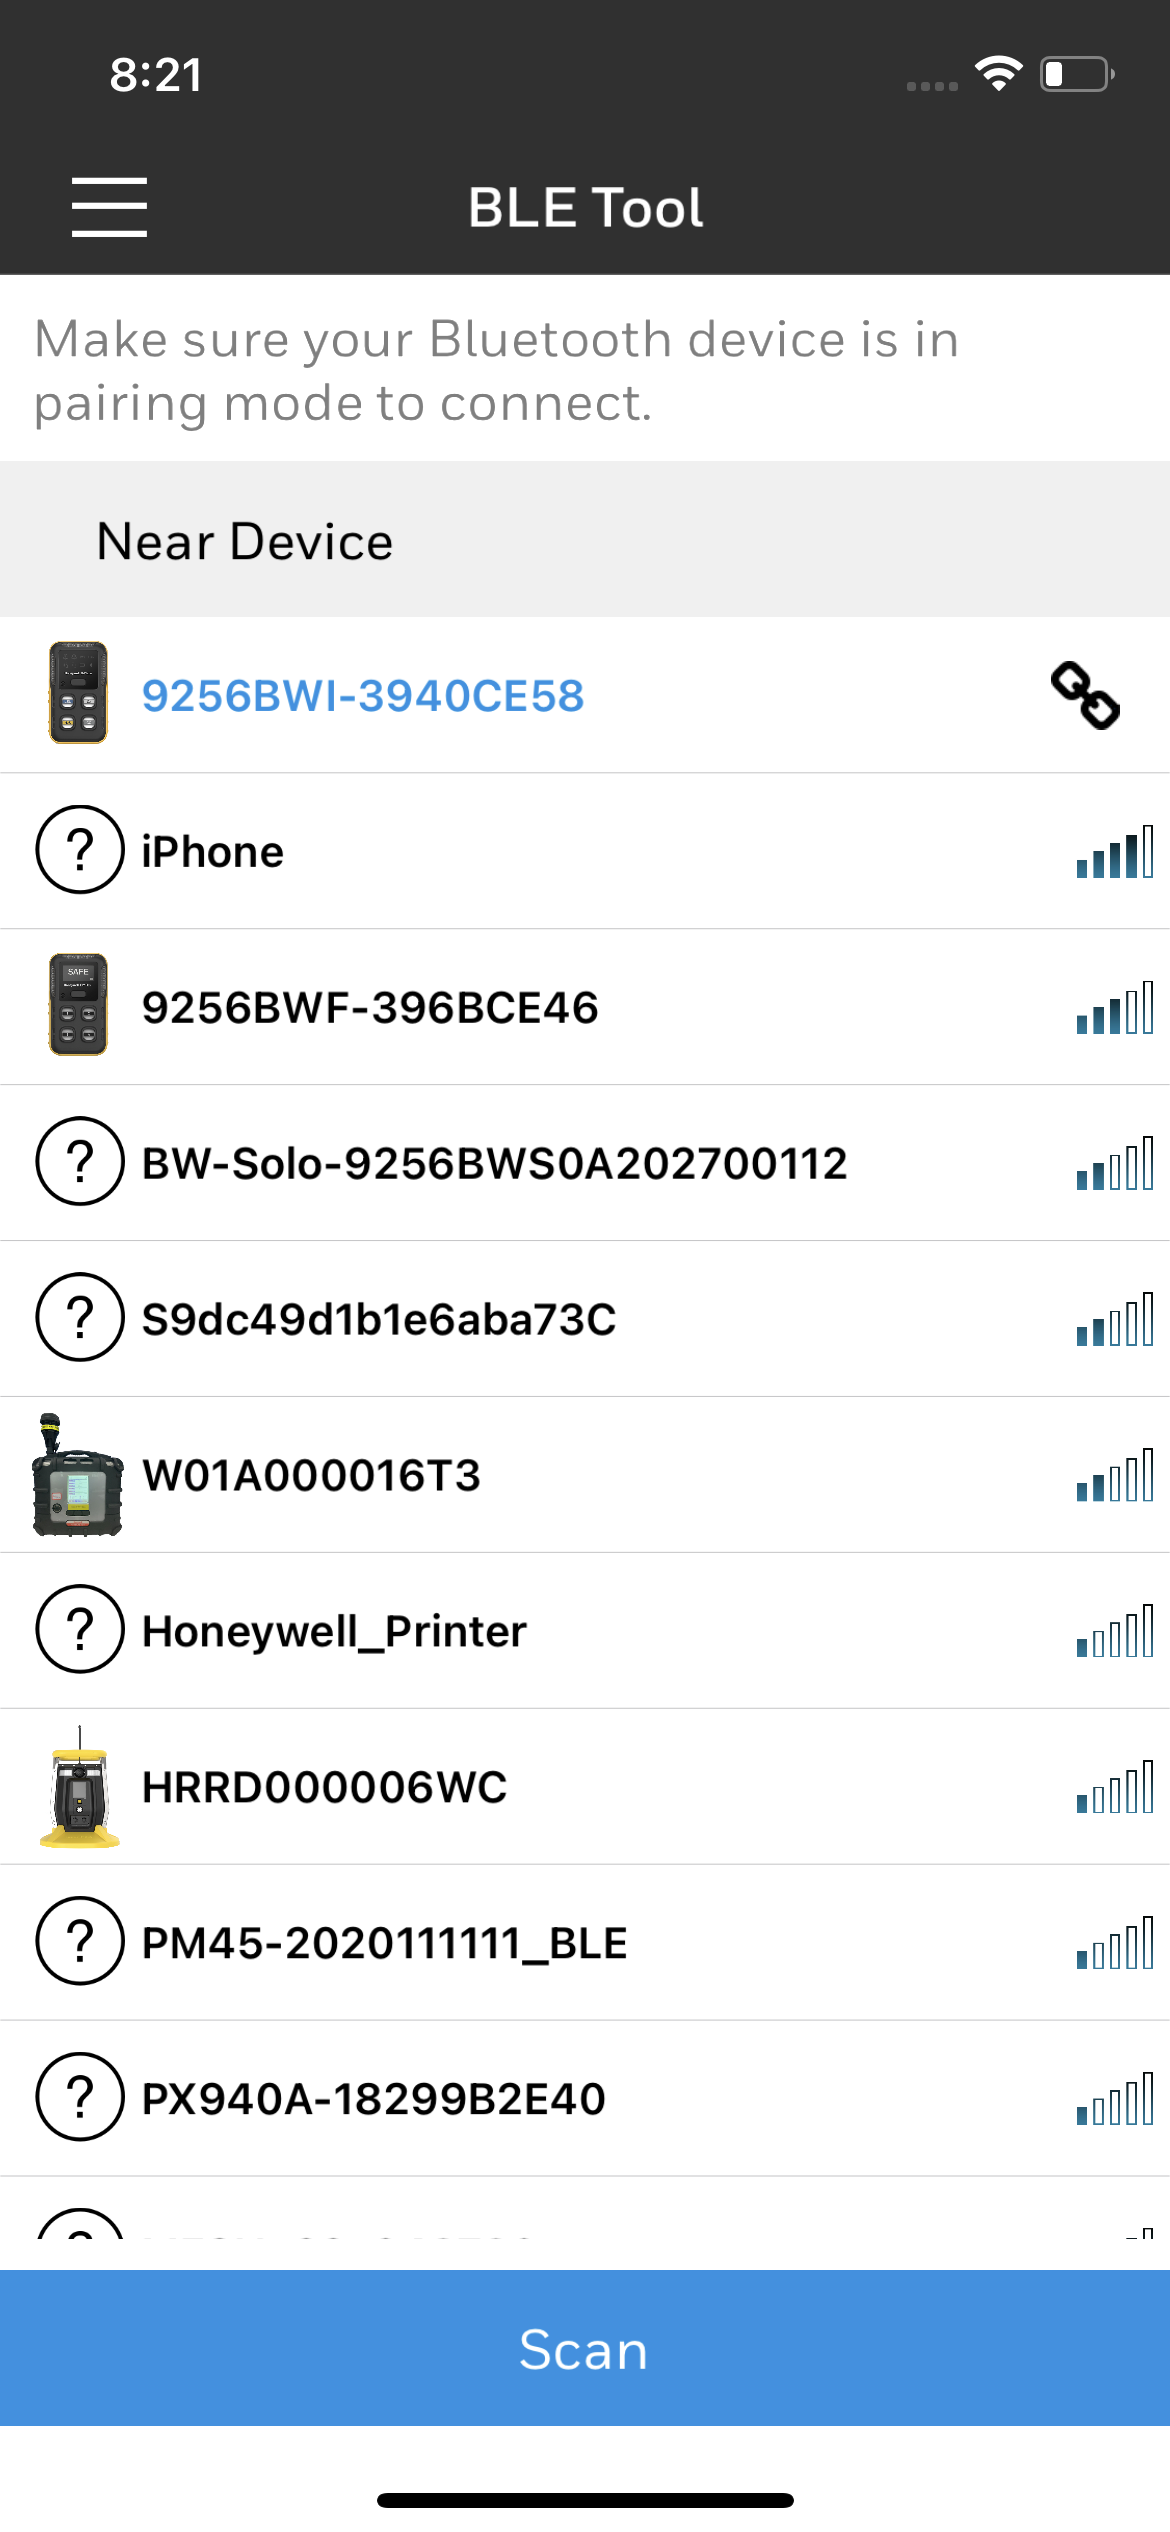
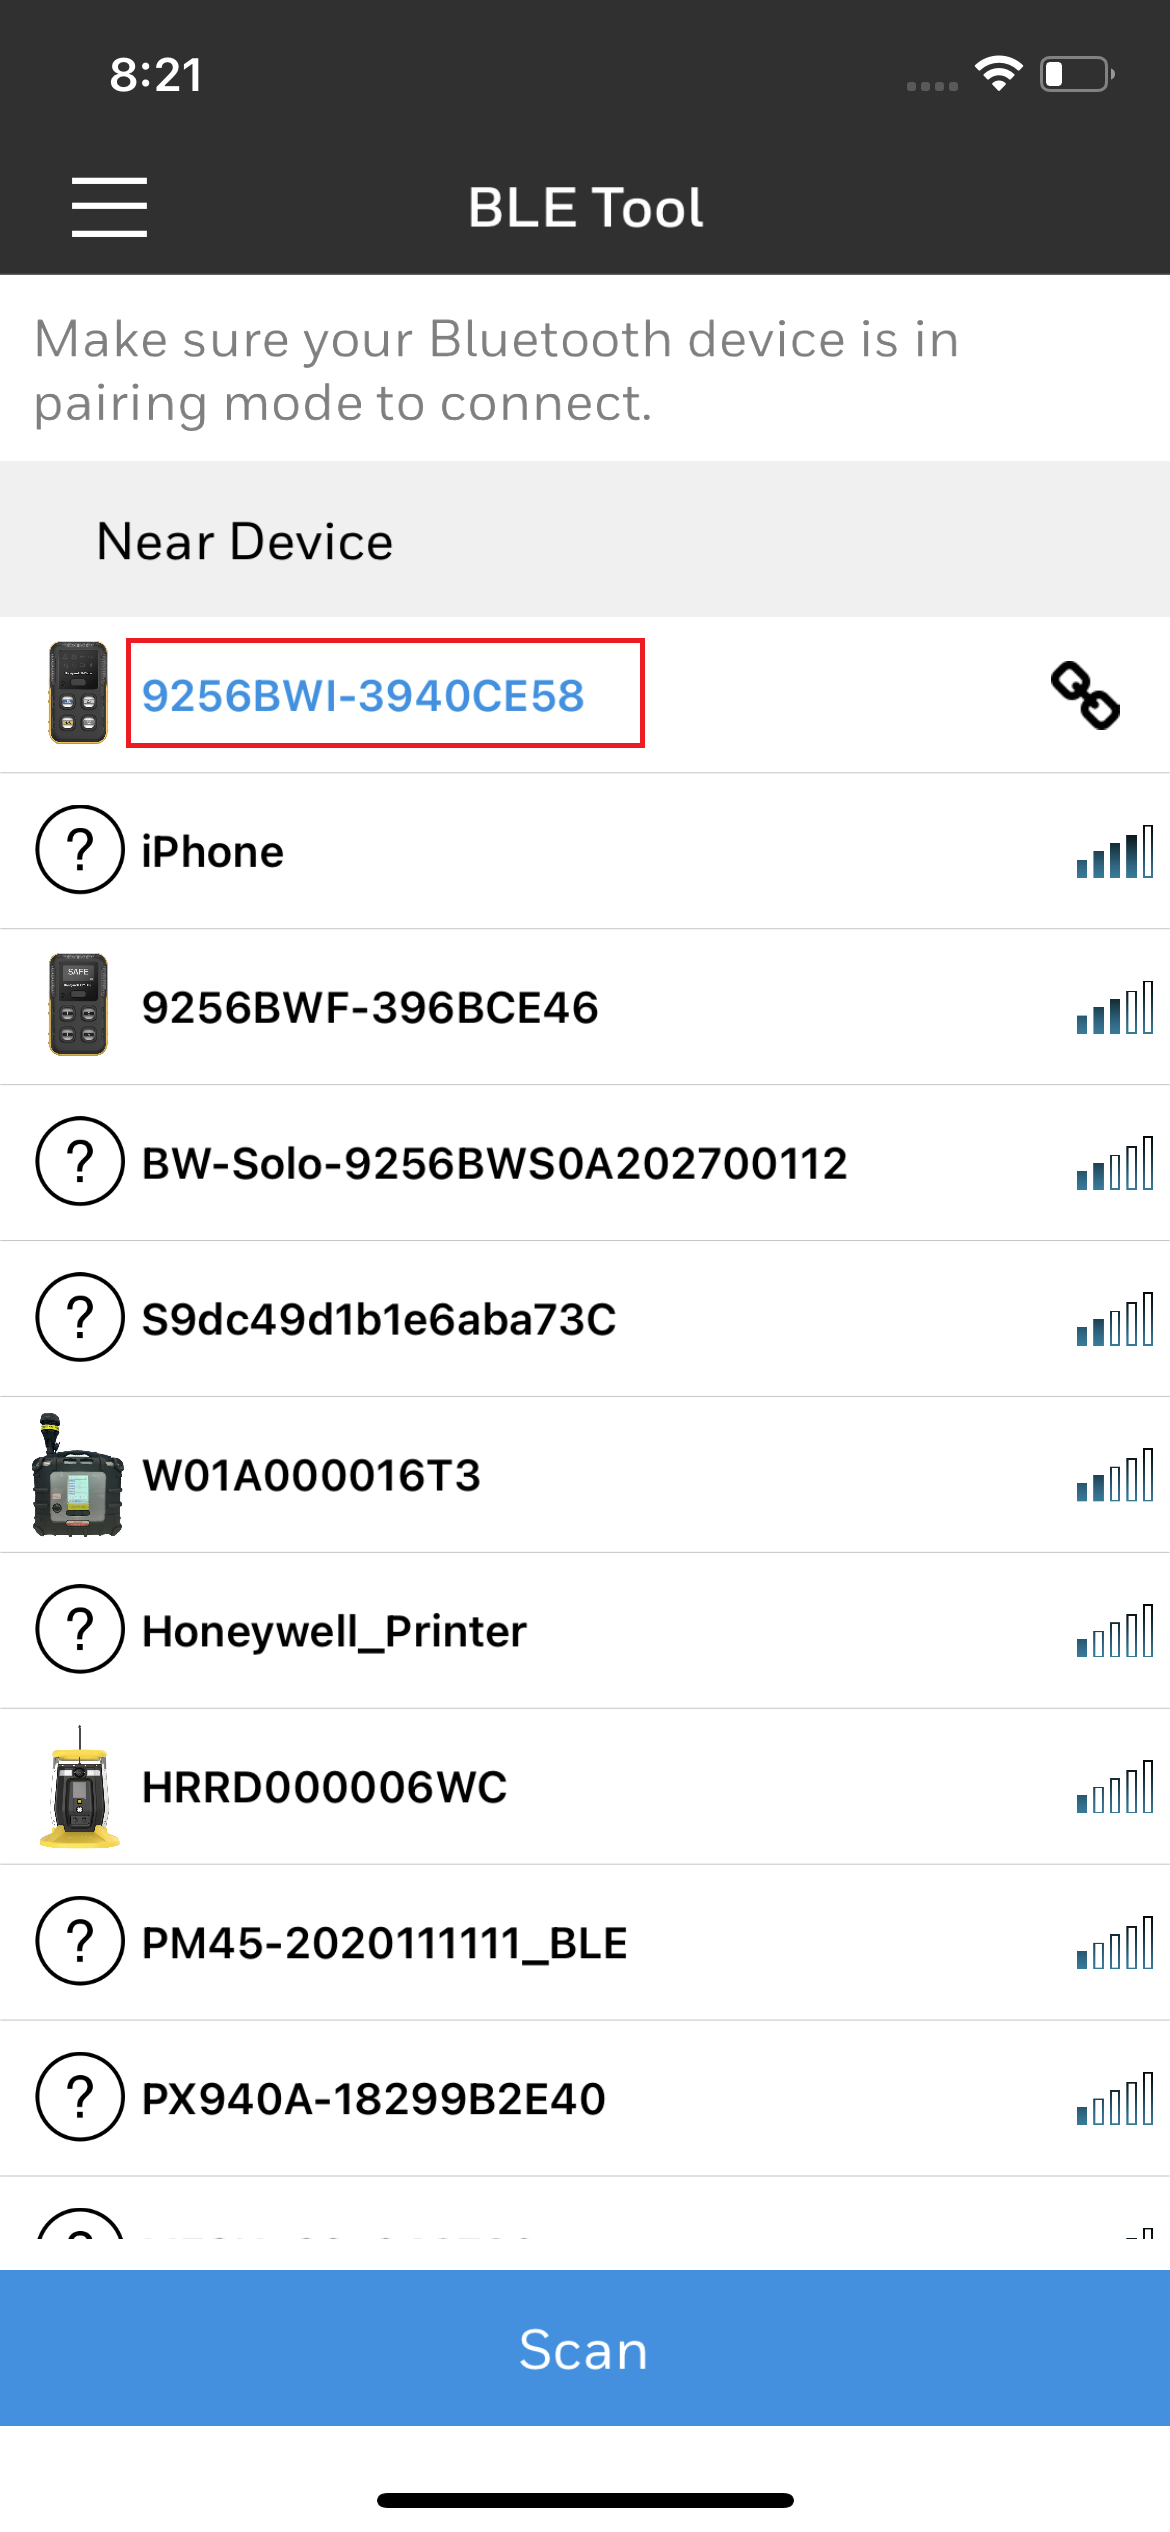
- Tap BLE Tool.
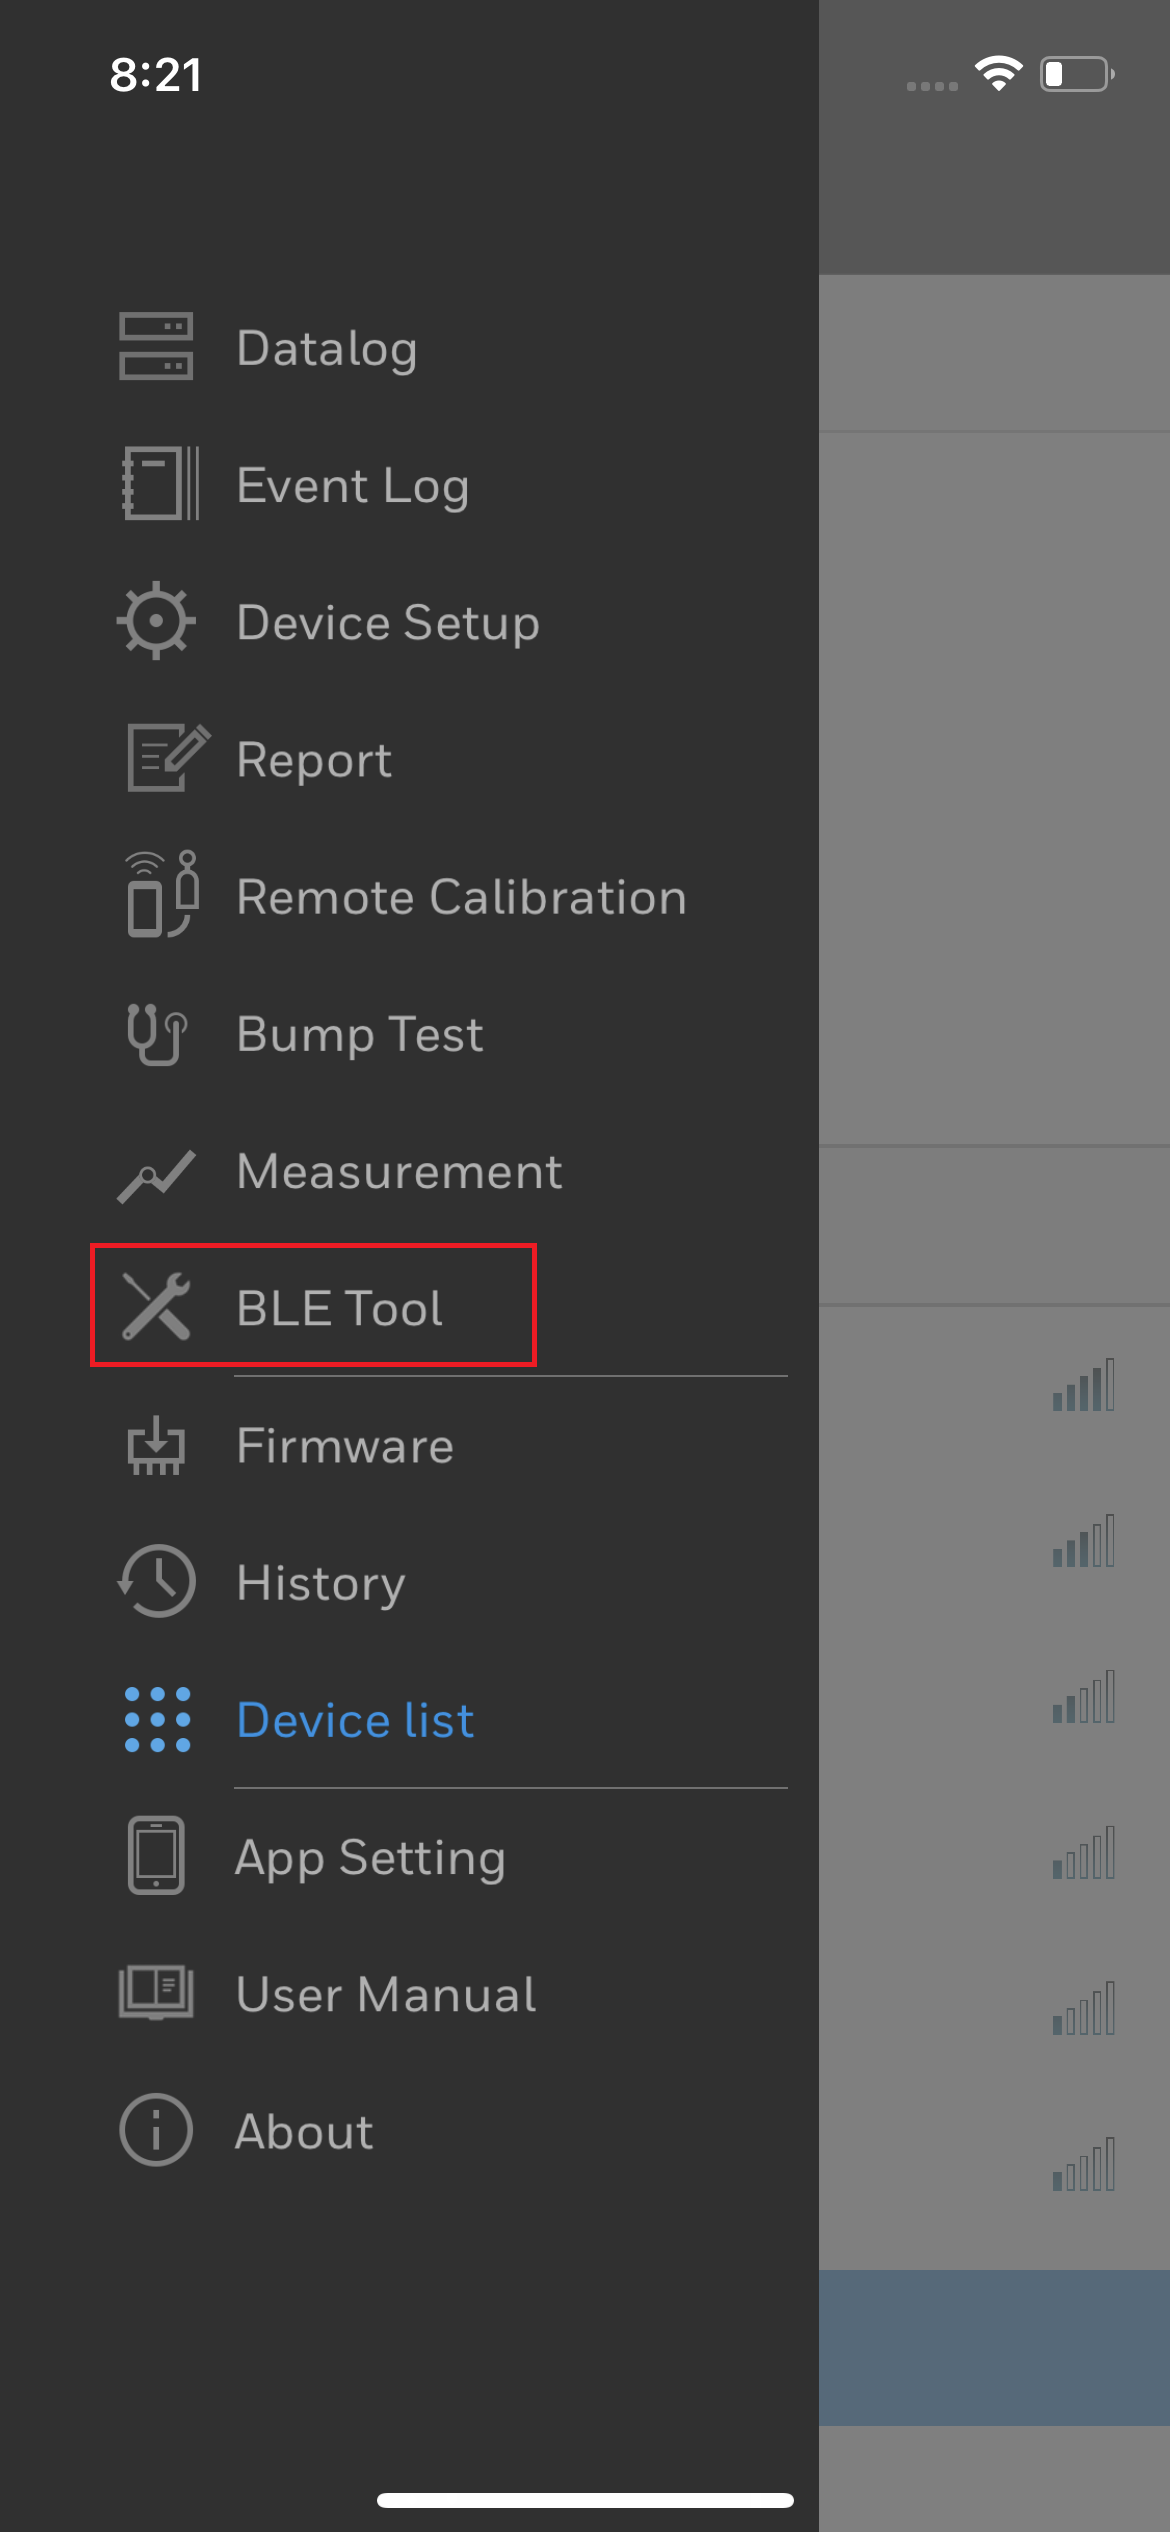
- Tap Scan to discover all of the available devices.

- Tap on the desired device to pair it; enter the PIN Code if needed.
The Datalog feature allows users to review available Datalogs on the paired devices (BW RigRat, MicroRAE, and MultiRAE BW).
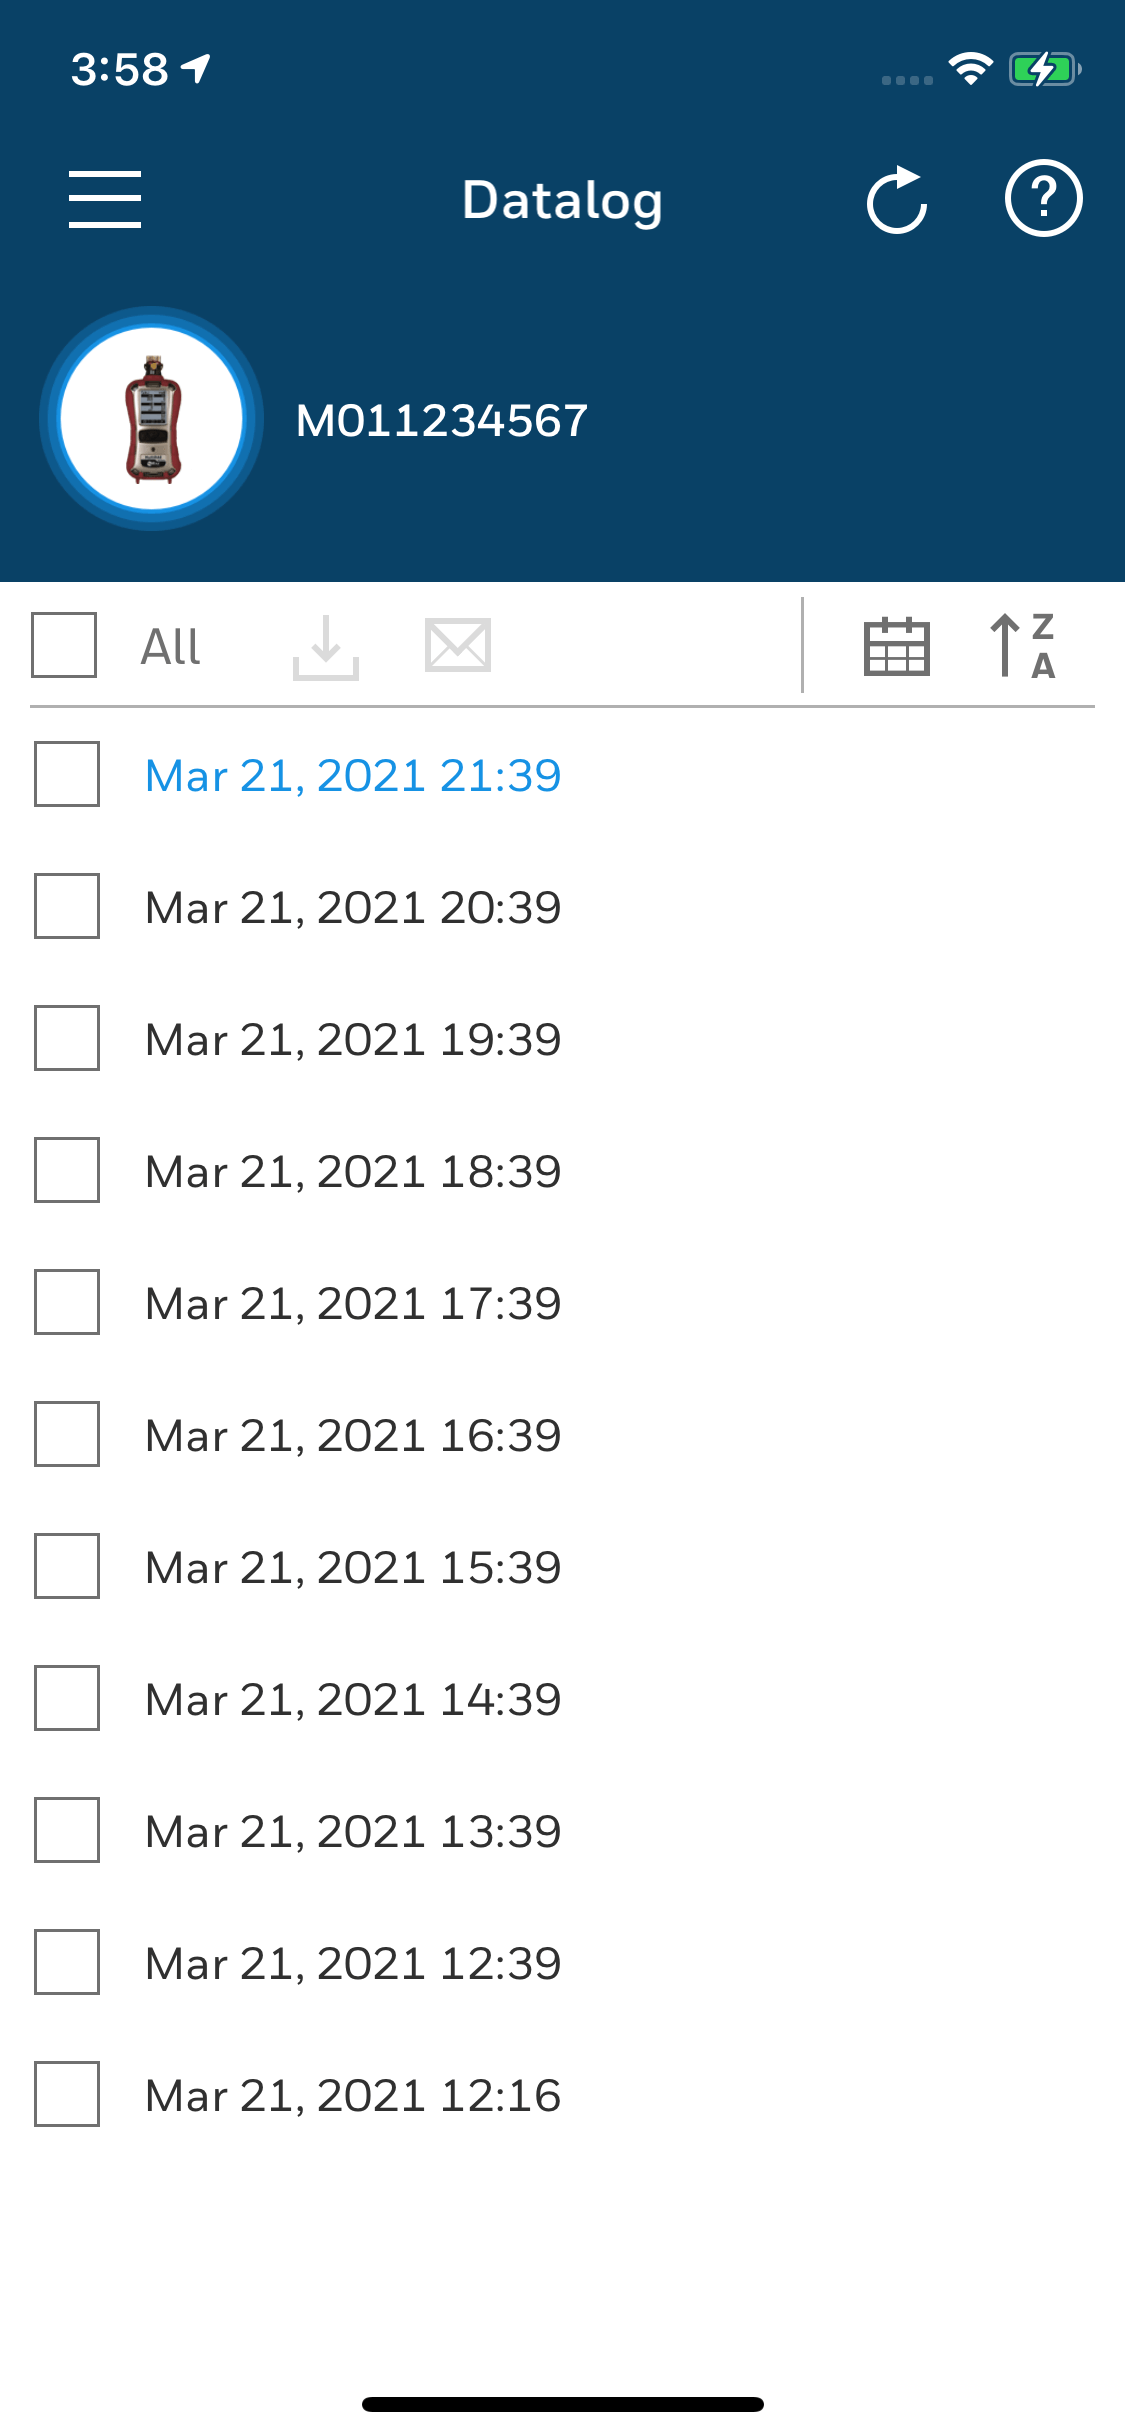
You can execute any of the following operations:
Tap  to download the Data Logs.
Tap  to Email the logs and details to anyone directly from the app.
Tap  to see the Data Logs of a particular date and day.
Tap  to sort the list of Data Logs alphabetically or in reverse order.
Tap  to refresh the Data Logs and get the latest events.
Tap on any date in the list to see the details.
Tap on the Summary tab to display the summary of all the event details such as Unit name, Serial no, Firmware version, mode, ID's, sensors, etc.
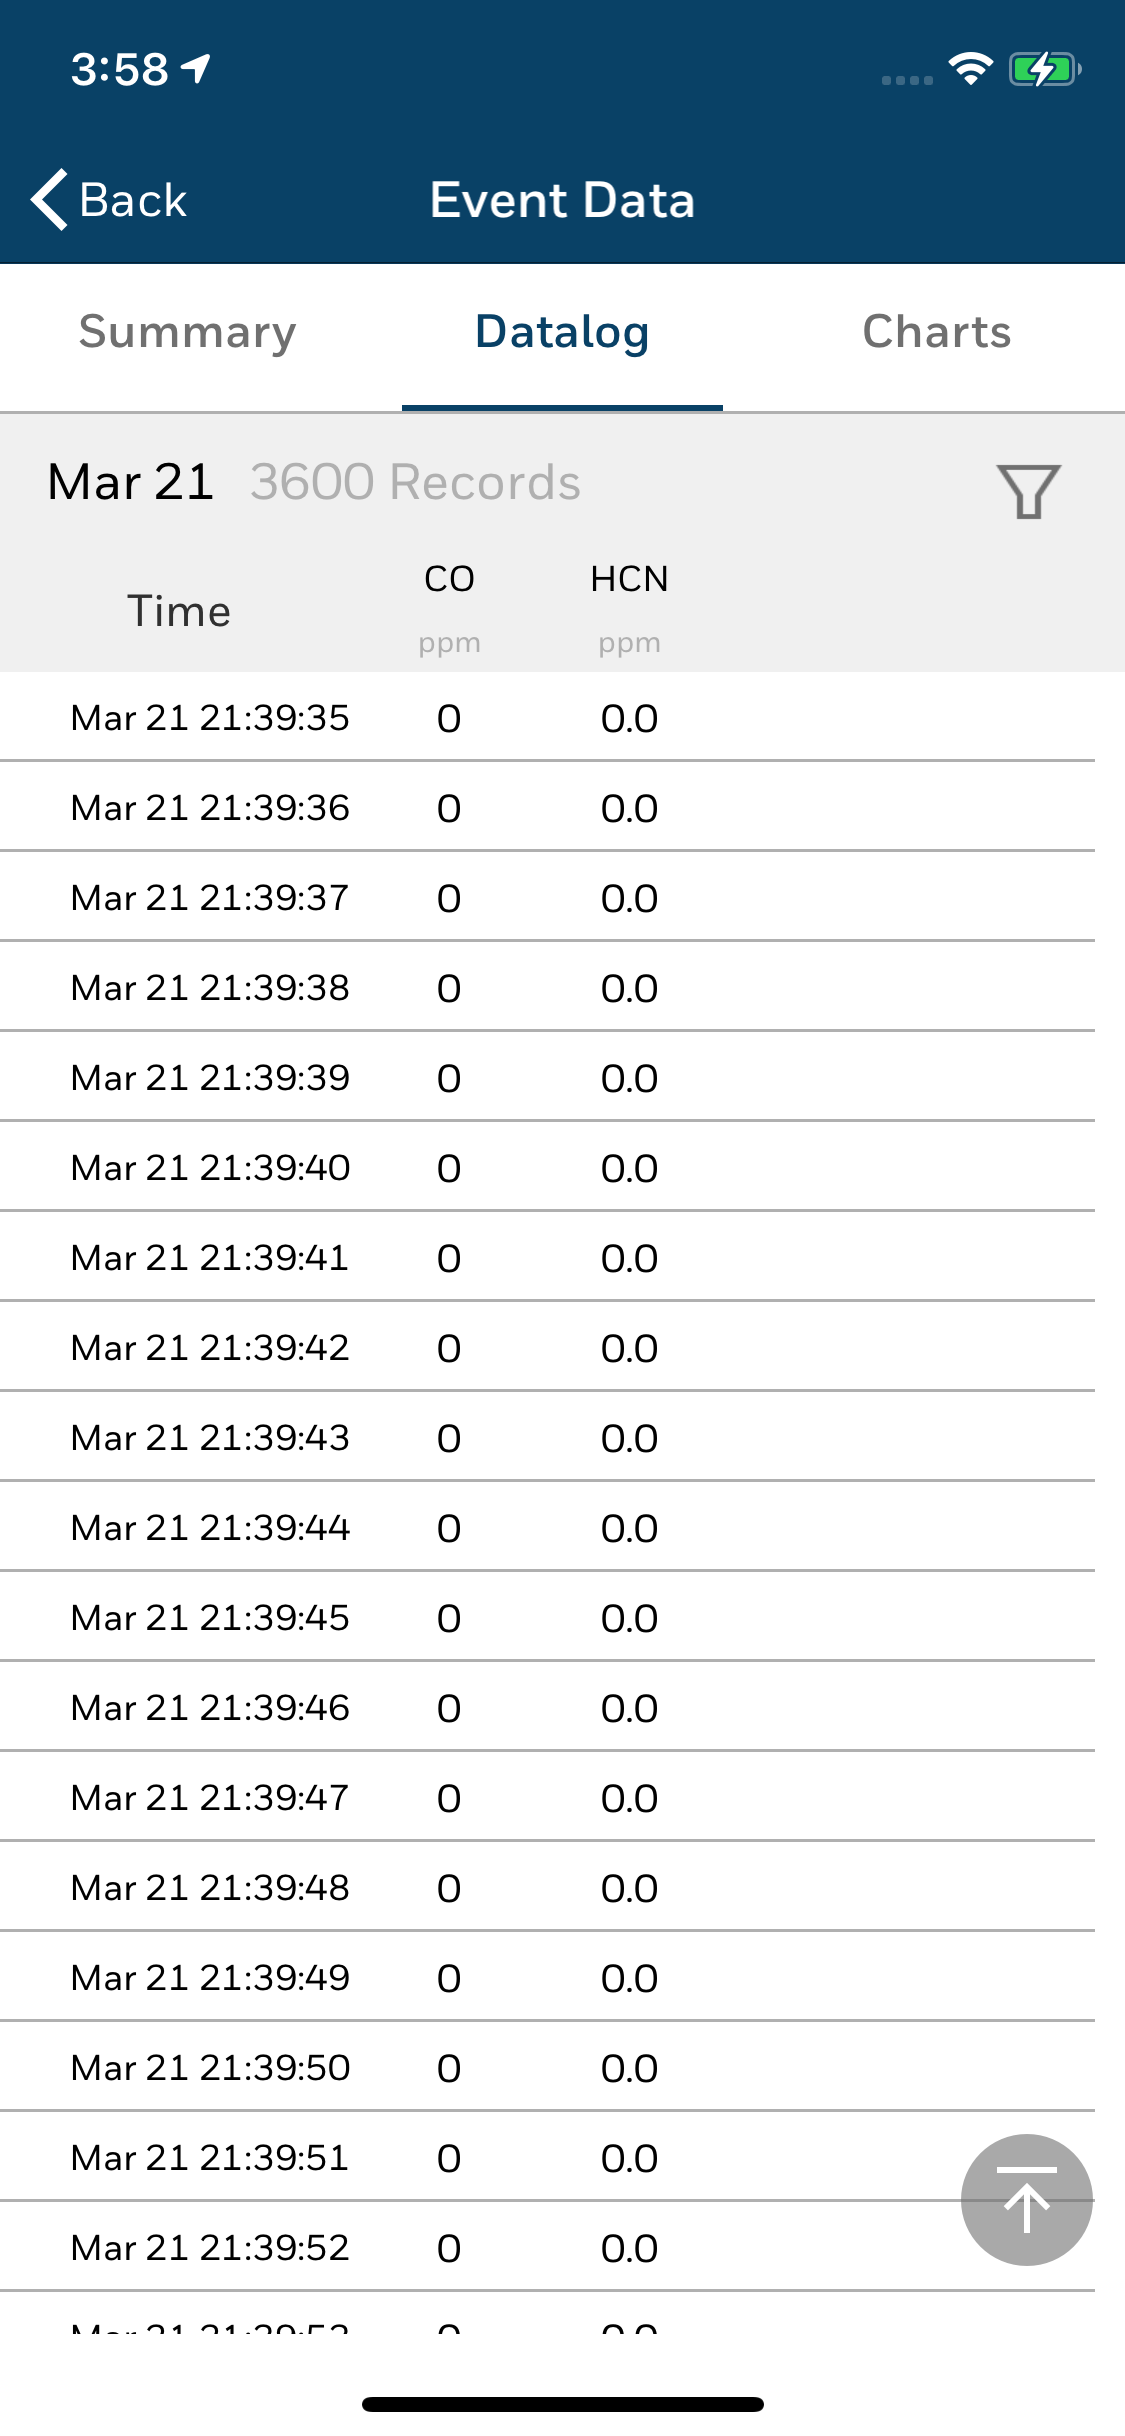
Tap on the Datalog tab to review the log of records in specified time intervals for the Gas bottles.
Tap  (filter) to apply and sort the capabilities to display information in a preferred status.

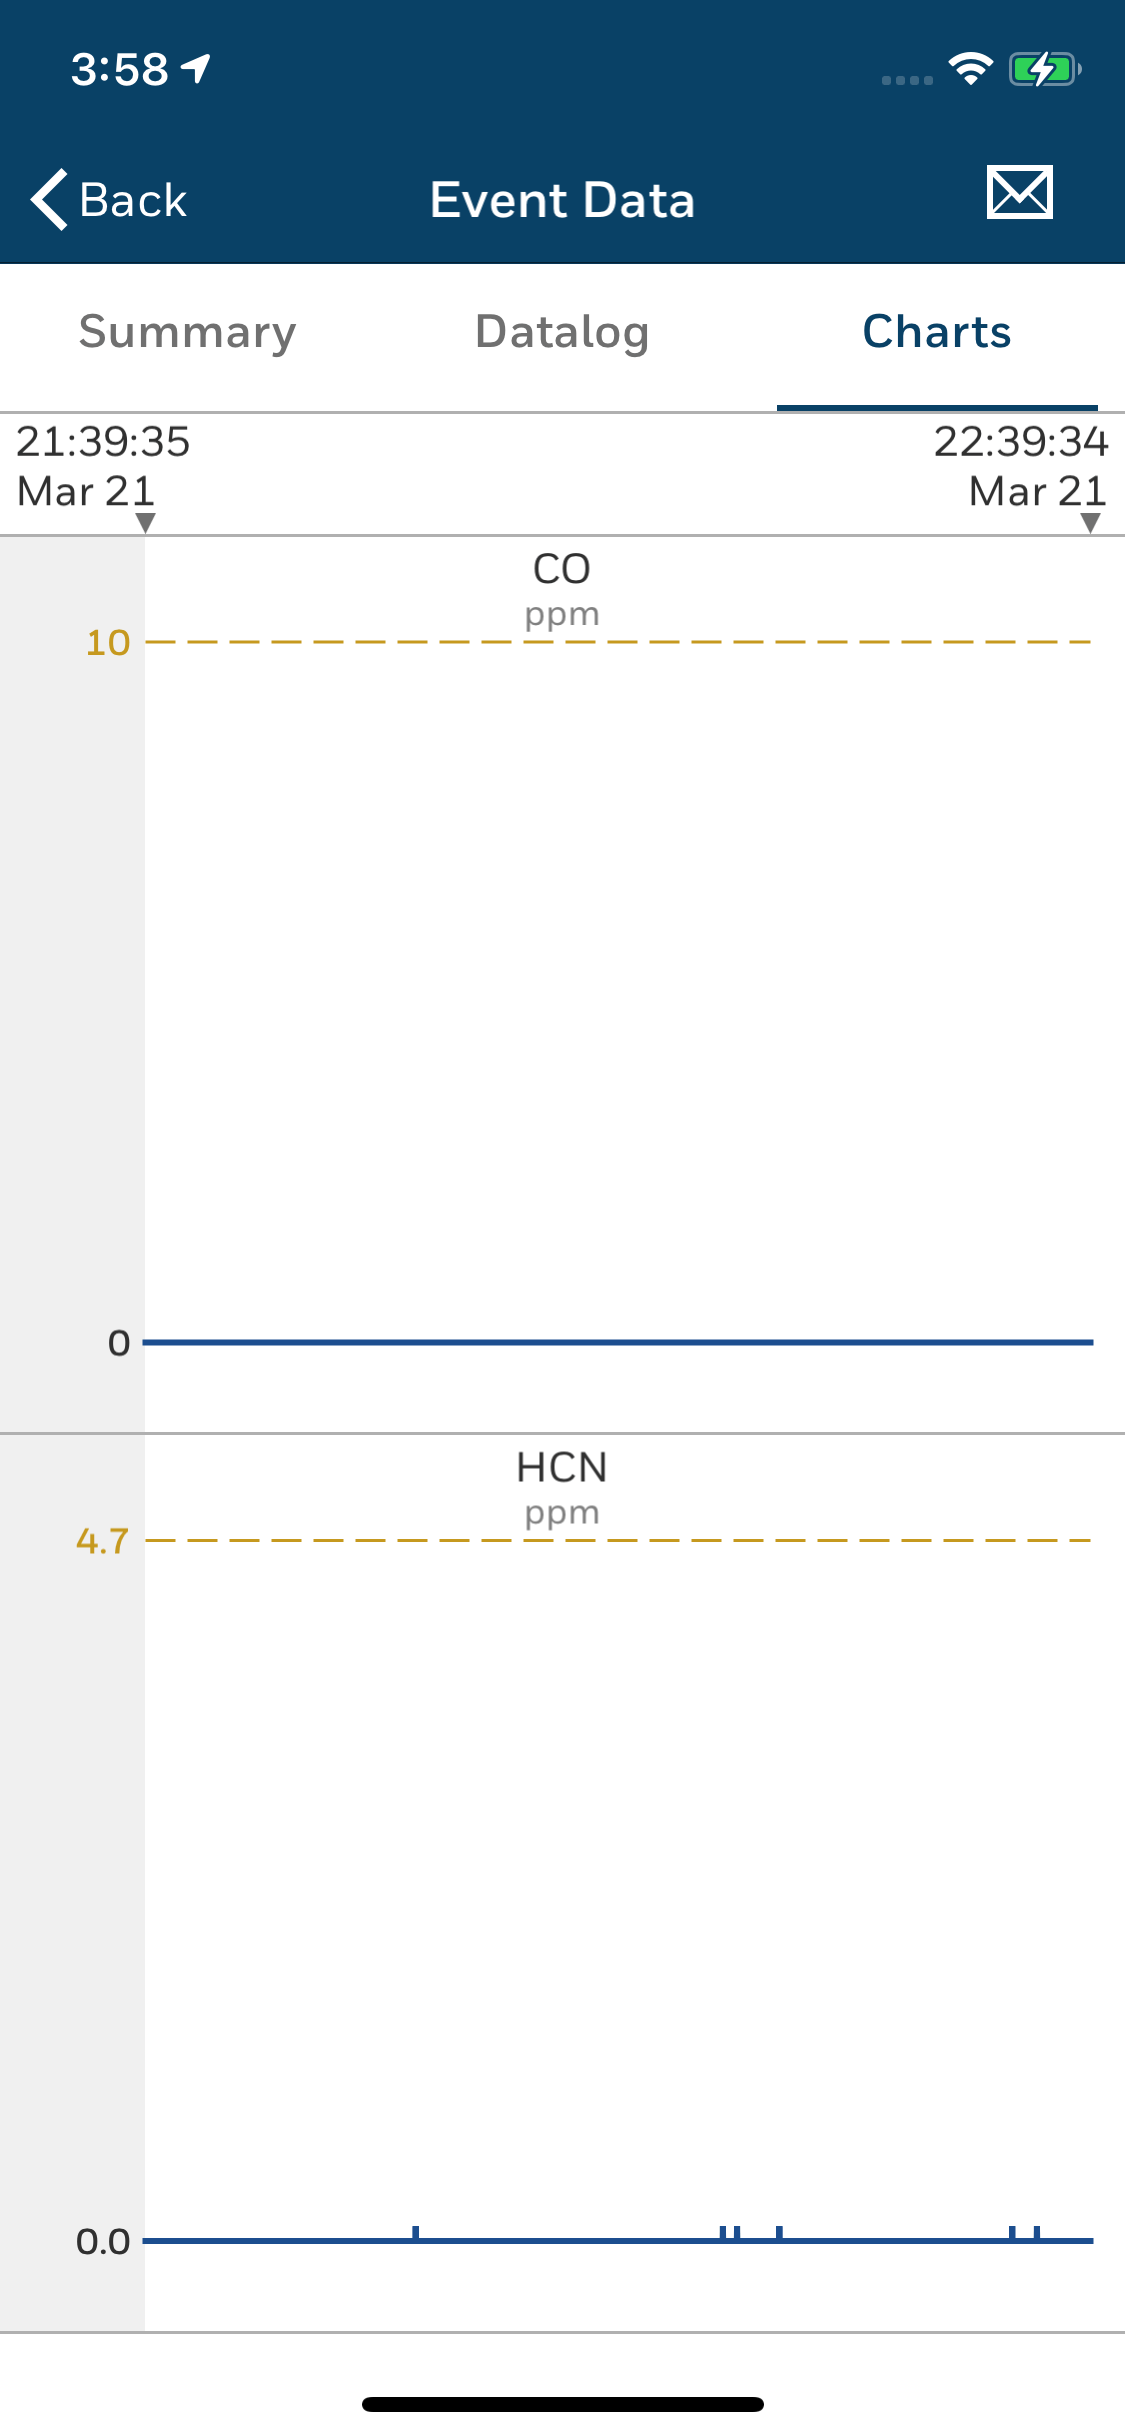
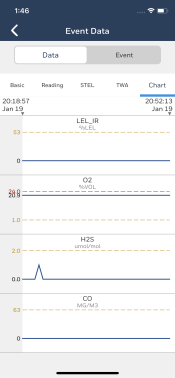
Tap on the Charts tab to review the event of each type of gas in a graphical representation.
Data and Event allows the BW Icon and BW Flex devices users only to view the Data and Event logs.
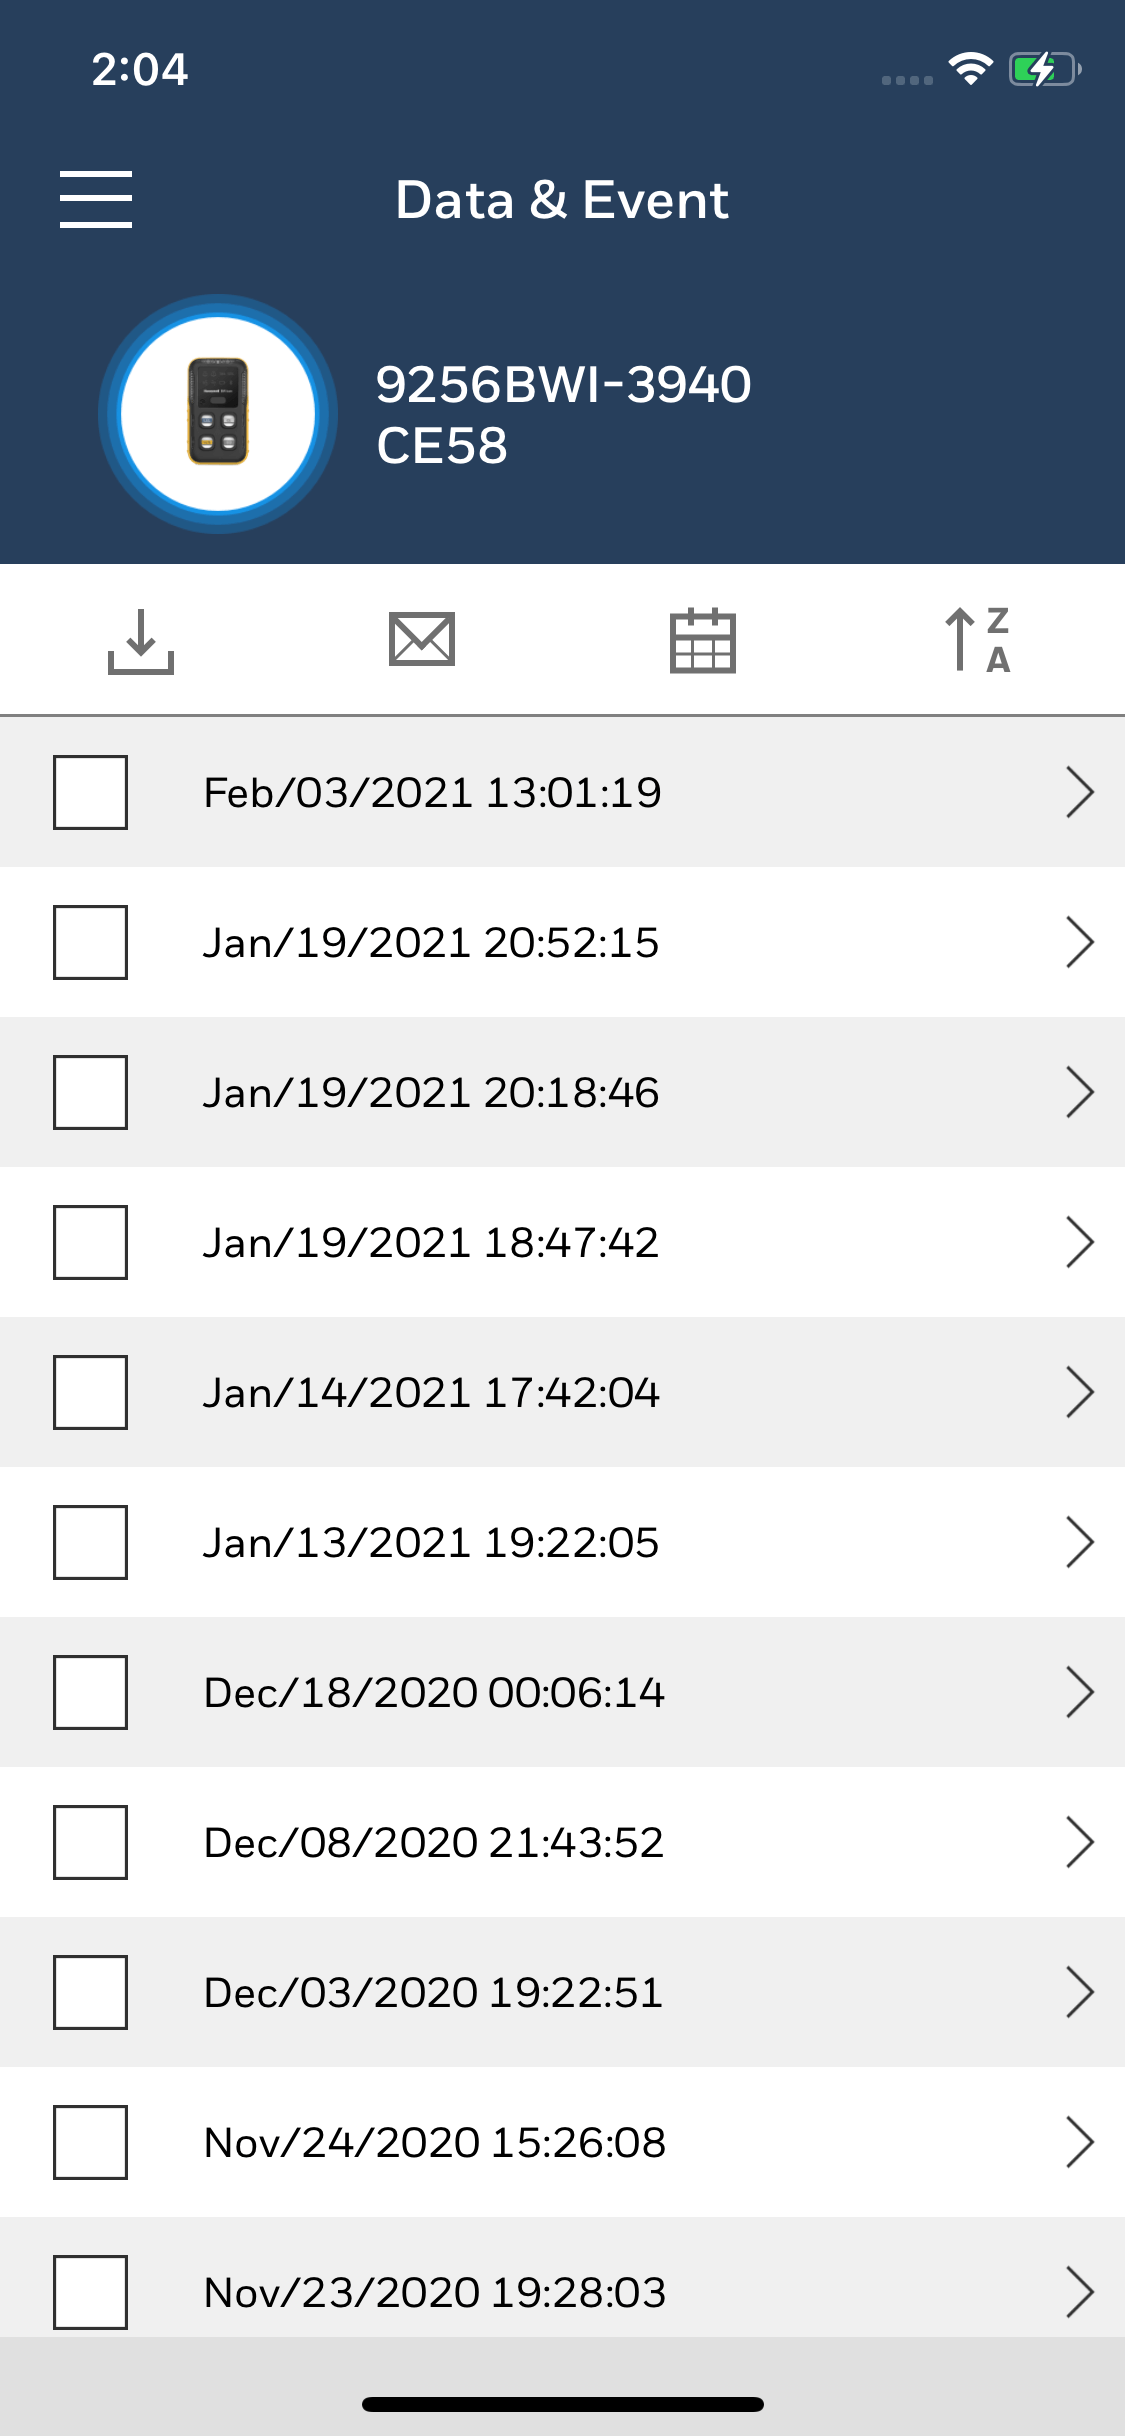
You can execute any of the following operations:
Tap to download the Data and Event Logs.
Tap to email the logs and details.
Tap to see the Events and Data of a particular date and day.
Tap to sort the list of Events and Data alphabetically or in reverse order.
Tap  to see the Data and Event tab and the details of the date in the list.
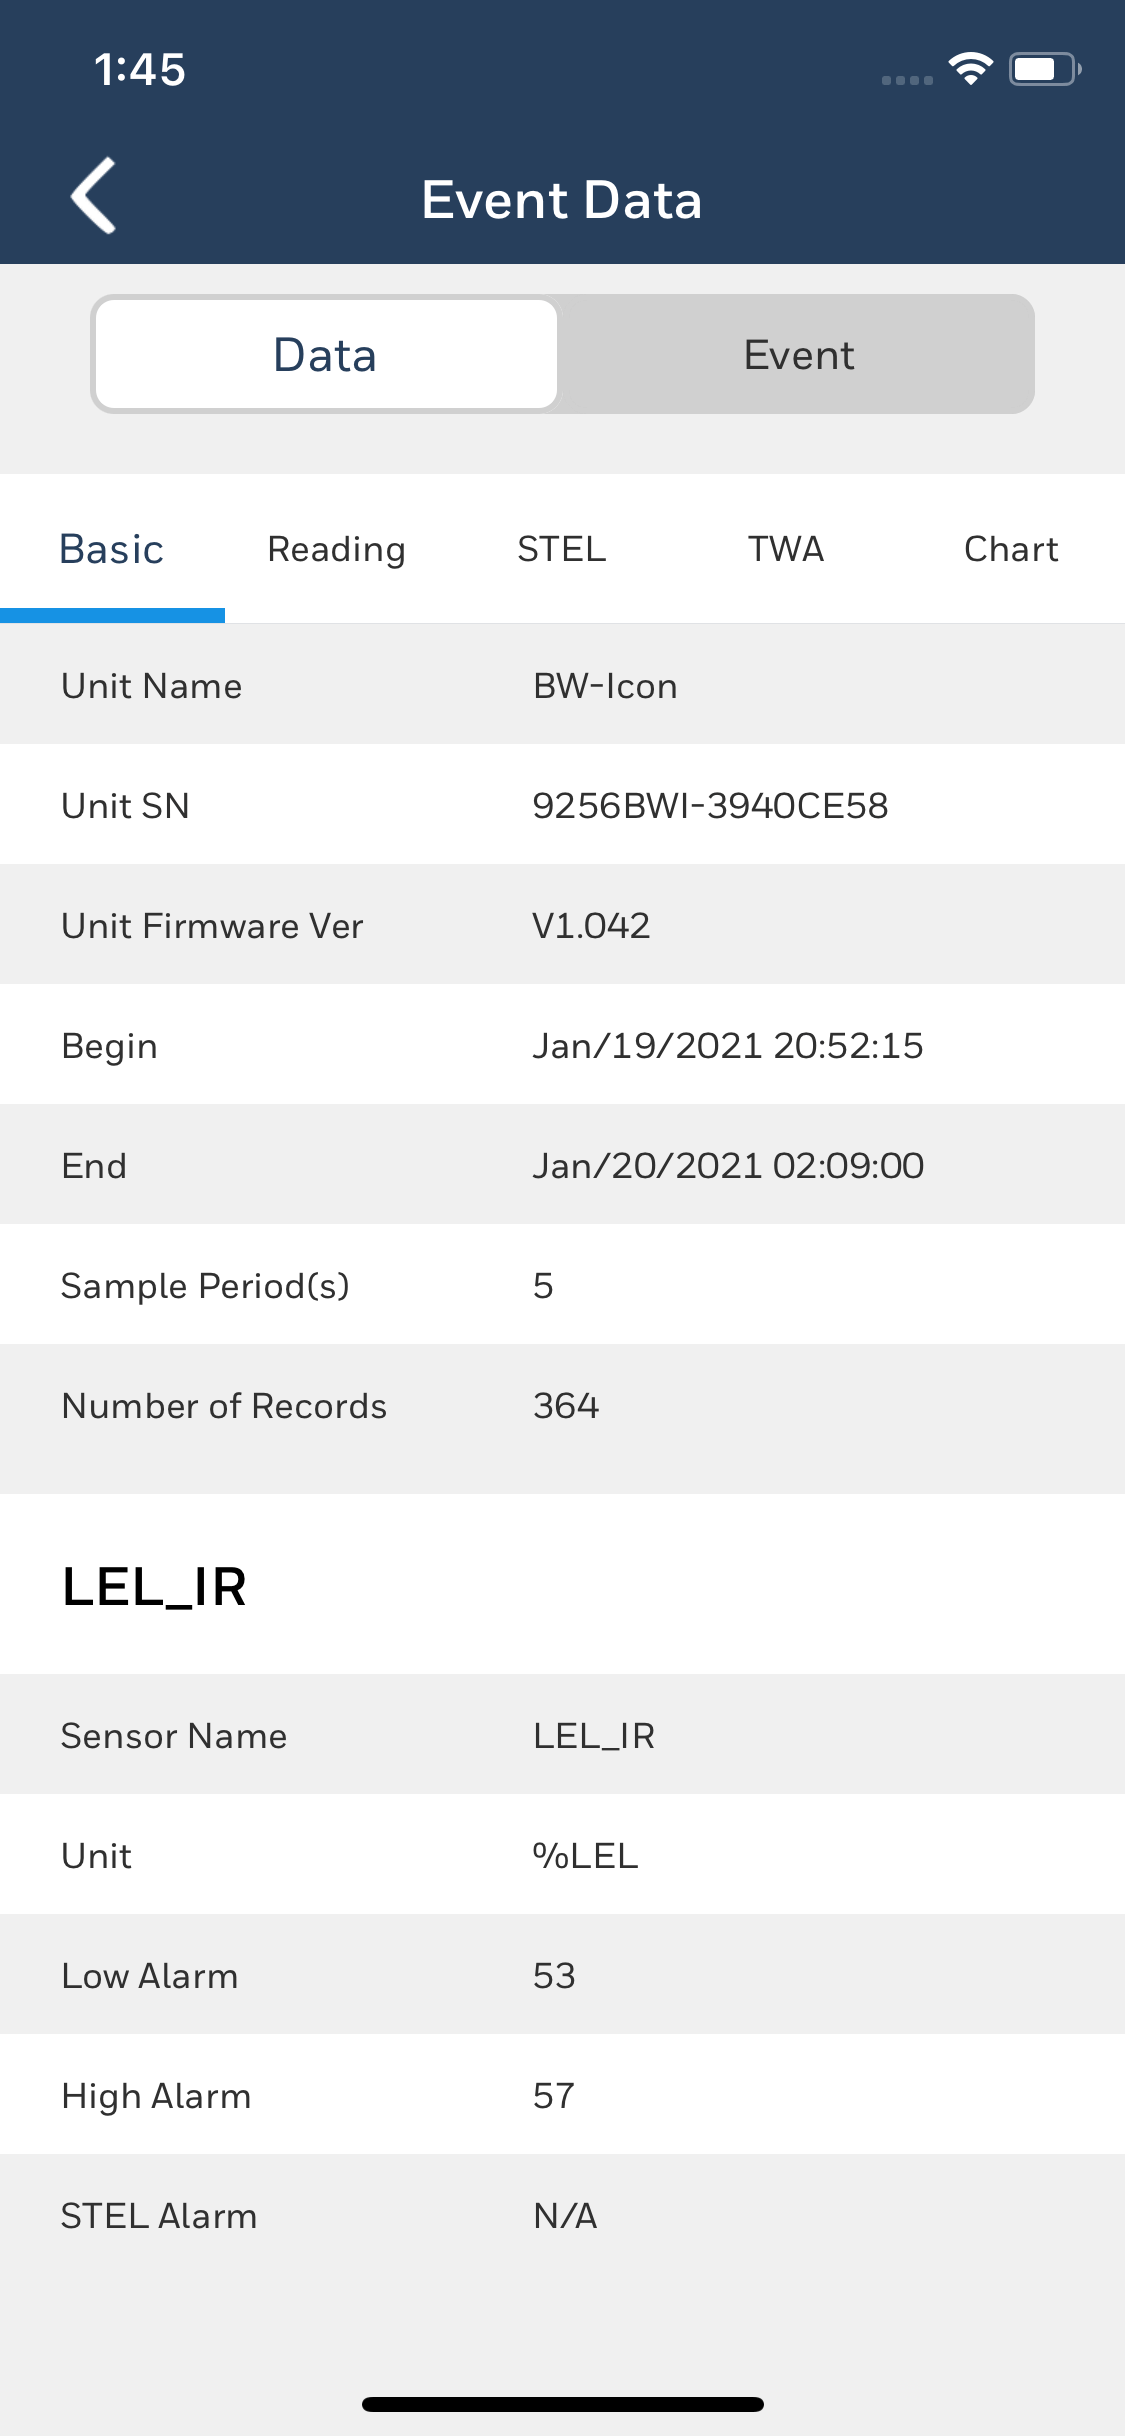
Data
The Data tab allows users to review available Datalogs on the paired devices and provides details under five different sections such as Basic, Reading, STEL, TWA, and Chart.
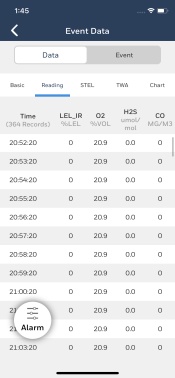

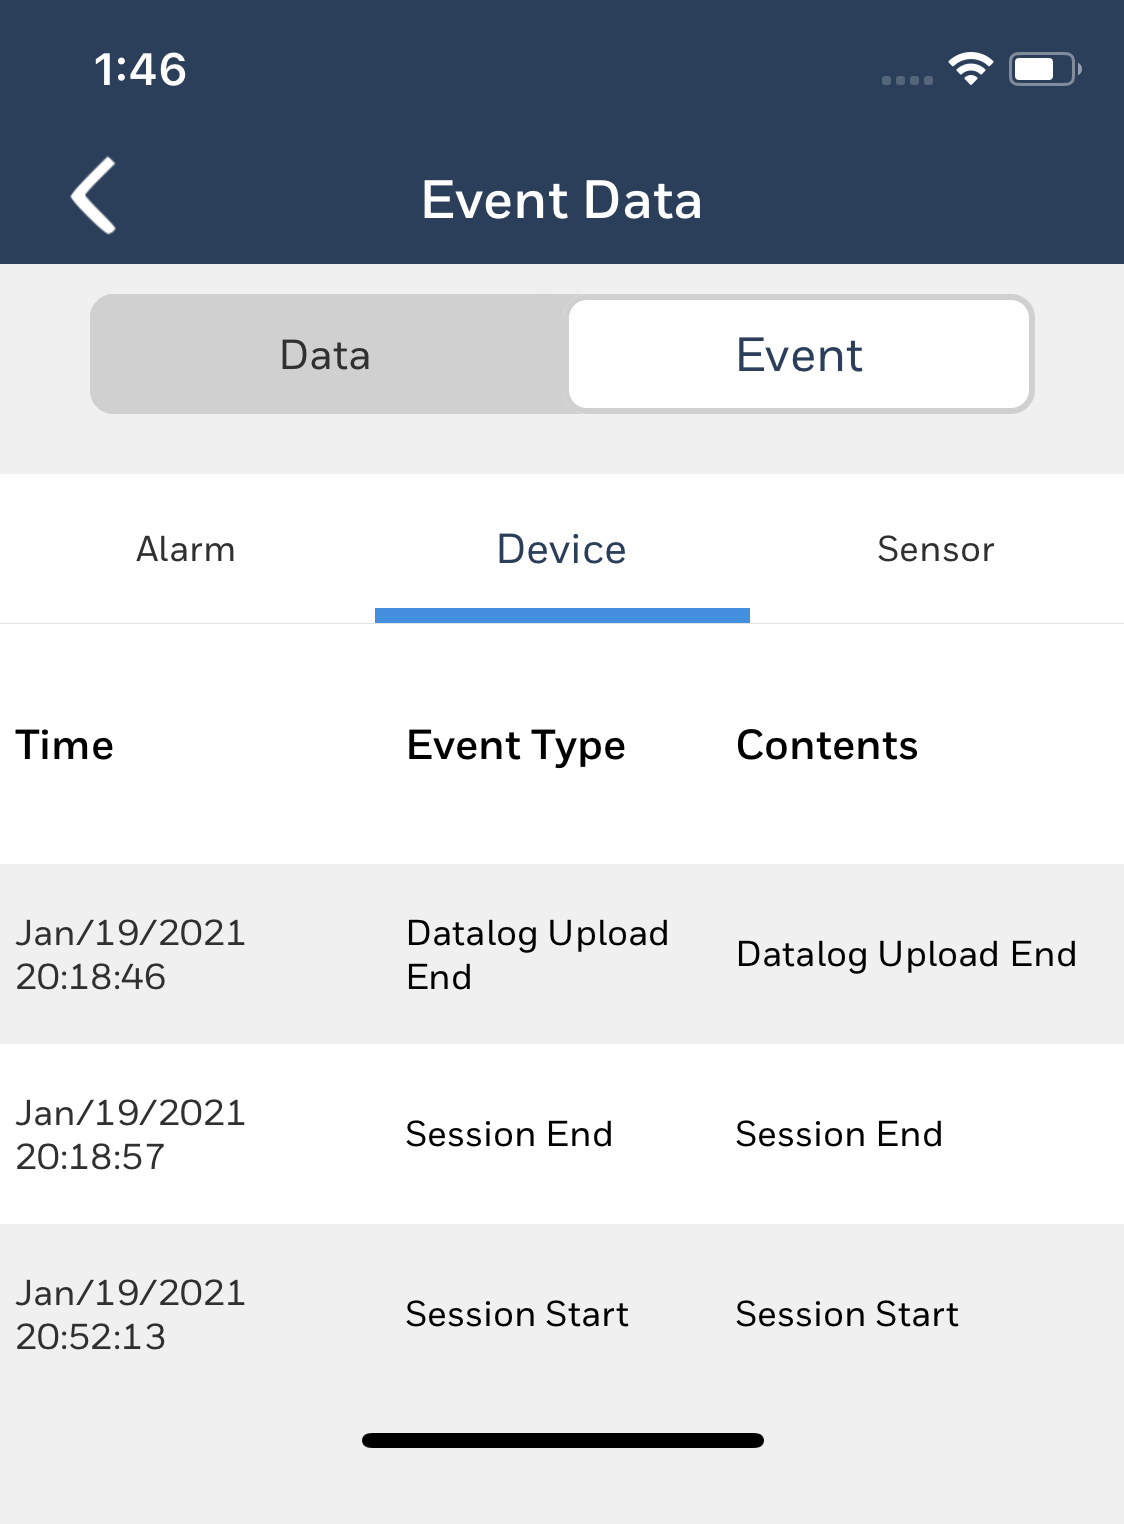
The Event tab allows users to review all events on the paired device and provides details under three different sections such as Alarms, Devices, and Sensor.
Alarm: Information about the event date/time, the sensor type and the alarm details.
![]()
Device: Information about the event date/time, the type of the event, and content details.
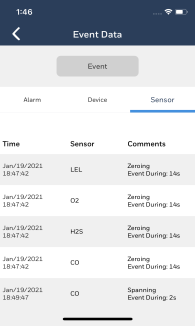
Sensor: Information about the event date/time, the sensor type, and the event details.
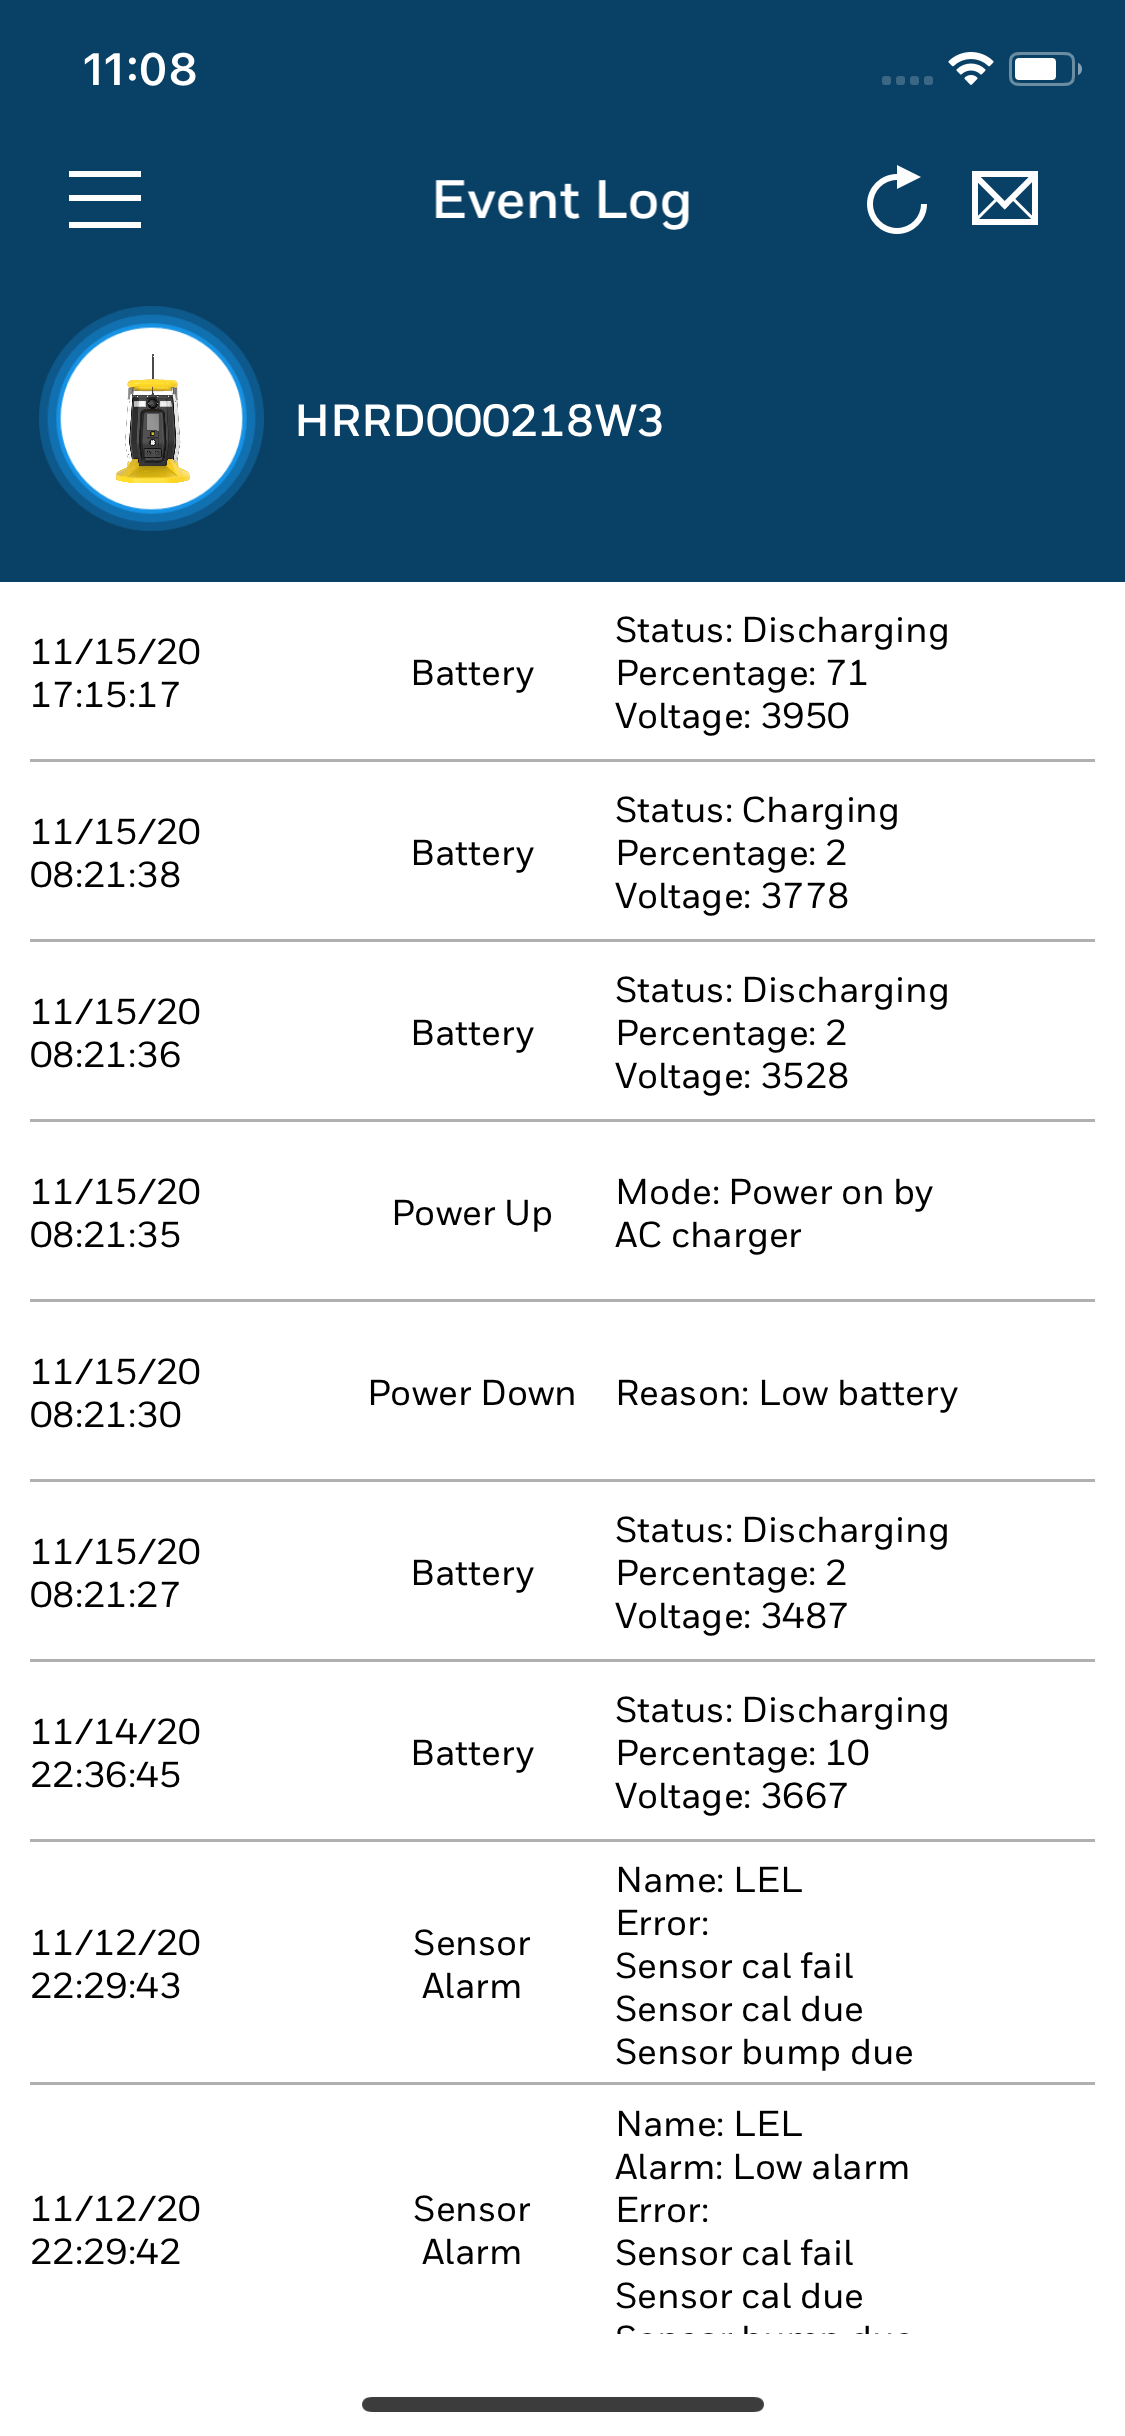
The Event log feature allows users to review and email all available historical events on the paired device.
The BW RigRat users can also review the Event logs.
Tap : To email the Event logs.
Tap to get the latest changes.
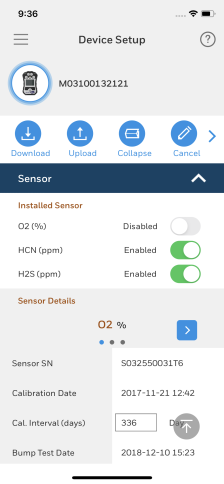
The device setup section contains the status (Enabled / Disabled) of the sensors installed on the device and sensor details such as serial no.
BW Icon, BW Flex, BW RigRat , MicroRAE, and MultiRAE devices users can view the Device Setup.
You can perform the following operations:
Tap to download the current configurations from the device.
Tap  to upload edits and changes to device configuration.
Tap  to Expand and Collapse all contents seen on screen
Tap  to edit current configurations on the device
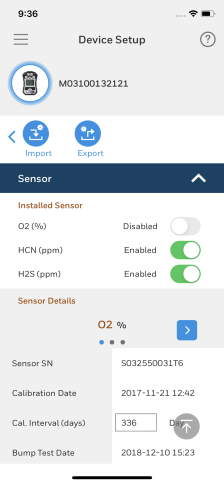
Tap to access the import and export icons.
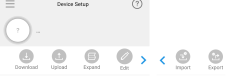
Tap  to import a configuration template
Tap  to export a configuration template.
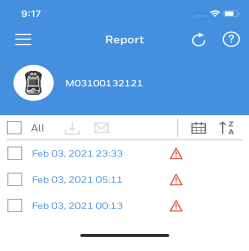
The Report feature allows users to:
- Review available reports with filter options by data and alphabetical order
- Download reports to phone
- Email the report to anyone, etc.
- View Calibration reports including details of Instruments tested, Calibration Certificate, Calibration Summary, Calibration detailed results, Fresh air Calibration Results and systems.
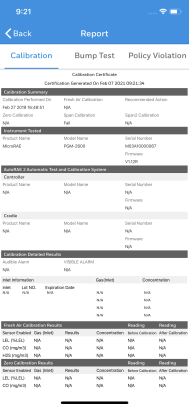
- View Bump Test reports including details of the Bump test summary, Instruments tested, Bump test detailed results, and Sensor Info.
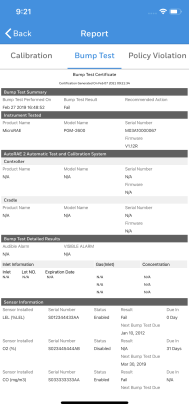
- View Policy Violation reports such as violation summary, Sensor bump test, and calibration due dates
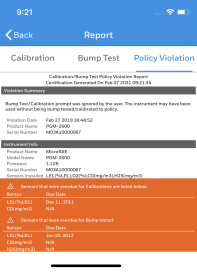
BW RigRat, MicroRAE, and MultiRAE device users can view the Report.
Tap Refresh  to get the latest reports.
Click on any report to view the details.
The remote calibration feature allows users to calibrate the devices remotely, assuring compliance, safety, and accurate measurement of gases. The report screen offers multiple options to:
- Configure the calibration gas bottle so the right gas is paired with the right device
- Calibration walk-through process for the paired device
- Have access to all the (previous and current) records of Remote Calibration.
This screen allows the users of BW Icon, BW Flex and BW RigRat devices to view the Remote Calibration.
The Remote Cal has three tabs: Bottle Information,Calibration, and Remote Cal. Records
Bottle Information
Editing Bottle info:
Step 1: Tap on Bottle Information in the Remote Calibration screen.
The list of Bottles previously calibrated are listed here.
Step 2: Bottle information screen also allows the user to Add New Bottle for span calibration.
Step 3: Tap on Add New Bottle.
Step 4: Fill the details displayed such as Bottle Number, Due date of Calibration and details of Gas Name, concentration and unit.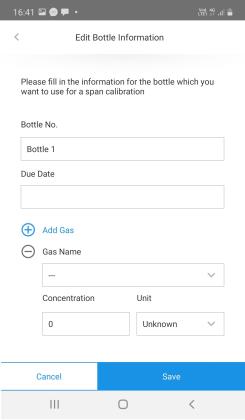
Step 5: Due Date:
Choose the Date, month and Year from the Calender.
Step 6:Gas name: Choose the name of the Gas from the drop down list.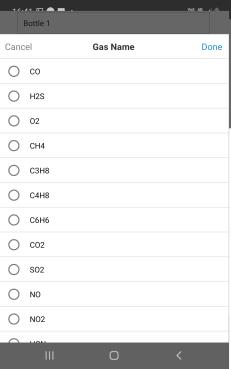
Step 7:Concentration: Enter a numerical value.
Step 8:Unit: Choose the Unit of Concentration from the drop down list.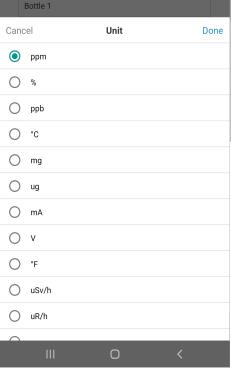
Step 9:Add Gas :
To add the details/ information of more than one Gas, tap on Add Gas.
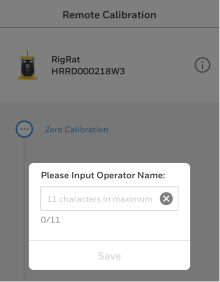
Calibration - BW RigRat
Tap on Calibration in the Remote Calibration page.
Enter the Operator Name for the calibration report.
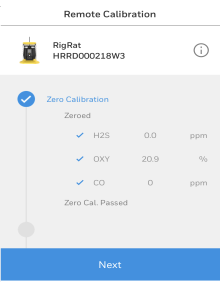
The device preparation for calibration will begin.
Zero Calibration under process.
Click on Next
Choose a Gas Bottle from the drop down in the pop up and tap on OK
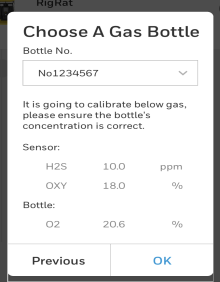
Tap on Start.
Span Calibration in progress.
Calibration results displayed as below (Pass /Fail).
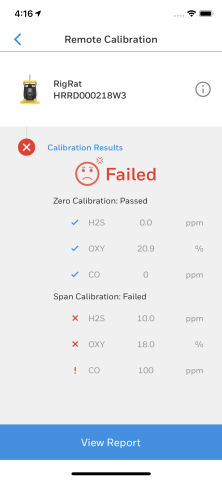
The Calibration report and Certificate are generated and will be available in records as below.
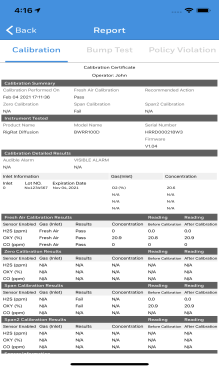
Remote Cal. Records - BW RigRat
This screen has options to display the report list based on the Pass / Fail status and device.
Tap on Remote Cal. Records in the Remote Calibration page.
Tap on to see the Calibration results.
Tap on Start to see the Calibration report.
The Calibration report and Certificate are generated.
Calibration - BW Icon & BW Flex
Tap on Calibration.

Enter the Name for the calibration report and Tap on Start

The 3 step calibration starts.

Select the Gas cylinder in the preferred method (Scanning, Selecting and Typing).
Select Sensors.
Tap on Start.

The 2nd step in calibration auto-begins as follows.


The Calibration is completed successfully.
The Calibration report and Certificate are generated.

Remote Cal. Records - BW Icon & BW Flex
This screen has options to display the report list based on the Pass / Fail status and device.

Send Report:
Tap on the 3 dots as marked below:
Tap on Send Report to send or mail the report.
Tick the Report to send or Select All to send all the reports.
Delete:
Tap on the 3 dots as marked below:
Tap on Delete to delete the report.
Tick the Report to delete or Select All to delete all the reports.
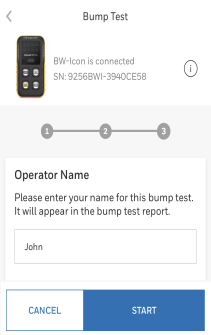
The Bump test feature allows the user to do the Bump tests and access the reports.
This screen allows the users of BW Icon and BW Flex devices to view the Bump Test.
Tap on Bump Test
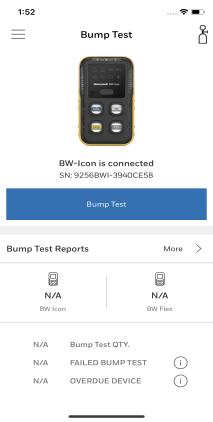
Enter the Operator's name and tap Start.
Select the Gas cylinder in the preferred method (Scanning, Selecting and Typing).
Select Sensors and tap on Start
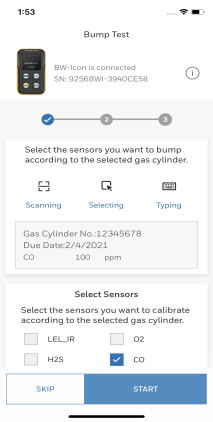
The 2nd step in calibration auto-begins.
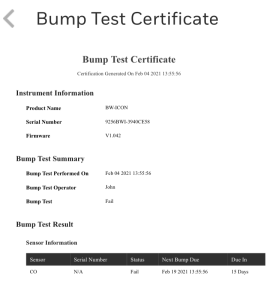
Report generation under progress.
The Calibration is completed successfully.
The Calibration report and Certificate are generated.
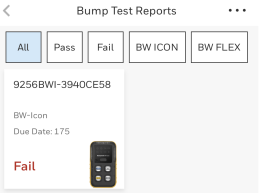
Bump test reports are sorted according to the status.
Tap on Fail: To view the list of Failed Bump Test reports,.
Tap on BW Icon: To view the list of all the Bump Test reports of BW icon.
Mail / Send Report:
Step 1:Tap on on Bump test report screen.
Step 2:Tap on Send Report.
Step 3:Select the report or Select All .
Step 4:Tap on Send.
Delete Report:
Step 1:Tap on on Bump test report screen.
Step 2:Tap on Delete.
Step 3:Select the report or Select All .
Step 4:Tap on Delete
The Measurement page allows the user to get access to Continuous Sampling, Measurement History and Capture Real time readings and Sampling Trends.
This screen allows the users of BW Icon, BW Flex, MultiRAE and 3GPID devices to view the Measurements.
Measurement History
To access the previous Measurement records:
Tap on History in measurement screen.
This screen has Measurement and Report Tabs
Create Report:
Step 1:Select the report to be created from the list.
Step 2:For Filter based on type, time and device: Tap on the respective drop down list and select.
Step 3:Tap on Create Report.
Step 4:Tap on Save to save the newly created report.
Report Tab
Measurement history reports can be sent thru Email.
Select the report.
Tap on Send by Email.
Manage
Step 1: To delete the reports:
Step 2:Tap on Manage
Step 3:Select the device
Step 4:Click on Delete.
To delete all the reports:
Step 1:Select the check box All
Step 2:Tap on Delete.
Update Report
Step 1:Tap the report to be updated from the list.
Tap on to edit the report to be updated.
Click on Update.
The report is now updated.
Measurement - BW Icon & BW Flex and MultiRAE
This page has two tabs Snapshot and Continuous Sampling.
Snapshot
This screen allows the user to Capture Real time reading and access the Sampling Trends.
Tap on Capture real time reading.
Tap on to edit the details.
Tap on Save to save the snapshots.
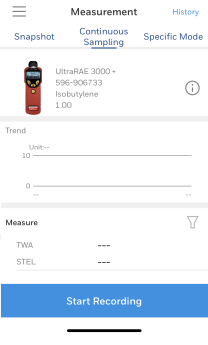
Continuous Sampling
Tap on the to measure.
Tap on Start Recording to record.
Tap on Save to save the samples.
Measurement 3GPID
This feature has three tabs Snapshot, Continuous Sampling and Specific mode.
Snapshot
This screen allows the user to Capture Real time reading and access the Sampling Trends.
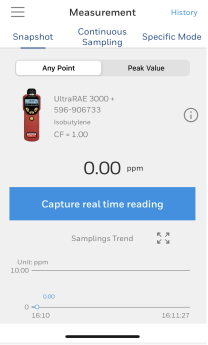
Continuous Sampling
Tap  to measure.
Tap Start Recording.
Specific Mode
The Firmware screen allows the User to view the Firmware Version and BLE Module version.
The user can also update the new versions from this screen.
The History screen allows the User to get the History of the connected Devices.
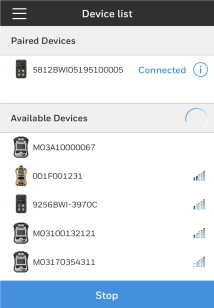
The Device list feature allows the user to Scan for the devices (to pair with).
The list of Paired Devices and Available Devices (to pair) are displayed.
The Device list Page is a default page for DC mob app.
Pair the DC app to device:
Turn on the Bluetooth feature on the smartphone.
Open the DC app on phone.
By default the Device List page opens.
Turn on the Gas Detection device (to be paired)
Tap on SCAN to detect the device in the mobile app.
List of All available devices will appear.
Tap on the desired Device.
Pairing will begin.
Enter a six-digit code to enable pairing (If prompted)(optional).
The user can now use all the features of the app.
Note: Once devices are paired with the DC app, they will remain in the inventory of “Available Devices” which includes all devices which have been paired to the specific smartphone.
Pairing a BW ICON
Prerequisites:
Step 1: Turn ON the BW ICON.
Step 2: Press and hold the button on the ICON until the startup beep sound starts.
The ICON will go through a series of self-diagnostic tests:
-
Long yellow flashes at the top of the monitor
-
Light test of all the lights on the monitor
-
Self check of all the sensors.
-
A series of beeps indicate the end of self tests.
-
A green Intelliflash will Flash every 15 seconds or so.
BW ICON is now ready to pair.
Follow these steps to pair a BW ICON
Step 1: Double click the button of BW ICON to turn ON the Gas cylinder light.
Step 2: Click the button again to turn ON the Bluetooth logo light.
Step 3: Hold the button down for 5 seconds (approx) until the device beeps again.
Step 4: Check the DC app on phone:
It should show the device available for pairing.
Tap on SCAN or DETECT DEVICE to refresh the app until it recognizes the BW ICON.
Note: The pair-up is a one time procedure to do. The phone will not need to go through the pairing sequence again with the same device. The paired up device appears in the list of Paired devices in Device List screen.
NOTE: Without completing the pairing sequence, the DC app may appear to pair with the ICON on the Device List screen. Data will not be shared as the device is not connected.
The App Setting feature allows the user to enable:
-
Auto Purge
-
Auto refresh Device Setup.
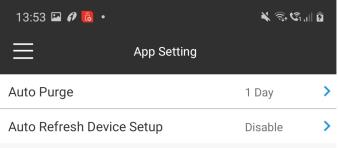
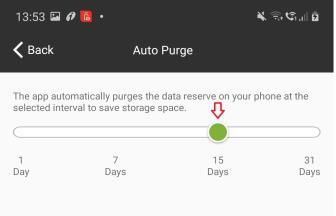
Auto Purge
To set the Auto Purge interval:
Tap on Auto Purge in the App setting screen.
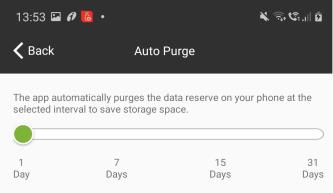
Choose the interval of no of days by sliding the green toggle.
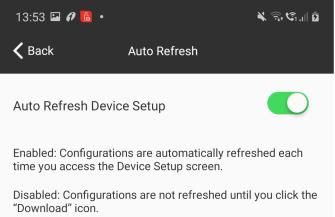
Auto refresh Device Setup
To Enable/Disable Auto refresh Device Setup:
Tap on Auto refresh Device Setup on App Setting screen.

Auto Refresh screen with a toggle switch to enable/ disable shall open.
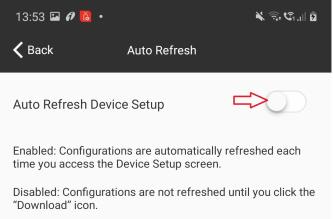
Slide the toggle switch to enable auto refresh of device setup screen.
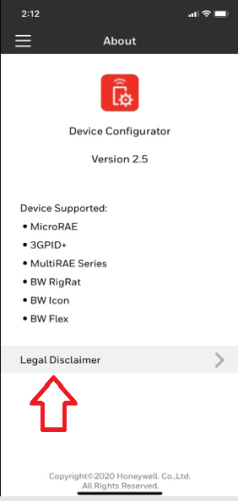
Tap  and select About to know more about DC application.
A screen with DC version no, Supported devices list and Legal Disclaimer details will appear.
Tap Legal Disclaimer to view the content.
Read the EULA (End User License Agreement), Privacy Statement and Disclaimer for Honeywell services.
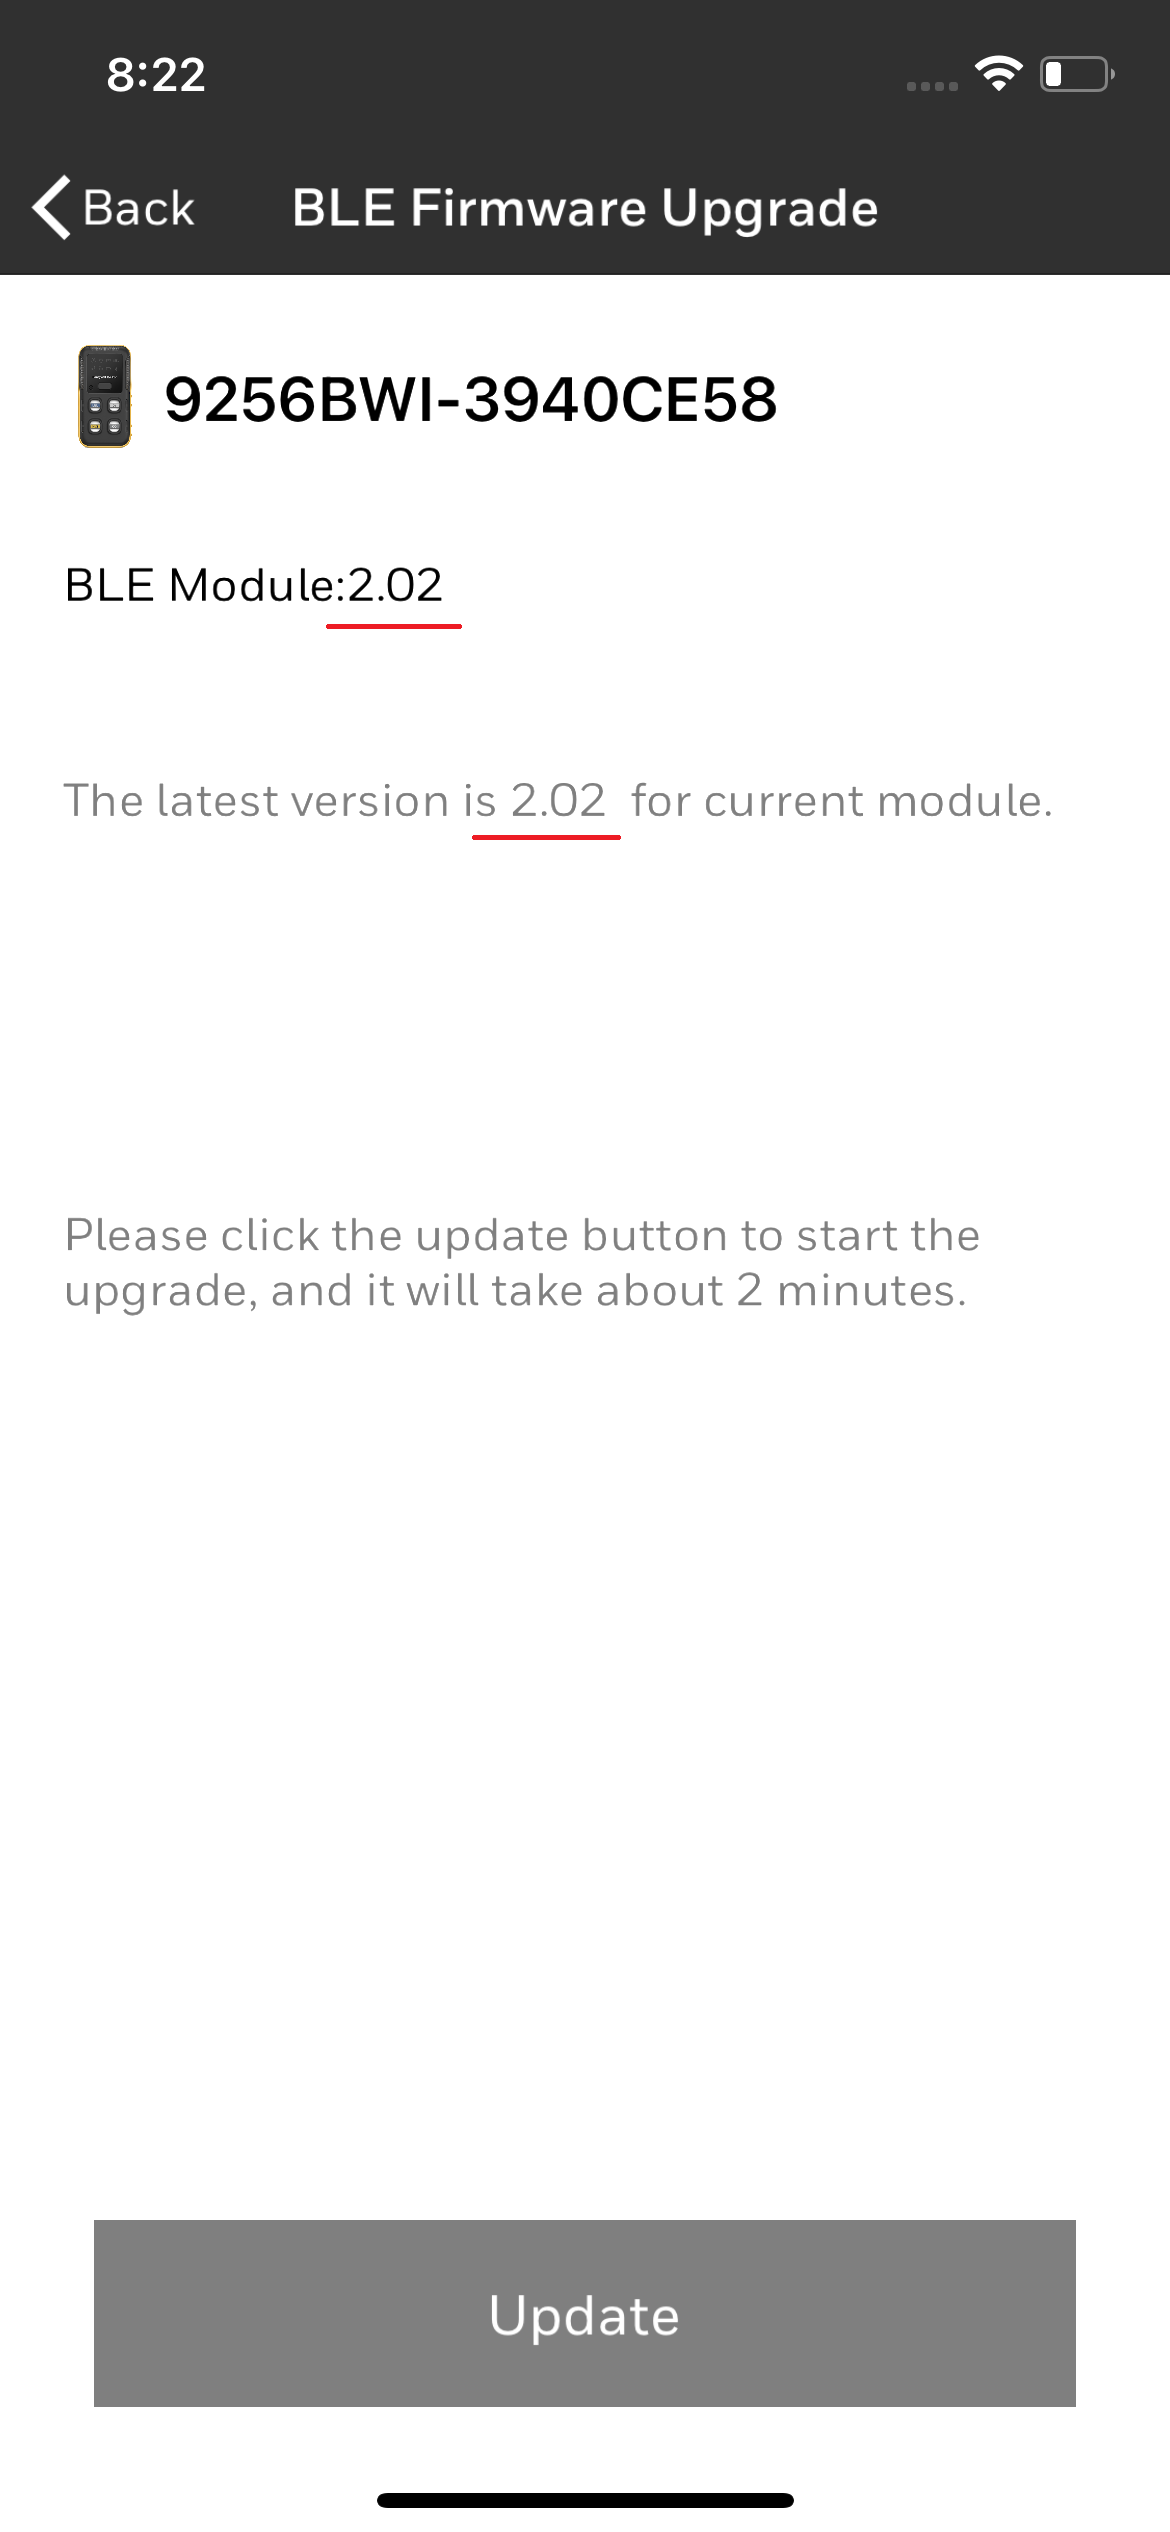
- Tap on the connected device and navigate to the BLE Firmware Upgrade page.
On this page, the current BLE version and latest one are listed.
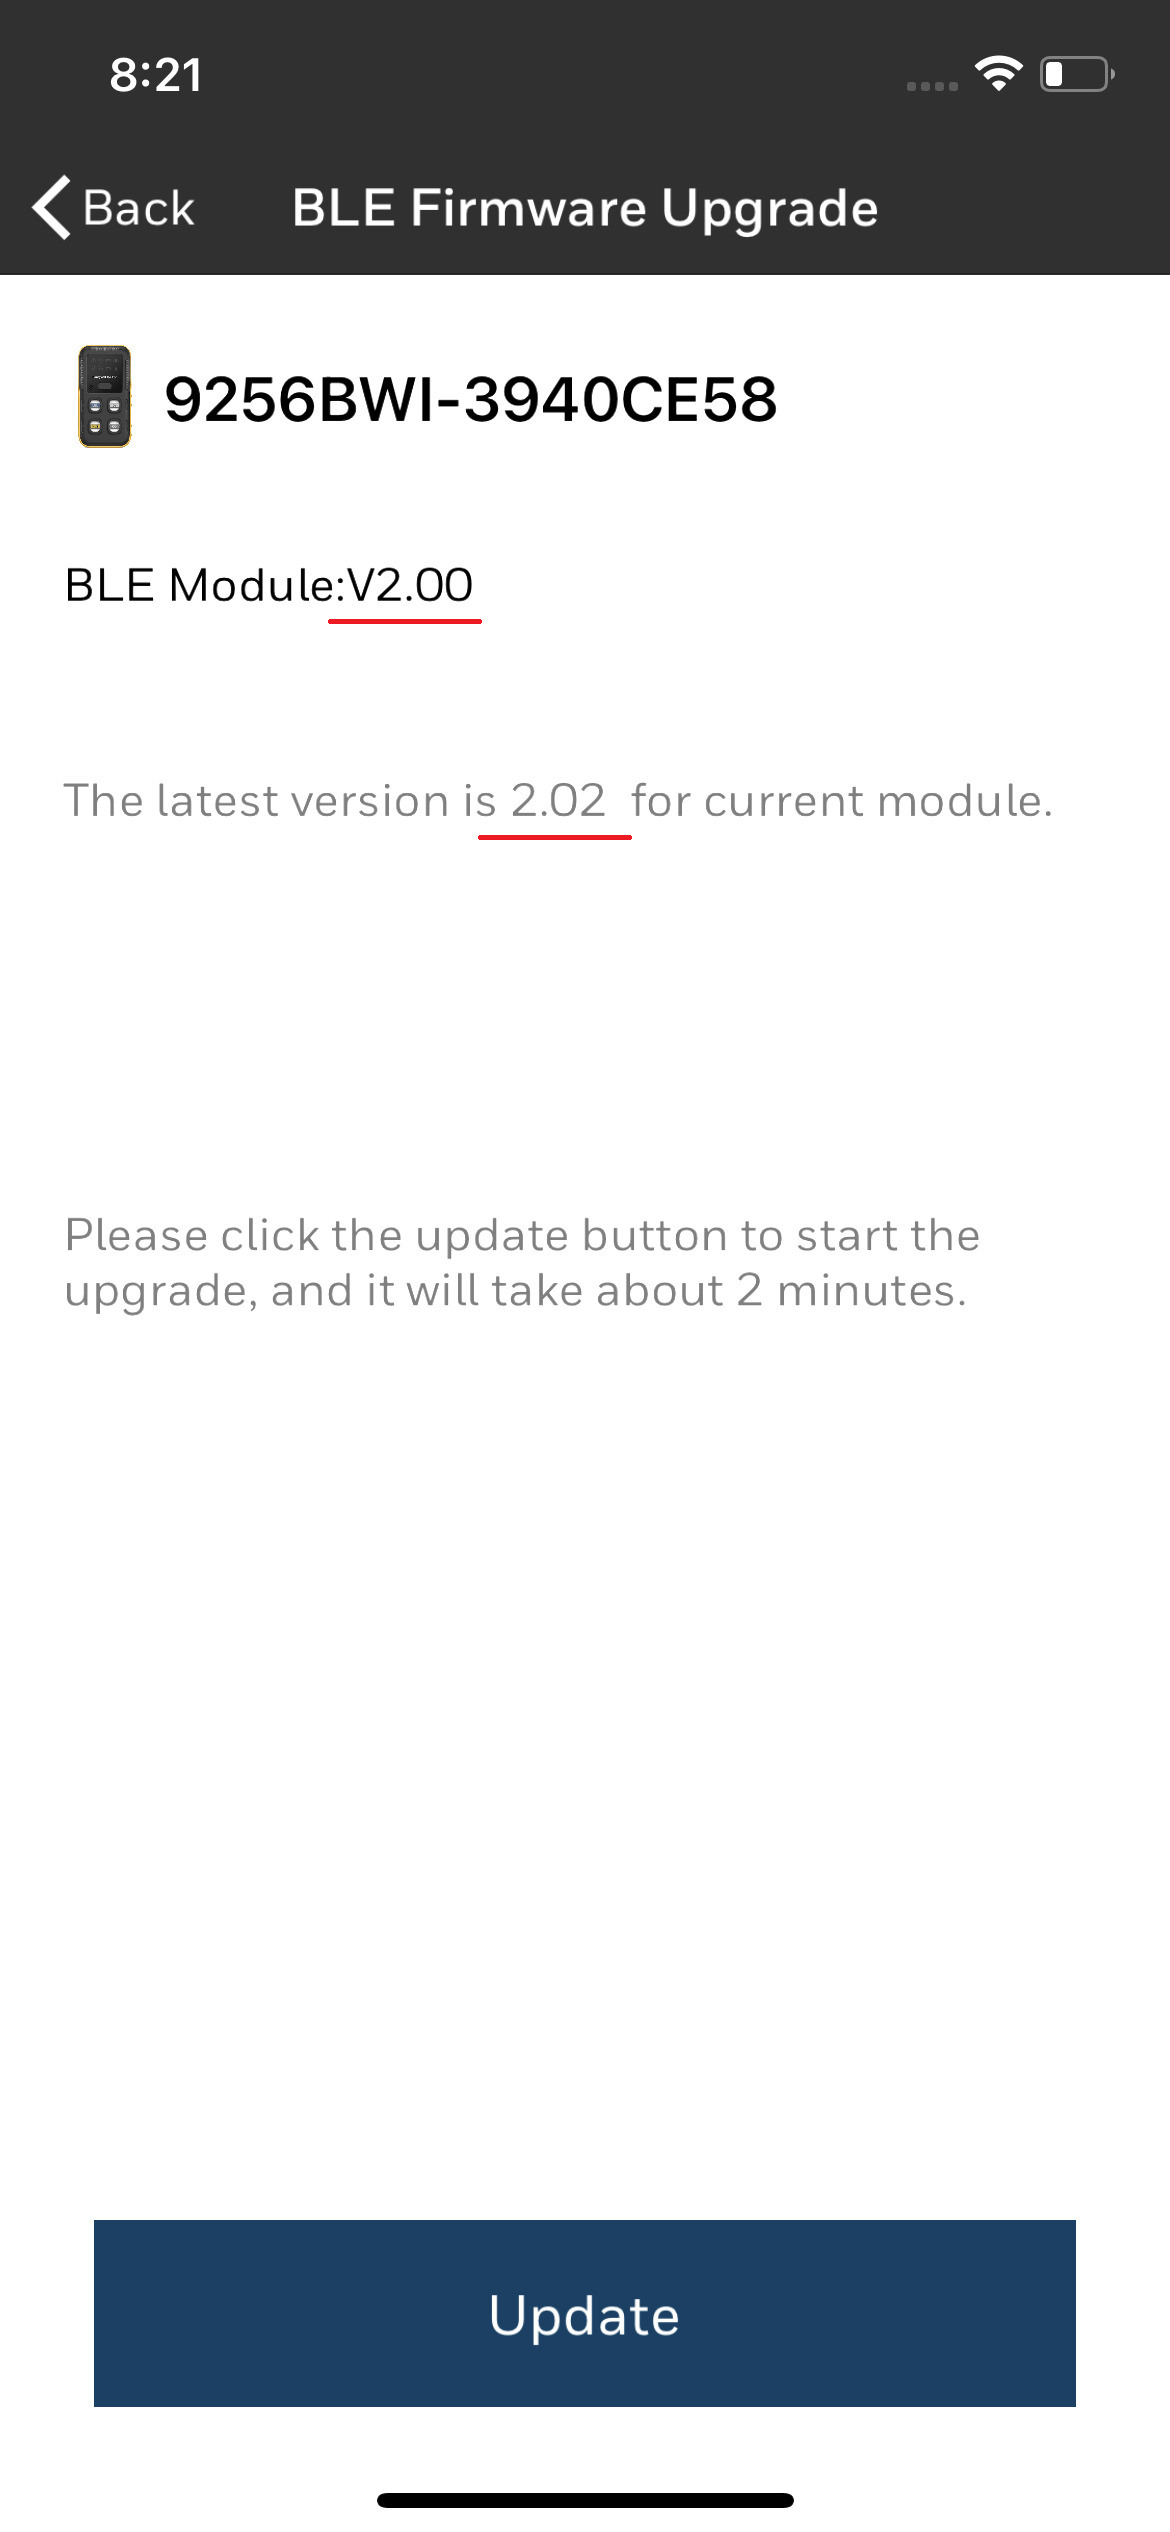
- If a new version is available, tap Update to start the BLE upgrading.
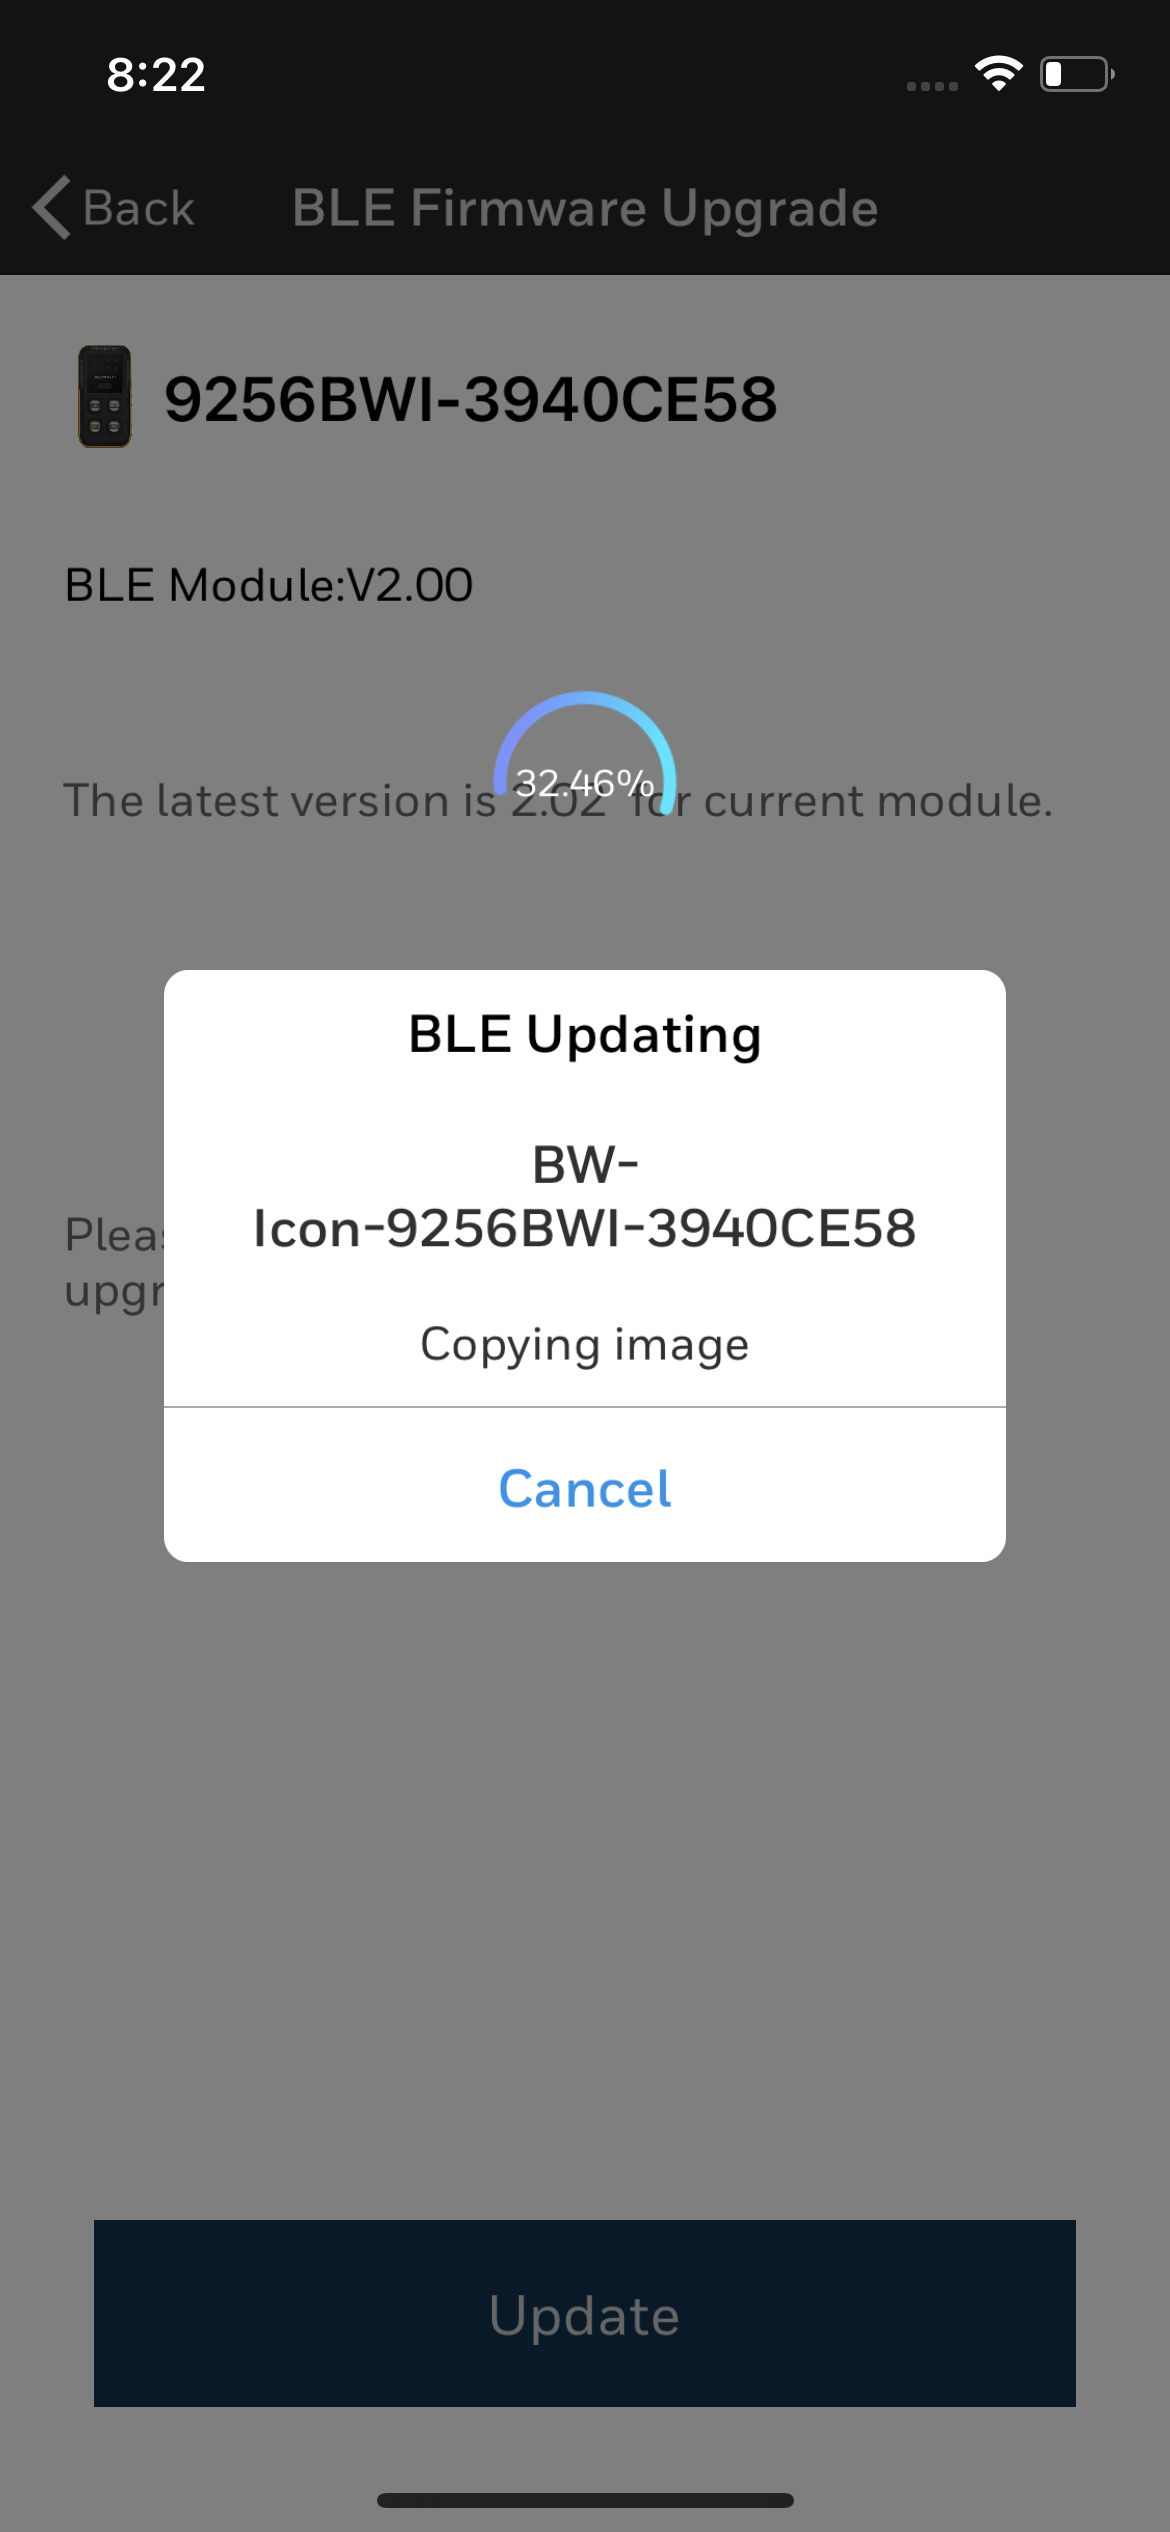
The BLE module will be upgraded successfully.
On the following screenshot, the current BLE version is the same as latest one.
NOTE: There is no Log out for the Device Configurator mobile app.
Step 1: Go to Notifications on your Smartphone.
Step 2: Tap Device Configurator
Step 3: Tap Force stop.
Step 4: Tap OK to exit.
IMPORTANT: Do not Force stop or Exit without completing the tasks in the Device Configurator app, errors may occur. The tasks and reports will not save if you force stop the app.
- The default BLE passcode for paring gas detectors is ‘00000’. It is recommended that the user change it to a different one through Safety Suite or the Device Configurator app.
- Honeywell strongly recommends that Safety Suite be installed with an HTTPS option for a secure connection between Safety Suite and the Device Configurator or Safety Communicator Apps. Honeywell WILL NOT be liable for any compromised data if HTTPS is not used for data communication between Safety Suite and Device Configurator or the Safety Communicator Apps.