Quick Start on Premise
Login
Open a Google Chrome or Microsoft Edge Internet browser and SIGN IN to http://127.0.0.1
1 Interface

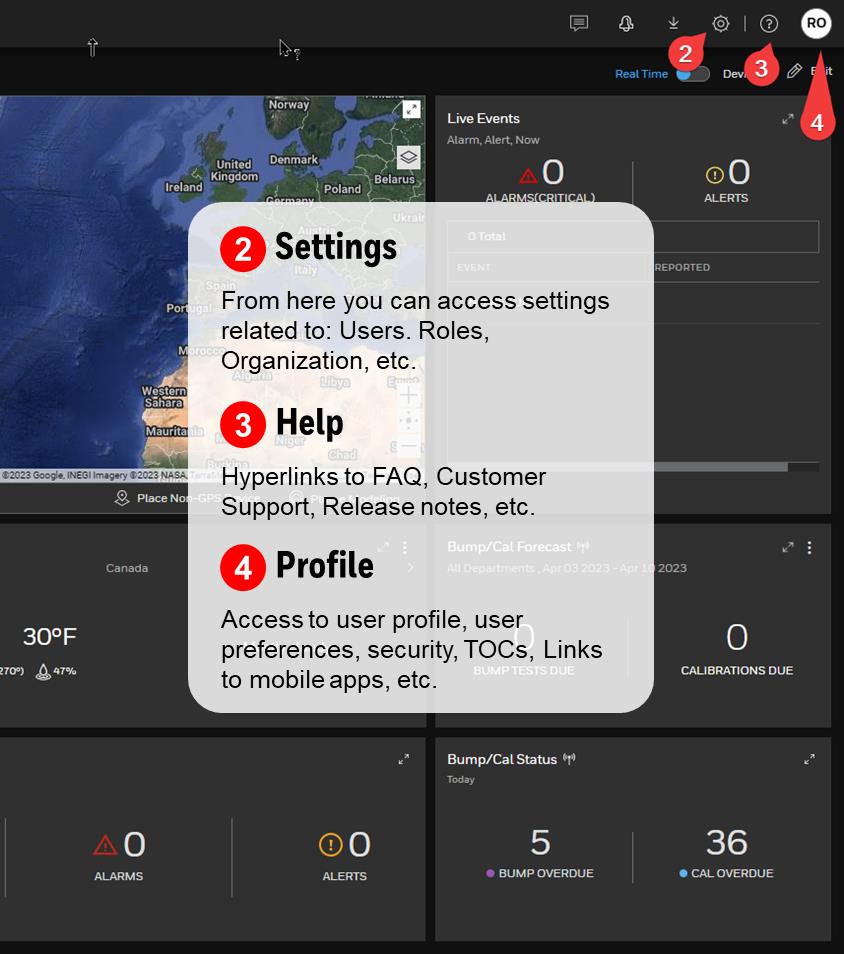
2 Admin
2.1 Security
Go to User Profile > Security

Available settings: Auto Logout, Password Expiration and Multi-factor Authentication.
These changes affect all users under the tenant account.

2.2 View Licenses
Go to Settings > Organization
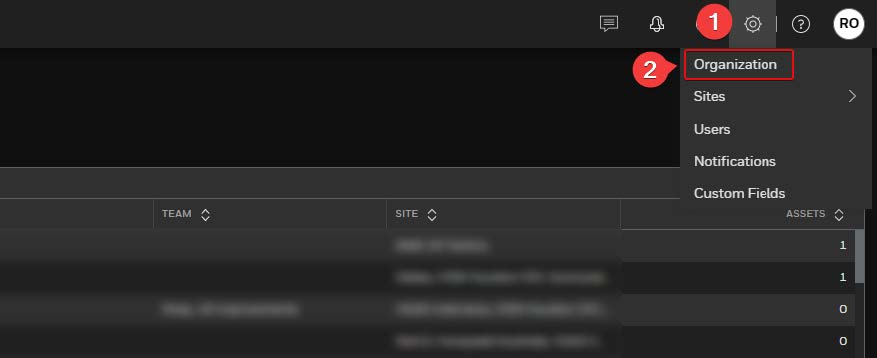
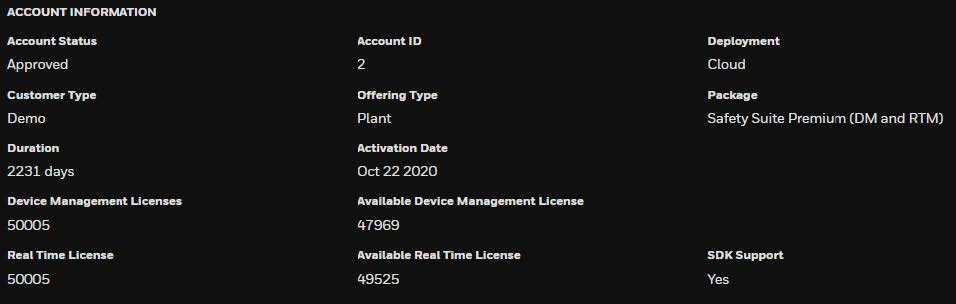
The Organization pages show your available licenses.
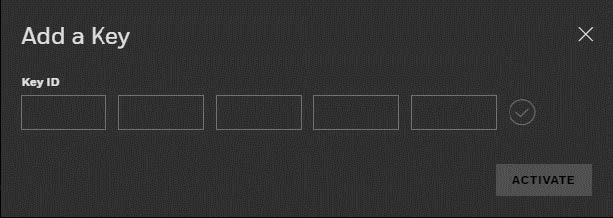
2.3 Add a key license
Click +ADD to add a new License Key.
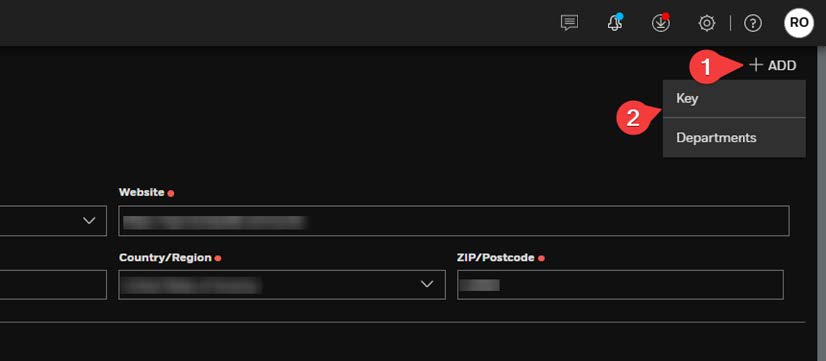
Add a key in the field and click ACTIVATE.
2.4 Users
- Go to Settings > Users
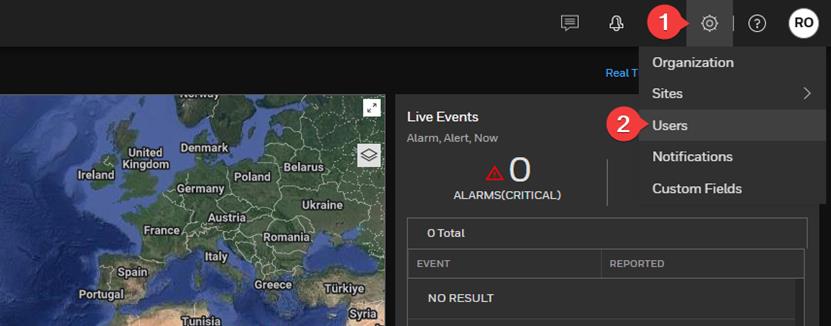
- Enter the user details, and then click SAVE
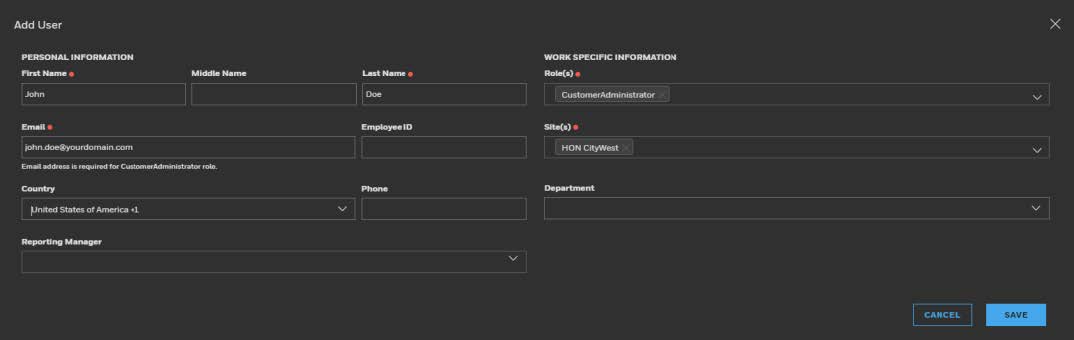
- CustomerAdministrator: Have all permissions to perform any activity in Safety Suite.
- Worker: Role designed to assign a gas detector to a person. User with Worker Role is also used to allow users login into Safety Suite Mobile apps (Device Configurator and Safety Communicator).
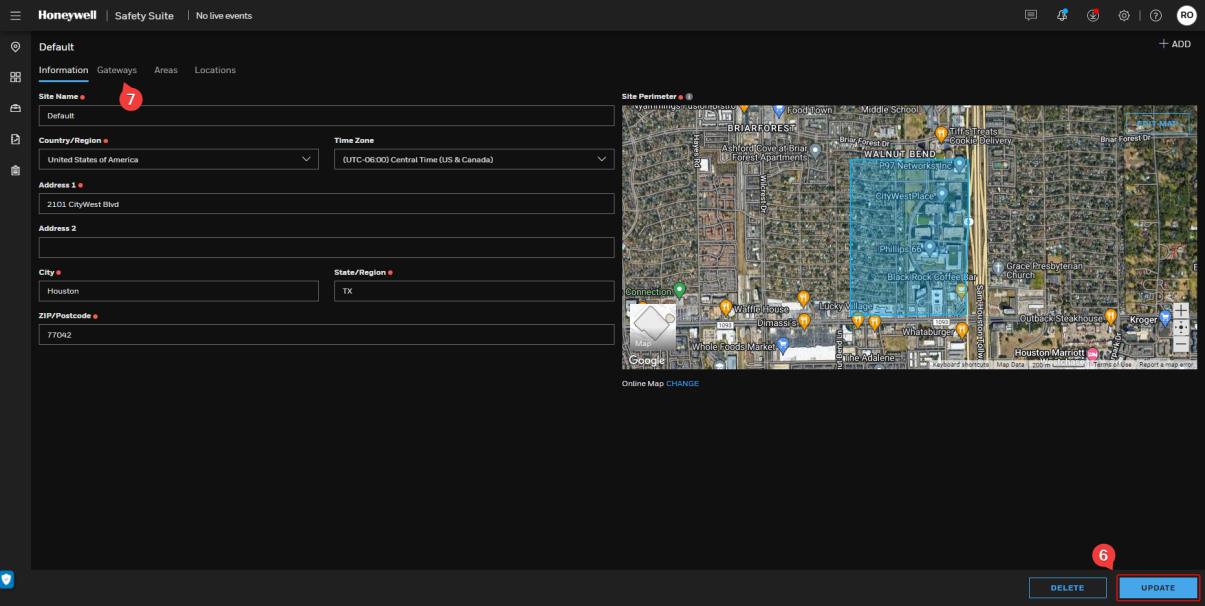
3 Site & Getaway Setup
Go to Settings > Sites > Default
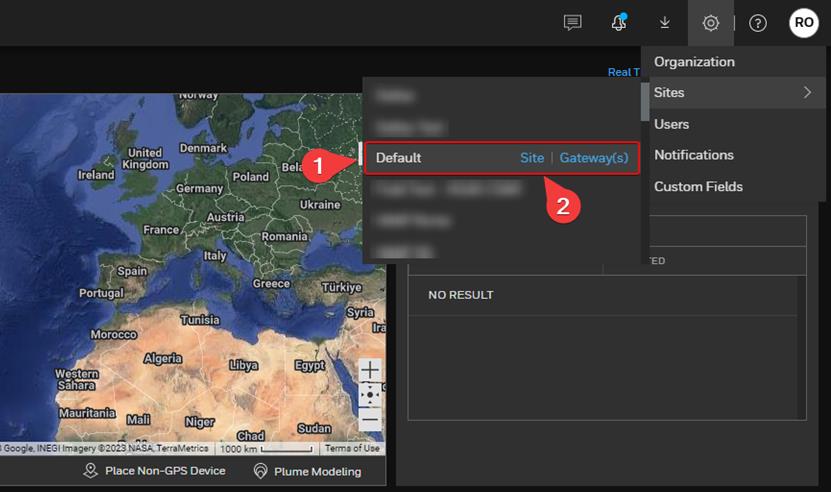
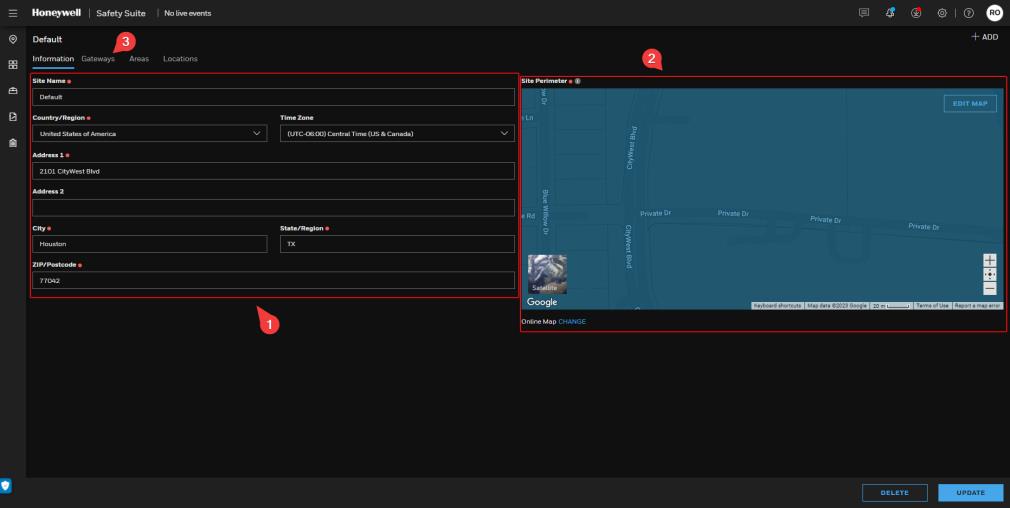
1: Site Address and Name | 2: Site Map | 3: Site’s Gateway
1) Enter the Name and Address for the Site in section 1 of the above screenshot.
2) Define the site's boundaries by editing the map; see detailed steps below.
3) Create Gateway; see detailed steps below.
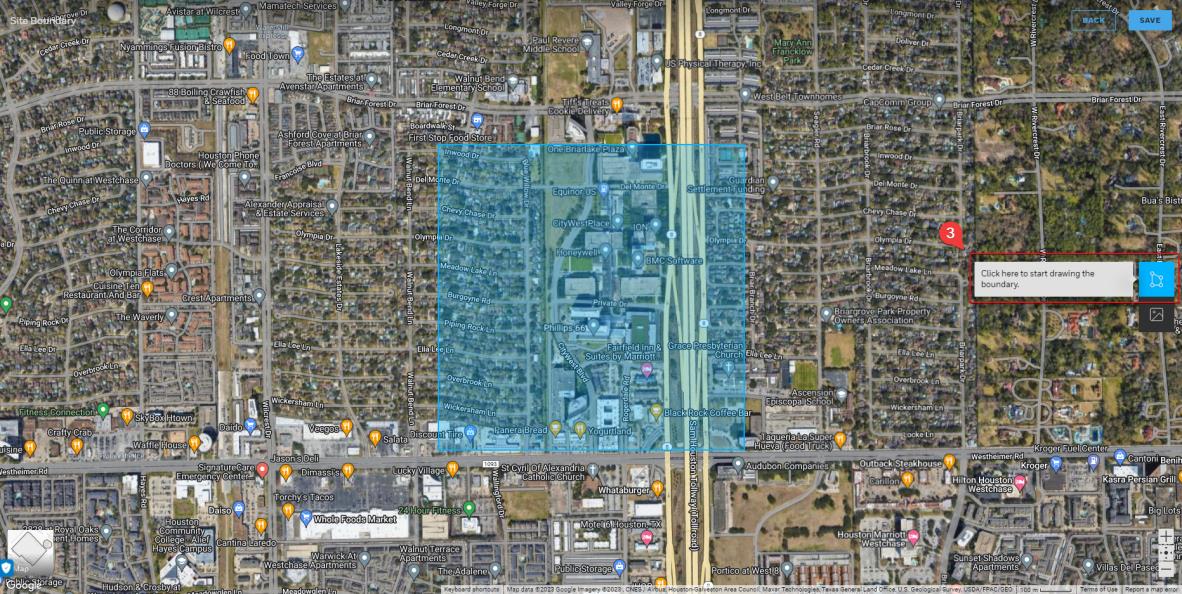
DEFINE THE SITE'S BOUNDARIES
The following steps only apply to the Safety Suite Plan
-
Click Edit Map.
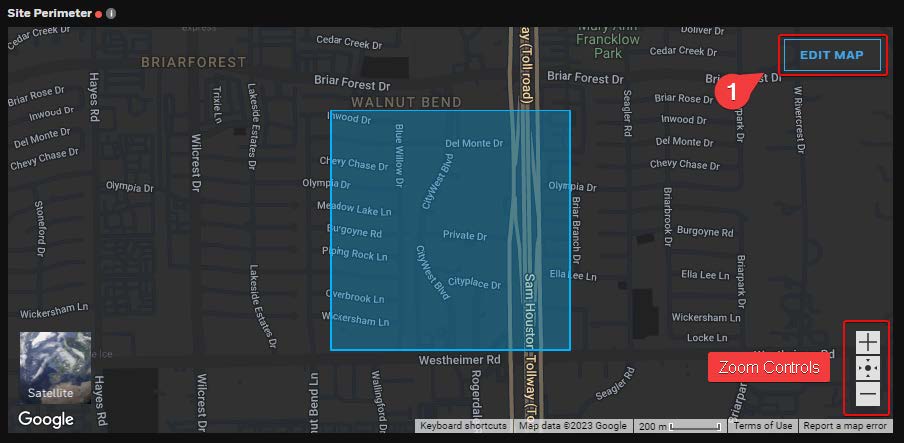
- Change view to Satellite
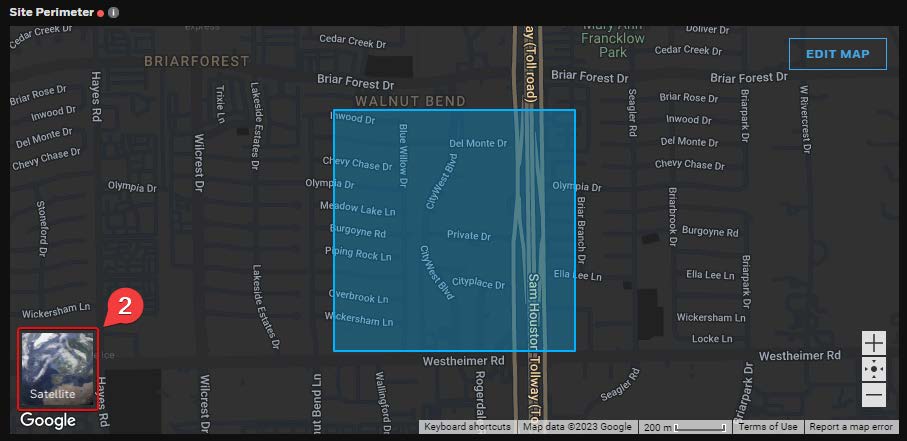
- Edit the site's boundaries.
-
Drag the corners of the rectangle to adjust the perimeter of the site.
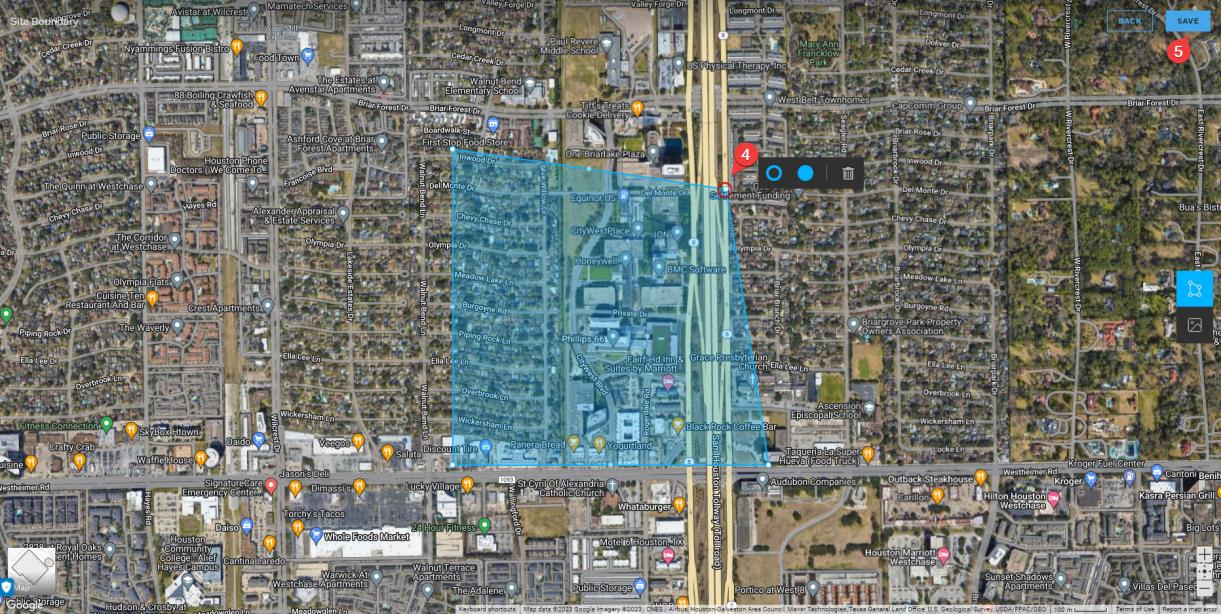
- Click SAVE.
-
Click UPDATE.
-
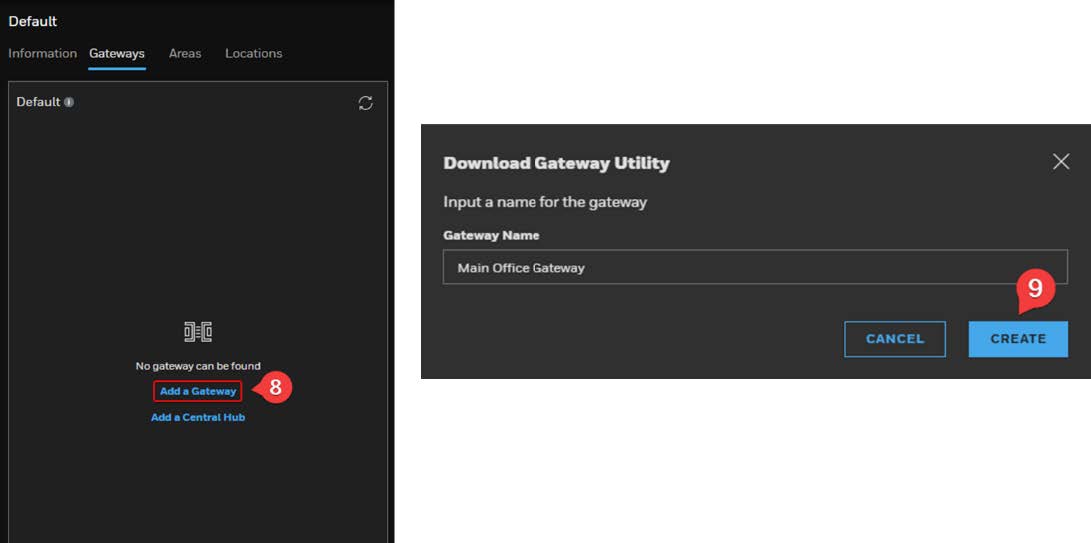
Click on the Gateway tab.
-
Click Add a Gateway to create a Gateway.
-
Click CREATE.
-
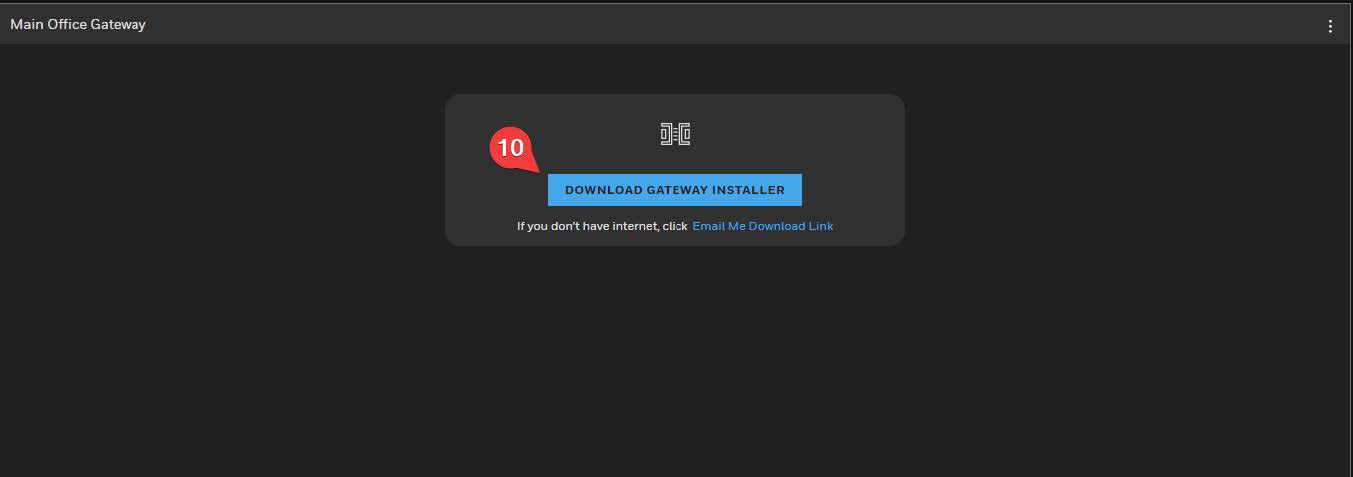
Click DOWNLOAD GATEWAY INSTALLER.
-
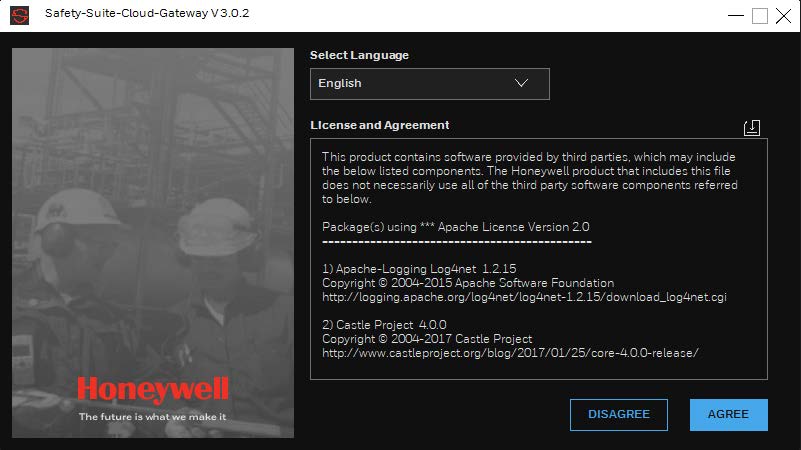
Execute the installer (Safety Suite Gateway V3.0.2 Setup….exe) after the download is completed. Approximately installer size 190 MB.
-
Click AGREE and click NEXT through the prompts.
-
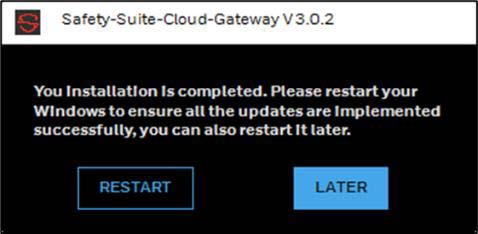
Click LATER.
-
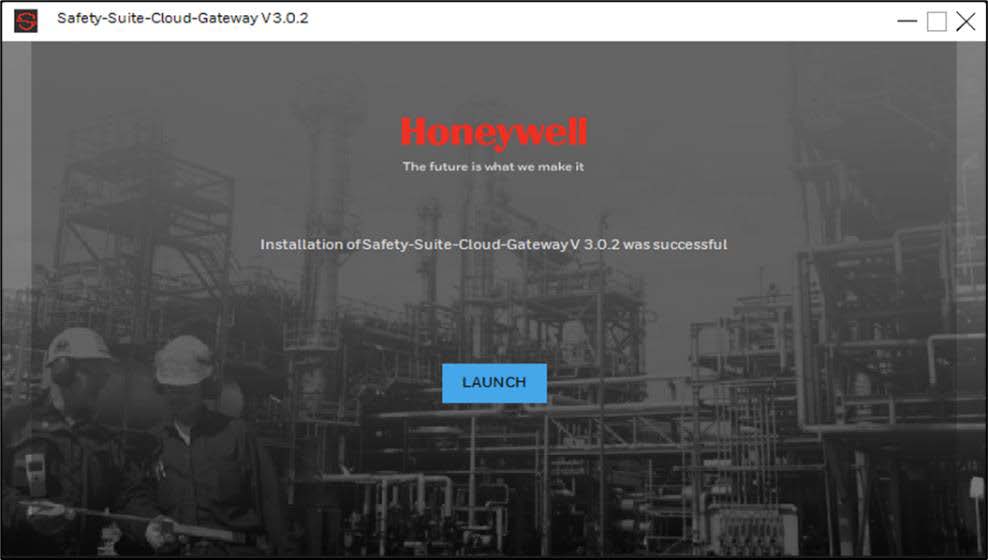
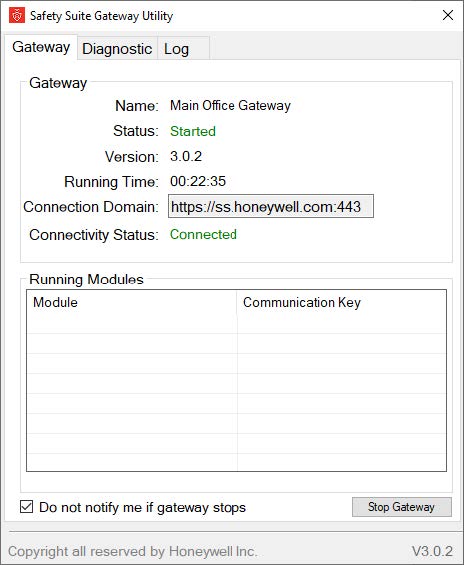
Click LAUNCH to launch the Gateway Utility.
-
Open the Safety Suite Gateway Utility, and confirm that Status is Started and Connectivity Status is Connected
CREATE A GATEWAY
4 Connecting Devices
4.1 Wireless (AreaRAE)
In this example we will be setting up an AreaRAE to Safety Suite using RAELink3 as a host. After installing the Gateway:
-
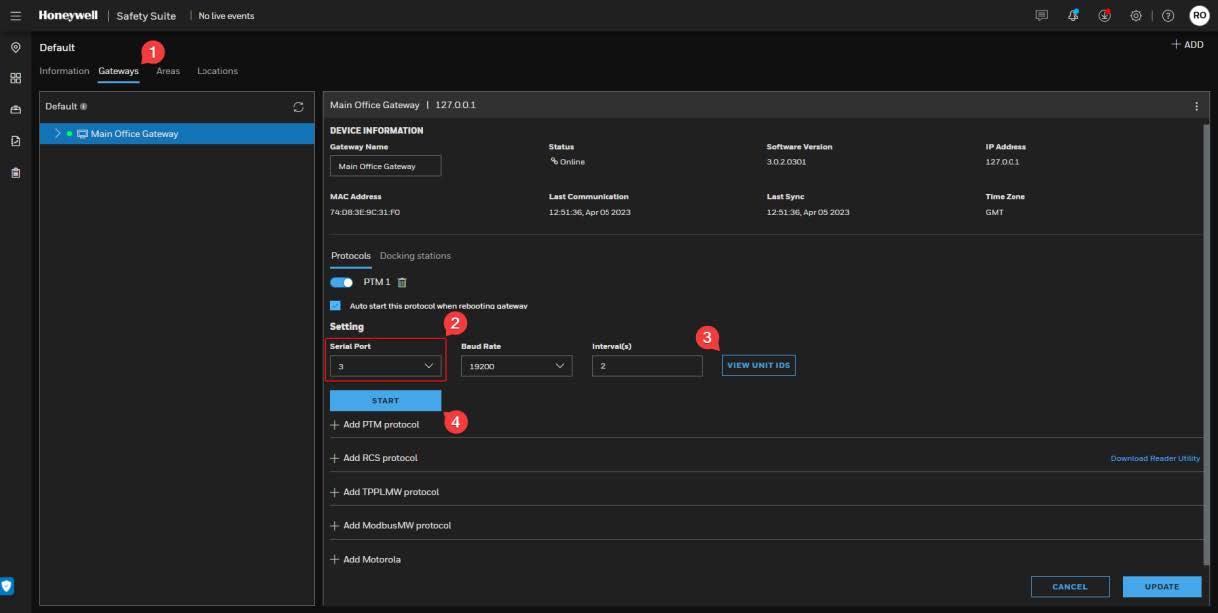
Go to the site and click on the Gateways tab, and then, click on the Protocols tab.
-
Expand the Serial Port menu and select the serial port where the RAELink is connected.
-
Click VIEW UNITS ID and select the Unit IDs assigned to AreaRAE in the UI.
-
Click START.
4.2 Wired (Docking Stations)
Connect the AutoRAE and IntelliDox docking stations via the Ethernet Network.
-
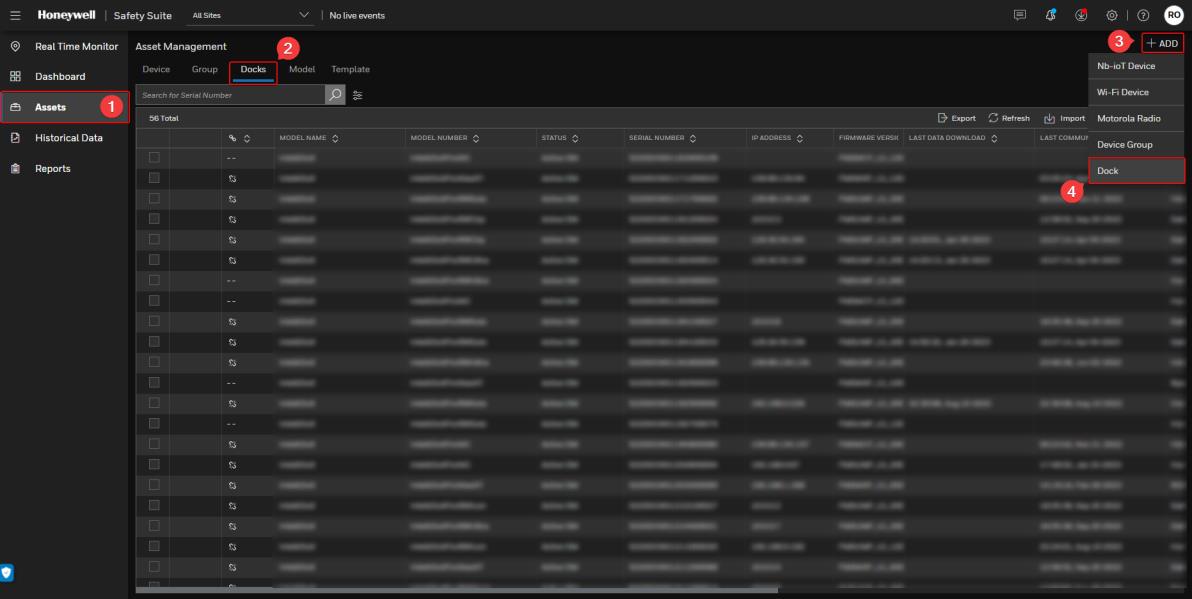
Click Assets.
-
Click on the Docks tab.
-
Click +ADD.
-
Select Dock from the expanded menu.
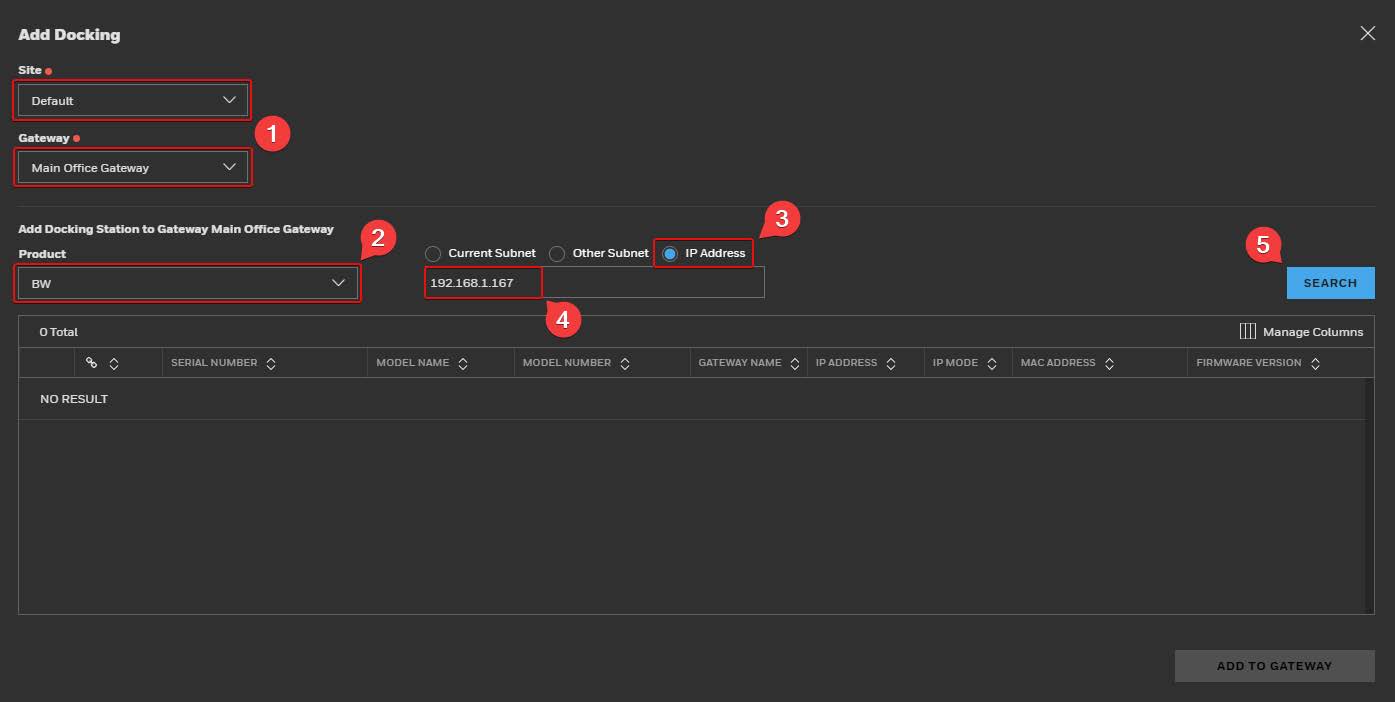
Search and Add the Dock
-
In the Add Docking window, select the Site and the Gateway.
-
Select the Product, BW if connecting an IntelliDox, RAE if connecting a AutoRAE docking station.
-
Check IP Address
-
Enter the Docking Station IP address
-
Click Search
-
Select the docks from the results and click ADD TO GATEWAY.